RSS

I currently live in Charlotte, NC and after spending 7 years as a personal chef and caterer, I am now happy to share my love of cooking with friends and family. My heart is in the kitchen, but my soul is in the stars!

Showing posts with label fruit. Show all posts

That thing called life


 Life is a funny thing.
 
One minute you are on top of the world and realize that you’ve had it really good for quite some time and you are so thankful for that.  But in the back of your mind, you secretly know that at some point you are going to have to pay a price for the good times.  Something is bound to happen to knock the goodness right out of your life. 

And sure enough a funny thing happens.  Life just sucks the life right out of you. 

I started losing my voice here at Wish Upon A Chef when my mother was diagnosed with cancer in September 2013.  Thankfully, so thankfully, she is in remission and on the mend.  My voice continued to dwindle after the loss on Super Bowl Sunday 2014 of my 4-legged companion, Jesse James.  And my voice was completely knocked out when my best friend and partner of several years announced that he no longer wanted to be in a relationship.

I had nothing left to say.  It seemed frivolous to snap a photo, share a recipe and talk about how delicious my dinner was or talk about how great my batch of cookies turned out.  And the truth of the matter is that I’ve been eating like crap for quite some time.  Definitely nothing worth mentioning on a food blog!

Life ain’t always a bed of roses and I can no longer pretend that it is.  This blog initially started years ago to keep me accountable for things that were going wrong in my life at the time and it’s time to turn to it again for the same accountability.  I’ll never find my voice again if I don’t make an attempt through the things that I find therapeutic – cooking, writing and gardening. 

My life needs to start simply and work its way to the top again.  So today I am sharing this simple recipe for wine syrup that I made a few weeks ago.  I was very proud of my accomplishment of getting back into the kitchen and simply mixing liquid and sugar and simmering it into goodness – it was a starting point.  The syrup was delicious served over pound cake and fresh strawberries and added a decadent touch to real vanilla bean ice cream.  I’ve even drizzled it over a salad with a splash of balsamic vinegar.  How great would this be on morning pancakes or waffles?

Any red wine will do, even one of the inexpensive ones.  I used a bottle that had been opened for a tasting at work and was destined to be poured down the drain until I saved it.  I work for a wine distributor and see this tragic event happen often so I’ve made it my life’s mission to rescue abandoned wine. 

Enjoy the simple things in life and never ever take them for granted!


Wine Syrup
Makes about 1 cup

1 cup sugar
1 vanilla bean, split
3 cups red wine

Combine all ingredients in a saucepan and bring to a boil.  Reduce heat and simmer, stirring occasionally, about 30-45 minutes or until liquid has reduced to about 1 cup.

Store in an airtight container in the refrigerator.

Pin It
  • Digg
  • Del.icio.us
  • StumbleUpon
  • Reddit
  • RSS

Port Wine Cranberry Chutney


I can't help but feel a little resentment when it comes to preparing food for others for the holidays.   Boy Toy is King of the deep fryer, so for the last two Thanksgivings I've been in charge of preparing side dishes to compliment his beautiful birds.  We host his family members for the meal and I understand that my idea(s) of tradition may be somewhat foreign to others.

My family's Thanksgiving meal consisted of most things that I continue to prepare today and for two years now, most of my food has gone untouched because it is not what Boy Toy's family is used to.  As time has gone by and the more I've socialized with them around the table, I've come to realize that most of his family members are used to (and prefer) processed, packaged foods.  The mashed potatoes they know come from a box, green beans come from a can, and bread is from a plastic bag with directions to "brown and serve."  I know that people tend to stick with what they are familiar with and what they like, but it is very disheartening when my hard work and love go into food that is greeted by grimaced faces and rude comments (someone actually told me they "wouldn't cross the street" for my made-from-scratch chicken tetrazzine.  He ended up eating a sleeve of saltine crackers for dinner that day.)

Last year I made the declaration that I would no longer spend so much time, energy and money preparing what I thought was "good" food for the holiday.  But as I started giving thought to the menu for this holiday season, I had a revelation.  I decided that I would continue to make my "weird" food and they could take it or leave it.  I made reference in my last post about there being no time like the present to introduce real food to Boy Toy (who is a little more open-minded about my food) and his kids and I'm going to continue with that mindset.  I'm not going to compromise what I love about Thanksgiving - especially when I am tasked with preparing the food.  Hopefully as my food continues to appear on the table year after year, someone will give in, try it, and decide it's not so bad after all.

This year I'm arriving at the Boy Toy home loaded down with cornbread dressing, creamed corn, spinach casserole, made-from-scratch green bean casserole, sweet potato casserole, pumpkin pie, cranberry tart.  and this port wine cranberry chutney.

I will be thankful for the opportunity to spend time in my kitchen preparing the things that I love and everyone else can be thankful that McDonald's is open!

Port Wine Cranberry Sauce 
servings = makes about 2 cups

½ cup ruby port
Zest of 1 orange
½ cup fresh orange juice
12 ounces fresh cranberries
¼ cup honey
2 tablespoons candied ginger, chopped

In a medium saucepan, combine port wine with orange zest and orange juice and bring to a boil. Add the cranberries, honey and ginger and simmer over medium-low heat until the sauce is jam-like, about 15-20 minutes. Transfer to a serving bowl and serve warm or at room temperature.

Can be made ahead and refrigerated for up to 2 weeks.

Pin It
  • Digg
  • Del.icio.us
  • StumbleUpon
  • Reddit
  • RSS

My Little Candied Kumquat


My weekly produce deliveries from Backyard Produce have allowed me to be a bit more daring than I normally would be on my regular visits.  I'm usually on a mission when I shop - to get in and get out quickly.  I have my list and try not to deviate (too much) from said list. 

A few weeks ago, I made the daring decision to include kumquats in my delivery from Backyard Produce - something I've always been curious about but have never purchased (and most likely wouldn't ever have.)  Kumquats resemble an orange in color and have a similar thick peel but are only about the size of the end of your thumb.  They are native to south Asia and the Asia-Pacific region but have been cultivated in North America for nearly 150 years now (and I'm just now brave enough to try them?!?)  The growing season ranges from January through June for those grown in California and November through mid-March for fruits harvested in Florida. 

I wasn't sure what to expect or do with the kumquats.  Do I peel them?  Are they sweet?  How exactly should I use them?  The answers to the first two questions are no and HECK NO! The skins aren't quite as thick as an orange peel and provide the only bit of sweetness amongst an otherwise extremely tart fruit.  For such a tiny thing, it packs a punch of zing - it took me a few minutes to come back to my senses after popping one into my mouth for taste-testing. 

Preliminary recipe research showed that most people enjoy them sliced and raw on a salad but they were a bit too sour for me to enjoy that way.  Others baked with them but quite frankly, I was too lazy to deseed them, so I opted to turn them into candied kumquats to enjoy spooned over the Hillsborough Farm goat cheese (also from Backyard Produce) and crackers.  I think it would make a fantastic topping for vanilla ice cream as well. 

Dare yourself to try something new by picking up a container of these little jewels on your next shopping trip and if you're interested in receiving fresh organic and natural produce delivered right to your door, check out Backyard Produce's website for how you can get started. 


Candied Kumquats

Printable Recipe

4 cups roughly chopped kumquats (about 1-1-1/2 lbs)
1 cup water
2 cups sugar

With a pairing knife, roughly chop the kumquats.  Discard any seeds that are easy to get too, but they're edible so don't worry if you don't get them all. 

Heat the water and sugar over high heat until boiling.  Reduce heat and simmer for 4 minutes.  Add the kumquats and simmer for 10 minutes.

Drain the kumquats through a sieve over a bowl.  Return the syrup to the pan and simmer for 5 minutes to reduce the syrup.  Combine the kumquats and 1/4 cup syrup together.

Serve or jar and refrigerate for up to 2 weeks. 

Pin It
  • Digg
  • Del.icio.us
  • StumbleUpon
  • Reddit
  • RSS

The Perfect Combination


Since my quest to move toward real food, I've surprised myself with a) how many recipes I've tried with ingredients I'm not used to, and b) how many of those recipes I've actually enjoyed.  This recipe for Apple & Fennel Salad with Bleu Cheese from Eating Well magazine has appeared in my dinner rotation two times in as many weeks.  I thought it was so delish I even ate the leftovers for breakfast the next morning!  Fennel is loaded with Vitamin C, fiber and potassium and the only way I had ever eaten it before was roasted  - it pairs well with pork.  The anise/licorice is more pronounced when raw, but not overpowering. 

As my food magazine subscriptions start to run out, I'll be more selective as to which ones I renew but Eating Well will definitely be one that I'll keep.  It's loaded with alot of simple and real recipes that don't require alot of exotic ingredients.

Give this salad a try - the sweet butter lettuce with the salty, tangy bleu cheese and crisp apples and fennel tossed in vinaigrette is the perfect combination.

Apple & Fennel Salad with Bleu Cheese
Eating Well, September/October 2012

Printable Recipe

1/4 cup extra-virgin olive oil
2 tablespoons cider vinegar
1/4 teaspoon salt
1/4 teaspoon freshly ground pepper
1 large crisp, sweet apple, such as Honeycrisp or Ambrosia, thinly sliced
1 medium fennel bulb, quartered and thinly sliced, fronds reserved
6 cups torn butterhead lettuce
1/3 cup crumbled bleu cheese

Whisk oil, vinegar, salt and pepper in a large bowl. Add apple and fennel and toss to coat.  Chop 1/4 cup of the fennel fronds and add to the bowl along with lettuce and bleu cheese; gently toss.

Pin It
  • Digg
  • Del.icio.us
  • StumbleUpon
  • Reddit
  • RSS

Trader Joe's Copy Cat Recipe: Cranberry Walnut Tart


I'm always thrilled to see fresh cranberries hit the produce shelves just before Thanksgiving.  I load up on way too many bags of the tart red berries and squirrel them away in the freezer to enjoy year round.

Several years ago I fell in love with Trader Joe's Cranberry Walnut Tart but I never gave much thought to trying to replicate it in my own kitchen until last year, quite by accident.   I was tired and in a hurry to throw together a cranberry pecan pie for Thanksgiving last year when I realized that I didn't have any pecans on hand.  I threw in some walnuts and also in my hurried stupor, I forgot to add the sugar.  As the pie baked I convinced myself that it was ruined but as luck would have it, it turned out quite good.  I realized that with a few more tweaks, it could be a close copy cat of my beloved Trader Joe's tart.  

I'm all about things being easy with no fuss in the kitchen so most occasions I make this in a 9x13 baking dish and cut it into squares for serving.  I wanted it to have a little fancier presentation for my first Thanksgiving with Boy Toy and his family this year so I prepared it in a 9" spring form pan.  I lined the bottom of the pan with parchment paper before pressing the crust in and I also lined the sides of the pan prior to pouring in the cranberry filling.   It turned out beautifully and I'm somewhat ashamed to admit that I ate way more than my fair share!


Cranberry Walnut Tart with Shortbread Crust
Serves 8

Crust:
1 cup butter, softened
½ cup confectioner’s sugar
2 cups all-purpose flour
¼ teaspoon baking powder
Tart:
2 cups chopped fresh cranberries
Zest of 2 medium oranges
1-1/2 cup chopped walnuts
3 eggs
1 cup dark corn syrup
1/3 cup sugar
¼ cup butter, melted

For the crust:
Preheat oven to 350 degrees.  In a large bowl, cream butter and sugar until light and fluffy.  Stir together flour and baking powder; blend into butter mixture.  Pat into a 9x13 glass baking dish.  Bake for 12-15 minutes or until edges are lightly browned.  Cool slightly. 

For the tart: 
Preheat oven to 325 degrees.  Combine cranberries with orange zest in a small bowl; mix well.  Spoon onto top of prebaked crust.  Arrange walnuts on top of cranberry mixture and press down slightly.  Combine eggs, corn syrup, sugar and butter in a medium bowl; whisk until smooth.  Pour evenly over the walnuts.  Bake 45 minutes to 1 hour, or until set.  Cool.  


Pin It
  • Digg
  • Del.icio.us
  • StumbleUpon
  • Reddit
  • RSS

Seasonally correct salsa


It is with great sadness that I start to adjust my menus for the fall and winter seasons while the rest of the food blogging world becomes ecstatic and rejoices that these seasons have rolled around so they can once again feature the likes of pumpkins, acorn squash and root vegetables on their menus.

The fact of the matter is, I don't really enjoy the fall and winter food offerings as much as I do the summer fruits and vegetables so I try to hold on to the seasons as long as I can by eating and posting seasonally incorrect items. I'm trying to do better, though.  I really am. 

I thought I'd break myself in slowly with this salsa that seemed more appropriate for fall since it featured cranberries and I still had a few bags of fresh cranberries in the freezer left over from last season.  Even though the recipe said not to use frozen, I went with it anyway and it probably accounted for the fact that all of the ingredients in the salsa were ruby red colored - fresh cranberries wouldn't bleed as much color, if any.  In addition to the 1/3 cup brown sugar it called for, I used pretty close to another 1/4 cup to season plus a pinch or two of salt because it was VERY tart and even then it was still just a tad too tart for my taste.  But again, I'm trying.  I really am. 

This salsa appeared in the November 2008 edition of Gourmet magazine and is a good complement when served with turkey or chicken but honestly, I liked it best with good old-fashioned tortilla chips and it seemed to get better, albeit still tart, a few days after it was made.  The saltiness of the chips seemed to balance it out very nicely. 


If this is your season, I'm happy for you. I really am.  I'll just sit over here in the corner and wait patiently for my beloved season to come back around.

Cranberry Pineapple Salsa
as published in Gourmet, November 2008


  • 1 (4-pounds) pineapple, peeled, cored, and cut into 1/2-inch pieces
  • 1medium onion, chopped
  • 1 tablespoon vegetable oil
  • 1 (12-ounces) bag fresh cranberries (3 1/2 cups; not frozen)
  • 1/3 cup packed dark brown sugar, or to taste
  • 1/4 cup Seville orange juice (or 2 tablespoon each of fresh lime juice and regular orange juice)
  • 1 cup packed cilantro sprigs, coarsely chopped

  • Preheat oven to 450°F with rack in upper third.

    Toss pineapple and onion with oil and 1/2 teaspoon salt in a large 4-sided sheet pan, then roast, stirring occasionally, until charred in spots, 40 minutes to 1 hour (Alison's note: 30 minutes was plenty enough time for roasting.  I decided to let it go upwards of 40 minutes but my pineapple started turning into charcoal briquettes shortly after 30).

    Meanwhile, pulse cranberries in a food processor until coarsely chopped, then transfer to a large bowl and stir in 1/3 cup brown sugar.

    Add hot roasted-pineapple mixture, stirring until sugar has dissolved, then stir in citrus juice. Season with brown sugar and salt. Cool, then stir in cilantro. Let stand, covered, 1 hour.

    Note: Salsa, without cilantro, can be made 3 days ahead and chilled. Bring to room temperature and add cilantro before serving.
     

    Pin It
    • Digg
    • Del.icio.us
    • StumbleUpon
    • Reddit
    • RSS

    Summertime Nosh


    With the temperatures in the Queen City reaching all-time record highs of 100+ degrees these past couple of weeks, my summertime meals have become more of a nosh than an actual meal.  The heat just seems to completely zap my appetite and who wants to heat up an already blazing hot kitchen with an oven and long cooking times?

    This quick and easy recipe from Southern Living featuring two of my favorite things: cherries and bleu cheese certainly fits the bill for something light yet satisfying on a hot summer day.  The combination of the sweet cherries and honey, the salty bleu cheese and the savory rosemary and arugula sends the taste buds into deliciousness overload. 

    This is meant to be an appetizer and the kind where you can set out all the individual components and allow your guests to assemble their own crostini or you can assemble and plate in advance.  The cherry compote also keeps for at least a week in the refrigerator.  The only change that I would make from the original recipe next time is to coarsely chop the cherries and possibly even the arugula as leaving them whole made for a pretty hefty crostini and it was awkward to bite into and maintain a lady-like appearance. 

    Stay cool but don't stay out of the kitchen!

    Honey-Rosemary Cherries & Bleu Cheese Crostini
    Southern Living, December 2011

    printable recipe

    1 shallot, thinly sliced
    2 teaspoons olive oil
    1 (12-oz.) package frozen dark, sweet pitted cherries, thawed
    2 tablespoons balsamic vinegar
    2 tablespoons honey
    1/4 teaspoon chopped fresh rosemary
    1/8 teaspoon salt
    1/8 teaspoon pepper
    2 cups loosely packed arugula
    16 (1/4-inch-thick) ciabatta bread slices, toasted
    1 (8-oz.) wedge bleu cheese, thinly sliced*


    1. Drain cherries and coarsely chop, reserving the juice.  Sauté shallot in hot oil in a medium skillet over medium-high heat 2 to 3 minutes or until tender. Add cherries (and reserved liquid) and next 5 ingredients. Cook, stirring occasionally, 8 to 10 minutes or until thickened. Let stand 10 minutes.

    2. Divide arugula among toasted bread slices (you may want to coarsely chop this as well if your leaves are large). Top each with cherry mixture and 1 bleu cheese slice.

    *Manchego or goat cheese may be substituted.

    Pin It
    • Digg
    • Del.icio.us
    • StumbleUpon
    • Reddit
    • RSS

    I'm Bringing Sexy Back

    I recently polled a few of my girlfriends as to what their definition of "sexy" is when it comes to the ideal mate.   Most of their answers focused on physical attributes: 

    I love a tall man with wide shoulders. 

    I think a foreign accent is totally sexy.

    Blue eyes and blond hair make me melt. 


    As it usually is with me, the cheese stands alone when it comes to being in agreement with what everyone else thinks.  Of course there are certain physical attributes that will turn my head, but what I find truly sexy has not so much to do with hair or eye color, dialect or stature. 

    The Boy Toy has the extremely lethal combination of all things that I find sexy in a man.  It's a given that I find him physically attractive - we won't even go there.  But what makes me weak in the knees about him is that he is a great cook.  And he does dishes (which scored him MAJOR points with my family during this trip.)  And if those things alone don't make you **swoon** I'll throw in the fact that he......

    Wait for it........


    Wait......


    He also shops for his own groceries. 

    Be still my beating heart, but those are all the things that trip my sexy trigger.  Now, if you'll give me just a moment to catch my breath and get myself back together, I'll finish my story...

    Since I am the "foodie" in our relationship, I naturally assumed that I would do most of the cooking when we became a couple and it wasn't until after the Boy Toy and I started dating that I discovered his culinary talents.  As it turns out, I've eaten more meals at his house prepared by his own hands than he has at mine.  So last week, when he emailed me this picture of a fruit trifle and said he thought it looked yummy, I knew it was my chance to impress him with my kitchen skills.

    Trifles are very easy to make and can be done with any combination of items that you have on hand.  When I catered, we sometimes used brownies and layered them with chocolate syrup, fresh whipped cream and either strawberries or raspberries.  Most other times it was yellow cake with vanilla infused whipped cream and any combination of fresh fruits.  You can be really creative when making these (just as someone was with this one probably made to celebrate The Queen's Diamond Jubilee.)

    This time I wanted my trifle to be over-the-top rich and delicious so I turned to my recipe for homemade Bavarian Cream.  I used a combination of sliced fresh strawberries and blueberries and I also used two diced fresh peaches for the fruit layers.  I purchased a Sara Lee family-sized pound cake (they're in the frozen section of my grocery store) and cut it into cubes for the cake layer.  The Bavarian Cream is GUARANTEED to bring the sexy back, so use it with caution :)


    I showed up for Sunday lunch with the Boy Toy and his family bearing my huge trifle, which initially frightened his children as something they may not enjoy and he later told me that when I first showed up, he wondered how in the world we were going to eat all of it.  After everyone (including the skeptics) had at least three huge helpings, he knew. 

    Who's sexy now?!? 


    Bavarian Cream
    Yields 3 quarts

    1 cup flour
    1/2 cup corn starch
    2 cups sugar
    1 teaspoon salt
    1/2 gallon milk
    1 pint heavy cream
    2 teaspoons vanilla
    3-4 drops yellow food coloring
    3 egg yolks

    In a large, heavy sauce pan mix first 4 ingredients.  Add next 4 wet ingredients to the dry.  Stir over medium heat constantly.  After about 10-15 minutes, it will begin to thicken.  Beat egg yolks with 1-2 cups of the cream mixture in a separate bowl to temper the eggs; stir back into cream mixture.  Cook for 5-10 minutes more for desired thickness.  Cool completely.

    *Tip:  when cooling or storing cream, place a piece of plastic wrap directly on top of the cream and press out the air bubbles.  The wrap needs to touch the cream so it won't form a "skin."

    Pin It
    • Digg
    • Del.icio.us
    • StumbleUpon
    • Reddit
    • RSS

    Life's a Beach

    After spending a (not nearly) long (enough) weekend at the beach, I now have a craving for all things seafood.  My family rented this gorgeous beach house in Georgetown, SC for a week as a surprise for my grandmother's 80th birthday and we all traveled from near and far to spend some time with her.  We had worked really hard to keep it all a secret so she would think she was going to enjoy a leisurely week at the beach with just my parents, but even at that we worried that maybe she was on to us and was really just pretending she didn't know what awaited her.  I mean, after raising my mother and her three siblings and dealing with the antics of all us grandchildren, she has to be a pretty smart woman.  Needless to say, we pulled one over on her. 


    As Boy Toy, his daughter and I headed to Georgetown, we were oblivious to the fact that tropical storm Alberto was swirling around out in the Atlantic and even though we didn't get to do typical beach activities once we got there, we still had a fabulous time.  Check out these awesome photos of our little one enjoying the turbulence of the waves crashing onto the deck of the house. 
    
    
    Dude, I have a 13-year-old brother...this tropical storm is NOTHING!
    
    She didn't get to go to the beach, so the beach came to her!

    The second night we were there, we did an awesome shrimp and crab boil and that just started to whet my appetite but there just wasn't enough time to get my fill of aquatic creatures so my recent menus have featured some sort of seafood. 

    Halibut is one of my favorite types of fish to prepare because its flavor is mild and you can dress it up with almost any kind of sauce or topping.  I love this recipe for Halibut with Pineapple Salsa because it's super easy and the jalapenos give it just the right amount of zestiness.  Even better is the fact that this entree can be prepped and ready in about 15 minutes.  The salsa is also great spooned over grilled chicken or you could make it in a larger quantity and scoop it up with tortilla chips as part of a Mexican feast.


    Halibut with Pineapple Salsa
    Serves 4

    1/2 cup dried pineapple, diced
    1/2 cup red bell pepper, diced
    1/4 fresh cilantro, chopped
    2 teaspoons jalapeno pepper, minced
    1/8 teaspoon salt
    1/4 cup fresh lime juice
    1 teaspoon vegetable oil
    4 halibut steaks (4 oz each)
    1 teaspoon vegetable oil
    salt and freshly ground black pepper
    Non-stick cooking spray

    Combine first 7 ingredients in a bowl and stir well.  Let stand for about 15 minutes, stirring occasionally.

    Brush fish with 1 teaspoon oil and season with salt and pepper.

    Place fish on a grill pan coated with cooking spray and cook about 5 minutes on each side over medium high heat until fish flakes easily with a fork.

    Serve with salsa.

    Pin It
    • Digg
    • Del.icio.us
    • StumbleUpon
    • Reddit
    • RSS

    Just Peachy


    When fresh peaches appear here at Wish Upon A Chef, you can bet I've been to the beach. This is the third year in a row that I've stopped at McLeod's Farms in McBee, SC for fruit on my way home from Myrtle Beach, so it's pretty safe to say that it's become a ritual now. This year I introduced two of my girlfriends to the tradition and based upon the bags of fresh peaches, peach bread and peach ice cream they carried out of the store, I think they liked it!

    The peaches are exceptionally sweet this year thanks to the weather that we've been having so I bought enough to share with my mother and to bake two peach cobblers ~ one to have all to myself and one to send home with a special friend. I hope you'll enjoy this Southern Peach Cobbler from allrecipes.com as much as we all did!


    Southern Peach Cobbler
    submitted by: aeposey
    allrecipes.com

    Ingredients
    8 fresh peaches - peeled, pitted and sliced into thin wedges
    1/4 cup white sugar
    1/4 cup brown sugar
    1/4 teaspoon ground cinnamon
    1/8 teaspoon ground nutmeg
    1 teaspoon fresh lemon juice
    2 teaspoons cornstarch

    1 cup all-purpose flour
    1/4 cup white sugar
    1/4 cup brown sugar
    1 teaspoon baking powder
    1/2 teaspoon salt
    6 tablespoons unsalted butter, chilled and cut into small pieces
    1/4 cup boiling water

    Mix Together
    3 tablespoons white sugar
    1 teaspoon ground cinnamon

    Directions
    1.Preheat oven to 425 degrees F (220 degrees C).

    2.In a large bowl, combine peaches, 1/4 cup white sugar, 1/4 cup brown sugar, 1/4 teaspoon cinnamon, nutmeg, lemon juice, and cornstarch. Toss to coat evenly, and pour into a 2 quart baking dish. Bake in preheated oven for 10 minutes.

    3.Meanwhile, in a large bowl, combine flour, 1/4 cup white sugar, 1/4 cup brown sugar, baking powder, and salt. Blend in butter with your fingertips, or a pastry blender, until mixture resembles coarse meal. Stir in water until just combined.

    4.Remove peaches from oven, and drop spoonfuls of topping over them. Sprinkle entire cobbler with the sugar and cinnamon mixture. Reduce heat to 350 and bake until topping is golden, about 30 minutes.

    Pin It
    • Digg
    • Del.icio.us
    • StumbleUpon
    • Reddit
    • RSS

    Strawberry Fields Forever


    Field-picked strawberries will always hold a special place in my heart because they remind me of my childhood, so when I had the opportunity to travel back to my hometown and attend the Strawberry Festival it was just like going home and being a kid all over again.

    The Strawberry Festival is still in the infant stages of becoming a large, well-known regional festival like our Apple Festival, but it was created in honor of a man named Wayne Scott who pioneered the strawberry movement in my hometown some 50+ years ago. The weather was not very cooperative this year and eventually put an end to the festivities early, but even still it was a fun time celebrating all things strawberry.

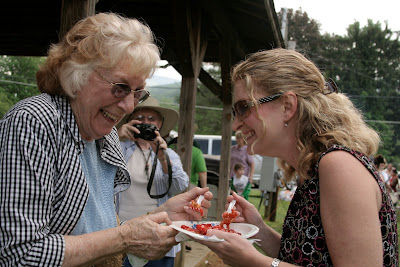
    Sharing a funnel cake top-heavy with fresh strawberries and powdered sugar with my grandmother was one of the major highlights of the festival. You can see from the photo that she had a death-grip on the edge of the plate out of fear that I'd take off running with the thing and not share (I'm not sure why we only children have such a stigma surrounding us about our inability to share.)


    I've shared a recipe for fresh Strawberry Salsa that will now become part of my strawberry season repertoire.  It was something that I tossed together to take to the second picnic gathering of the Charlotte Food Bloggers to celebrate the theme of strawberry picking. I was unable to join the group when they hit the fields to pick their own berries but that didn't stop me from enjoying the fruits of their labor. I was amazed at the creativity and beauty of the dishes brought and I suggest you check out the blogroll and take a look-see for yourself what our fabulous members bring to the table. I find them all to be such an inspiration!

    Homemade cinnamon-sugar dusted tortilla chips were the perfect accompaniment to the sweet and spicy Strawberry Salsa, and now that strawberry season is over, don't be afraid to use store-bought berries in this recipe. Those berries have a firmer texture and they actually hold up better and longer in the salsa than freshly picked berries.


    Strawberry Salsa
    Inspired by Gourmet Magazine

    Ingredients:
    2 fresh jalapeño chilies, finely chopped
    2 cups finely chopped strawberries
    1/2 cup finely chopped white onion
    6 oz. finely chopped dried pineapple
    1/4 cup chopped fresh cilantro
    1 teaspoon fresh lime juice
    1/2 teaspoon salt
    1 teaspoon sugar

    Directions:
    Combine chilies, strawberries, onion, cilantro, lime juice, salt and sugar in a medium bowl. Mix gently to combine. Salsa can be made several hours before serving and chilled. Yield: 3 cups.

    Homemade baked tortilla chips are really easy to make. I used the whole wheat variety but feel free to use the flour ones if you wish. Stack them up together and cut them into 8th ~ cut in half, then half again and then cut each quarter into halves. Brush each triangle with a bit of olive oil and sprinkle with a mixture of cinnamon and sugar. If you'd like savory chips, feel free to use any spice blend you desire! Bake in a single layer on a baking sheet at 350 degrees for approximatly 10-12 minutes or until chips are slightly browned.

    Pin It
    • Digg
    • Del.icio.us
    • StumbleUpon
    • Reddit
    • RSS

    End of Season Sale

    We may still be speeding toward a few record high temperatures here in the South, but summer is now officially visible in the rear view mirror. It's over, people. Move along. There's nothing left to see here.

    I struggle during the time it takes my appetite to make the transition from one season to the next, running the gamut between noshing on fruits and vegetables and gorging myself on stick-to-your-ribs hearty, heavy meals. I'm well aware that typical summer fruits and vegetable are available year round thanks to the modern means of transportation, but there's just something unnatural about eating a watermelon when the air is just as chilled as the melon.

    I make no secret of liking my watermelon straight up with a pinch of salt and nothing else. No frills, no fluff, no stuff. There's no sense in messing up a naturally good thing so I'm not sure why I felt compelled to combine my most favorite summertime treat with the savoriness of Gorgonzola cheese and red onion in the Watermelon Salad featured in the August 2008 issue of Bon Appetit magazine. A reader had written in to request the recipe that she had tried at The Beach House Restaurant in Kauai, Hawaii. According to their menu, the restaurant's version of the salad includes carrots whereas BA's rendition does not. It also appears that it is such a requested recipe that it has been added to their website, probably since the BA article was published. No matter which version you try, I think you'll enjoy the combination of sweet, savory, and fresh.

    Farewell Summer 2010!

    Watermelon Salad
    Bon Appetit, August 2008
    Serves 6-8

    Raspberry Vinaigrette
    1/4 cup seedless raspberry jam
    1/4 cup cranberry juice cocktail
    2 tbls. balsamic vinegar
    2 tbls. white balsamic vinegar
    6 tbls. vegetable oil

    Caramelized Macadamia Nuts
    1 tbls. butter
    2 tbls. packed brown sugar
    3/4 cup coarsely chopped macadamia nuts

    Salad
    2-1/2 to 3 lbs. watermelon, cut into 1/2" thick triangles, rind removed
    5 to 6 ounces bag or container mixed baby greens or arugula
    3/4 cup Gorgonzola cheese, crumbled
    1/2 small red onion, halved and thinly sliced

    For dressing, puree first 4 ingredients in blender until smooth. With machine running, gradually add oil. Season to taste with salt and pepper. Can be made 2 days ahead. Cover and chill.

    For nuts, melt butter in nonstick skillet over medium heat. Add sugar and stir to blend. Add nuts and stir to coat. Transfer to plate and cool. Can be made 2 days ahead. Store airtight at room temperature.

    For salad, arrange watermelon slices around edges of plates and toss greens in large bowl with dressing to coat. Divide salad among plates. Sprinkle with cheese, red onion, and caramelized nuts over.

    Pin It
    • Digg
    • Del.icio.us
    • StumbleUpon
    • Reddit
    • RSS

    Passage of Time

    This time of year not only marks the much anticipated end of the sultry dog days of summer but also the change of seasons for appetites. Menus will soon consist of the warmth of comfort foods and hearty soups and stews. Road-side produce stands and farmers markets will fold up their tents and the bounty of summer will be replaced by root vegetables and produce trucked in from far away warmer climates.

    My taste buds mourn the passage of this time, wanting instead to rewind to the time when South Carolina peaches were just gorgeous blooms on a tree. Wanting to relive the eager anticipation of the juicy, sweet fruit. Never wanting summer to end.

    It has become a summer ritual to stop for peaches at McLeod Farms in South Carolina on the way home from the beach and last year, I used the peaches to honor my friend. This year, I couldn't decide which direction I wanted to go and luckily I brought home enough peaches for three kitchen projects!

    One of my favorite but hardly-ever-used kitchen appliances came out of hiding for the first project ~ peach ice cream. Rich, cool and creamy, it is the perfect way to say goodbye to the few remaining hot and humid summer days. As with most homemade ice creams, it is best served while still in the soft-serve stage but if you need to freeze and serve later, just let it sit out for a bit to soften up. I'm already having luscious visions of using brandied peaches next year for an over-the-top ice cream treat.

    It would be a crime to let peach season pass without an old-fashioned peach pie. And let's just get one thing out of the way....I used a pre-fab pie crust because while I may be good at alot of things, making pie crusts is not one of them. I am not ashamed. I am ashamed, however, at how many pieces of this pie I ate. I had aspirations of baking a peach, cranberry, apple pie but that will have to wait until next year.

    The third project was a combination peach-strawberry quick bread that was reduced to mere crumbs by my coworkers before I could even entertain taking a picture.

    Unfortunately, I can't stop the passage of time or the change of seasons, but I can continue to dream up fabulous creations for next year's peach projects. I hope you'll enjoy the last official week of summer with one of these peachy delights!


    Carolina Peach Ice Cream

    2 1/2 pounds fresh peaches - peeled, pitted and chopped
    1/2 cup granulated sugar
    1 pint half-and-half cream
    1 (14 ounce) can sweetened condensed milk
    1 (12 fluid ounce) can evaporated milk
    1 teaspoon vanilla extract
    2 cups whole milk, or as needed

    Puree peaches with the sugar and half-and-half in batches in a blender or food processor.

    In a gallon ice cream freezer container, mix together the peach mixture, sweetened condensed milk, evaporated milk, and vanilla. Pour in enough whole milk to fill the container to the fill line, about 2 cups.

    Follow the manufacturer's instructions to freeze the ice cream.

    _____________________________________________________________________________________

    Old-fashioned Peach Pie

    1 (15 ounce) package pastry for a 9 inch double crust pie
    1 egg, beaten
    5 cups sliced peeled peaches
    2 tablespoons lemon juice
    1/2 cup all-purpose flour
    1 cup white sugar
    1/2 teaspoon ground cinnamon
    1/4 teaspoon ground nutmeg
    1/4 teaspoon salt
    2 tablespoons butter

    Preheat the oven to 450 degrees.

    Line the bottom and sides of a 9 inch pie plate with one of the pie crusts. Brush with some of the beaten egg to keep the dough from becoming soggy later.

    Place the sliced peaches in a large bowl, and sprinkle with lemon juice. Mix gently. In a separate bowl, mix together the flour, sugar, cinnamon, nutmeg and salt. Pour over the peaches, and mix gently. Pour into the pie crust, and dot with butter. Cover with the other pie crust, and fold the edges under. Flute the edges to seal or press the edges with the tines of a fork dipped in egg. Brush the remaining egg over the top crust. Cut several slits in the top crust to vent steam.

    Bake for 10 minutes in the preheated oven, then reduce the heat to 350 degrees and bake for an additional 30 to 35 minutes, until the crust is brown and the juice begins to bubble through the vents. If the edges brown to fast, cover them with strips of aluminum foil about halfway through baking. Serve warm.

    Pin It
    • Digg
    • Del.icio.us
    • StumbleUpon
    • Reddit
    • RSS

    Just Stuff It!

    We've all had one of those Steven Slater kind of days.

    The kids are cranky and the spouse is on your last nerve. Traffic is a bitch and making you later than normal. The boss is yelling and the next thing you know you've been hit in the head with a suitcase.

    It's enough to make anyone grab a few beers and scoot down the emergency ramp, all the while telling everyone within earshot to go screw themselves. But we really shouldn't say things like "Screw you!" on this blog, now should we? (That's really just a question interjected to show my mother that I try to keep it clean. Hi Mom!)

    Who can blame Steven, anyway? Alot of us wish we could quit our jobs in a blaze of glory and develop a huge fan base in support of our defiance. But unfortunately, for most of us it's out of the question to do such a bold thing.

    I dedicate today's post to Steven because as I stood looking at a pint of fresh strawberries, I was perplexed as to what to do with them. Bake them into bread? Whirl them into a smoothie? Use them for salad or ice cream makings? I was just too overwhelmed to make a decision and finally I just said to myself, "Oh, screw it...just stuff 'em!"

    There's no real recipe here folks ~ I just pulled the emergency chute and hoped I'd land on my feet when I whipped up a block of softened cream cheese with about a 1/2 cup of confectioner's sugar (more or less to get the consistency to squeeze through a decorator tube and have it hold it's shape) and about 2 tablespoons of orange liqueur. Cut the stem from the top of the berries so they sit flat and with a small pairing knife, cut an "X" in the bottom of the berry, taking care not to cut all the way through. Gently open the berry and pipe the cream cheese mixture inside. You may like to garnish with some finely shaved chocolate, whereas I did not because these were going to be out in the heat for a bit and I didn't want them to have a total meltdown as opposed to the "small meltdown" that Slater's mother described. The next time someone asks me for an idea of what to do with fresh strawberries, I'm going to tell them to fix 'em Slater style!

    If you really want to crack up, check out this reenactment of Slater's ordeal from the Chinese viewpoint.

    Pin It
    • Digg
    • Del.icio.us
    • StumbleUpon
    • Reddit
    • RSS

    Taste the Caribbean

    If I could spend my days frolicking with the Boy Toy in the Caribbean sand, I would.

    But since I have bills to pay and the sand chafes me, I'll settle for being reminded of the Caribbean with these yummy fresh fruit and chicken kabobs.

    Quick and easy to make, these kabobs are perfect for the grill and keeping you out of the kitchen during this blazing hot summer.

    If you don't have the time to marinate, just baste them with the glaze while grilling but I do recommend marinating if you have the time ~ since the marinade ingredients are so light, it adds a little more depth to the flavor. I like to serve these with a simple side dish like rice or a green vegetable and a light salad.

    Simplicity. Deliciousness. The next best thing to building sand castles in the Caribbean with the Boy Toy. Almost.


    Caribbean Chicken Kabobs

    Serves 6

    1-3/4 cups honey
    3/4 cup fresh lemon juice
    1/3 cup fresh ginger
    1/2 cup Dijon mustard
    4 pounds boned and skinned chicken breast, cut into 1" cubes
    6 each plums -- pitted & quartered
    4 cups fresh pineapple -- cubed
    2 cups coconut, toasted

    Combine first four ingredients. Skewer chicken and fruit then use half of the marinade to marinate chicken for several hours or overnight. Grill, turning and brushing frequently with remaining marinade. When chicken is done, roll in toasted coconut.

    Pin It
    • Digg
    • Del.icio.us
    • StumbleUpon
    • Reddit
    • RSS

    Two of my favorite things


    Goat cheese and sweet cherries.

    Combine them both in a leafy green salad dressed with a simple homemade vinaigrette and it's heaven on a plate!

    With temperatures in the high 90's and even reaching 100 a few times, it's been too blazing hot here in the Carolinas to cook, let alone eat, so my meals have consisted mainly of salads or light snacks. Many thanks to a back issue of Bon Appetit magazine for giving me the idea to pair two of my most favorite things!

    Enjoy and stay cool...oh, and even though the recipe says you can prepare the goat cheese ahead of time, don't. It only takes a few minutes and it's best when baked just before topping the salad. I do think the dressing tasted better prepared the day before.

    Mesclun and Cherry Salad with Goat Cheese
    June 2008 Bon Appetit
    Serves 6

    •2 tablespoons roasted almond oil or olive oil (I used toasted hazelnut oil)
    •2 tablespoons finely chopped shallot
    •2 tablespoons chopped fresh tarragon
    •1 tablespoon fresh lemon juice
    •3/4 teaspoon finely grated lemon peel
    •3/4 cup sliced almonds (about 3 ounces)
    •1 large egg
    •1 tablespoon water
    •1 11-ounce log soft fresh goat cheese, cut crosswise into 6 rounds
    •6 cups (packed) mixed baby greens or baby spinach
    •1 cup halved pitted fresh Bing cherries or other dark sweet cherries (about 7 ounces whole unpitted cherries)
    •1/2 cup 2x1/4-inch strips fresh fennel bulb


    •Preheat oven to 400°F. Whisk first 5 in small bowl. Season dressing generously with salt and pepper.
    •Spread almonds on plate. Whisk egg and 1 tablespoon water in small bowl; sprinkle with freshly ground black pepper. Turn goat cheese rounds in egg mixture, then coat with sliced almonds, covering all sides. Place on rimmed baking sheet. DO AHEAD Dressing and goat cheese rounds can be made 4 hours ahead. Cover separately and chill. Bring dressing to room temperature and whisk before using.
    •Bake goat cheese rounds until cheese is warm but not melted, about 10 minutes.
    •Combine greens, cherries, and fennel in large bowl. Add dressing and toss to coat. Divide salad among 6 plates. Place 1 cheese round on each plate and serve.

    Pin It
    • Digg
    • Del.icio.us
    • StumbleUpon
    • Reddit
    • RSS

    Spring has sprung!

    I don't think I've ever seen a prettier Spring. At least not one that compelled me to get out of bed early on my coveted Sunday morning and head into the neighboring town to snap some photos of the spring blooms. Even though the weather is still a little iffy these days, I hope these pictures will help you understand why I'm a day late posting my March Daring Baker's Challenge. It was just too pretty outside to be stuck in the kitchen.

    The 2010 March Daring Baker’s challenge was hosted by Jennifer of Chocolate Shavings. She chose Orange Tian as the challenge for this month, a dessert based on a recipe from Alain Ducasse’s Cooking School in Paris. And let me tell you, it was the perfect challenge for spring!


    When I first saw the challenge, I decided I wasn't going to participate because I was short on time and the dessert just didn't call my name when I read through the ingredients. But a few days later, I had a change of heart and I'm so glad that I did. The combination of sweet oranges, freshly whipped cream infused with homemade orange marmalade atop a pate sablee crust was a delightful, airy combination. If you haven't chosen your Easter menu dessert, give some serious consideration to the Orange Tian. Don't let the length of the recipe posted below scare you as it's really not that complicated at all. All of the components with the exception of the whipped cream can be made in advance.

    Thank you, Jennifer, for an excellent challenge!


    Note: There are quite a few steps to making this dessert; however a lot of them can be made in advance. The orange marmalade can be made several days ahead of time and the caramel sauce and orange segments preparation should be made the day before you make the dessert. Also, if you have a scale, try and use the weighed measurements as they will be the most accurate.

    The recipe can be a little bit tricky to put together, especially the first time. The main tip is to make sure the whipped cream is firm enough when you make it and be sure to leave the desserts to set in the freezer for long enough or they will fall apart when you unmold them.

    Preparation time:
    - Pate Sablee: 20 minutes to make, 30 minutes to rest, 15 minutes to roll out, 20 minutes to bake
    - Marmalade: 20 minutes to make, 30 minutes to blanch
    - Orange segments: 20 minutes, overnight to sit
    - Caramel: 15 minutes, overnight to sit
    - Whipped Cream: 15 minutes
    - Assembling: 20 minutes
    - Freezer to Set: 10 minutes

    Equipment required:
    • Cookie cutters . Ideally, you should have about 6 cookie cutters to build the desserts in and cut the circles of dough. The cookie cutters will be the size of your final dessert, so they should be the size of an individually-sized tart mold. If you don’t have round cookie cutters you could use an individually-sized cheesecake mold without its base.
    • A food processor (although the dough could be made by hand too)
    • A stand-up or hand mixer
    • Parchment paper or a silicone sheet
    • A baking sheet
    • A rolling pin

    For the Pate Sablee:

    Ingredients U.S. Imperial Metric Instructions for Ingredients
    2 medium-sized egg yolks at room temperature
    granulated sugar 6 tablespoons + 1 teaspoon; 2.8 oz; 80 grams
    vanilla extract ½ teaspoon
    Unsalted butter ¼ cup + 3 tablespoons; 3.5 oz; 100 grams ice cold, cubed
    Salt 1/3 teaspoon; 2 grams
    All-purpose flour 1.5 cup + 2 tablespoons; 7 oz; 200 grams
    baking powder 1 teaspoon ; 4 grams

    Directions:
    Put the flour, baking powder, ice cold cubed butter and salt in a food processor fitted with a steel blade.

    In a separate bowl, add the eggs yolks, vanilla extract and sugar and beat with a whisk until the mixture is pale. Pour the egg mixture in the food processor.

    Process until the dough just comes together. If you find that the dough is still a little too crumbly to come together, add a couple drops of water and process again to form a homogenous ball of dough. Form into a disc, cover with plastic wrap and leave to rest in the fridge for 30 minutes.
    Preheat your oven to 350 degree Fahrenheit.

    Roll out the dough onto a lightly floured surface until you obtain a ¼ inch thick circle.

    Using your cookie cutter, cut out circles of dough and place on a parchment (or silicone) lined baking sheet. Bake for 20 minutes or until the circles of dough are just golden.

    For the Marmalade:

    Ingredients U.S. Imperial Metric Instructions for Ingredients
    Freshly pressed orange juice ¼ cup + 3 tablespoons; 3.5 oz; 100 grams
    1 large orange used to make orange slices
    cold water to cook the orange slices
    pectin 5 grams
    granulated sugar: use the same weight as the weight of orange slices once they are cooked

    Finely slice the orange. Place the orange slices in a medium-sized pot filled with cold water. Simmer for about 10 minutes, discard the water, re-fill with cold water and blanch the oranges for another 10 minutes.

    Blanch the orange slices 3 times. This process removes the bitterness from the orange peel, so it is essential to use a new batch of cold water every time when you blanch the slices.

    Once blanched 3 times, drain the slices and let them cool.

    Once they are cool enough to handle, finely mince them (using a knife or a food processor).

    Weigh the slices and use the same amount of granulated sugar . If you don’t have a scale, you can place the slices in a cup measurer and use the same amount of sugar.

    In a pot over medium heat, add the minced orange slices, the sugar you just weighed, the orange juice and the pectin. Cook until the mixture reaches a jam consistency (10-15 minutes).

    Transfer to a bowl, cover with plastic wrap and put in the fridge.

    For the Orange Segments:

    For this step you will need 8 oranges.

    Cut the oranges into segments over a shallow bowl and make sure to keep the juice. Add the segments to the bowl with the juice.

    For the Caramel:

    Ingredients U.S. Metric Imperial Instructions for Ingredients
    granulated sugar 1 cup; 7 oz; 200 grams
    orange juice 1.5 cups + 2 tablespoons; 14 oz; 400 grams

    Place the sugar in a pan on medium heat and begin heating it.

    Once the sugar starts to bubble and foam, slowly add the orange juice. As soon as the mixture starts boiling, remove from the heat and pour half of the mixture over the orange segments.

    Reserve the other half of the caramel mixture in a small bowl — you will use this later to spoon over the finished dessert. When the dessert is assembled and setting in the freezer, heat the kept caramel sauce in a small saucepan over low heat until it thickens and just coats the back of a spoon (about 10 minutes). You can then spoon it over the orange tians.

    [Tip: Be very careful when making the caramel — if you have never made caramel before, I would suggest making this step while you don’t have to worry about anything else. Bubbling sugar is extremely, extremely hot, so make sure you have a bowl of ice cold water in the kitchen in case anyone gets burnt!]

    For the Whipped Cream:

    Ingredients U.S. Metric Imperial Instructions for Ingredients
    heavy whipping cream 1 cup; 7 oz; 200 grams
    3 tablespoons of hot water
    1 tsp Gelatin
    1 tablespoon of confectioner's sugar
    orange marmalade (see recipe above) 1 tablespoon

    In a small bowl, add the gelatin and hot water, stirring well until the gelatin dissolves. Let the gelatin cool to room temperature while you make the whipped cream. Combine the cream in a chilled mixing bowl. Whip the cream using a hand mixer on low speed until the cream starts to thicken for about one minute. Add the confectioner sugar. Increase the speed to medium-high. Whip the cream until the beaters leave visible (but not lasting) trails in the cream, then add the cooled gelatin slowly while beating continuously. Continue whipping until the cream is light and fluffy and forms soft peaks. Transfer the whipped cream to a bowl and fold in the orange marmalade.
    [Tip: Use an ice cold bowl to make the whipped cream in. You can do this by putting your mixing bowl, cream and beater in the fridge for 20 minutes prior to whipping the cream.]

    Assembling the Dessert:

    Make sure you have some room in your freezer. Ideally, you should be able to fit a small baking sheet or tray of desserts to set in the freezer.

    Line a small tray or baking sheet with parchment paper or a silicone sheet. Lay out 6 cookie cutters onto the parchment paper/silicone.

    Drain the orange segments on a kitchen towel.

    Have the marmalade, whipped cream and baked circles of dough ready to use.

    Arrange the orange segments at the bottom of each cookie cutter. Make sure the segments all touch either and that there are no gaps. Make sure they fit snuggly and look pretty as they will end up being the top of the dessert. Arrange them as you would sliced apples when making an apple tart.

    Once you have neatly arranged one layer of orange segments at the bottom of each cookie cutter, add a couple spoonfuls of whipped cream and gently spread it so that it fills the cookie cutter in an even layer. Leave about 1/4 inch at the top so there is room for dough circle.

    Using a butter knife or small spoon, spread a small even layer of orange marmalade on each circle of dough.

    Carefully place a circle of dough over each ring (the side of dough covered in marmalade should be the side touching the whipping cream). Gently press on the circle of dough to make sure the dessert is compact.

    Place the desserts to set in the freezer to set for 10 minutes.

    Using a small knife, gently go around the edges of the cookie cutter to make sure the dessert will be easy to unmold. Gently place your serving plate on top of a dessert (on top of the circle of dough) and turn the plate over. Gently remove the cookie cutter, add a spoonful of caramel sauce and serve immediately.

    Pin It
    • Digg
    • Del.icio.us
    • StumbleUpon
    • Reddit
    • RSS

    Friends Forever


    Do you have what it takes to be a really good friend?

    If a friend trusts you with a secret, can you cross your heart, hope to die, stick a needle in your eye promise not to tell another soul?

    Do you always remember their birthdays?

    Do you promise not to fight over boys even if one of you has to swallow the bitter pill when Mr. Right chooses her over you?

    When a fight breaks out, can your friends count on you to have their back?

    When I lived in the Wasteland, one of the (many) things that I struggled with most was the fact that I had no friends. I had close friends located far away, but the Captain and I didn't socially interact with alot of people and while he was honestly one of my best friends, I truly missed having a gossip-filled lunch with my girlfriends or having other friends over for an impromptu dinner. It was a lonely existence and when I found myself back in the Queen City, I made it a point to become acquainted with lots of cool people and also made it a point to keep the fires burning under the friendships formed so long ago.

    I made this sinfully delicious Caramel Apple Pie for my friend G., who's birthday was back in....oh, I don't know... November sometime? We tried numerous times to get together so that I could gift him with some good home cooking but I got sick, he had a hot date, the holidays interfered, and before we knew it, it was next year. But being the good friend that I am try to be, I hounded G. until he came for his birthday dinner.

    It's hard enough to imagine that this recipe, with all of its decadence, came from a 1999 publication of Cooking Light, but even harder to imagine that it took me this long to find out about it. After the gluttonous holidays, we probably should all be counting our calories but at 277 calories a slice, this isn't too bad of an indulgence and definitely worth an extra mile on the treadmill tomorrow!

    Bake the pie, invite some friends over to enjoy, and if you can't decide who's going to get who's back during the fight, just call my friend K. because she's really good at getting your back when it counts!

    P.S. I cheated and used a pre-made pie crust because I was pressed for time and I don't think G., in all of his birthday dinner excitment, even noticed.

    Caramel Apple Crumb Pie
    Cooking Light, November 1999

    Crust:
    1 cup all-purpose flour
    1/8 teaspoon salt
    2 tablespoons chilled butter or stick margarine, cut into small pieces
    2 tablespoons vegetable shortening
    3 tablespoons plus 1/2 teaspoon ice water
    1 teaspoon cider vinegar
    Butter-flavored cooking spray

    Filling:
    1 tablespoon butter or stick margarine
    1/2 cup packed brown sugar
    3/4 teaspoon ground cinnamon
    9 cups sliced peeled Granny Smith apple (about 2 3/4 pounds)
    3 tablespoons all-purpose flour
    2 teaspoons lemon juice

    Topping:
    1/4 cup all-purpose flour
    1/4 cup packed brown sugar
    2 tablespoons chilled butter or stick margarine, cut into small pieces
    1/4 cup fat-free caramel sundae syrup
    Preparation
    Preheat oven to 375°.

    To prepare crust, lightly spoon 1 cup flour into a dry measuring cup; level with a knife. Combine 1 cup flour and salt in a bowl; cut in 2 tablespoons butter and shortening with a pastry blender or 2 knives until mixture resembles coarse meal. Sprinkle surface with ice water, 1 tablespoon at a time; add vinegar. Toss with a fork until moist and crumbly (do not form a ball).

    Press mixture gently into a 4-inch circle on heavy-duty plastic wrap; cover with additional plastic wrap. Roll dough, still covered, to a 12-inch circle. Freeze 10 minutes or until plastic wrap can be easily removed.

    Remove 1 sheet of plastic wrap; fit dough into a 9-inch pie plate coated with cooking spray. Remove top sheet of plastic wrap. Fold edges under; flute. Line bottom of dough with a piece of foil; arrange pie weights (or dried beans) on foil. Bake at 375° for 15 minutes or until the edge is lightly browned. Remove pie weights and foil; cool on a wire rack.

    To prepare filling, melt 1 tablespoon butter in a large nonstick skillet over medium-high heat. Combine 1/2 cup brown sugar and cinnamon. Add sugar mixture and apples to skillet; cook 5 minutes, stirring occasionally. Remove from heat; stir in 3 tablespoons flour and lemon juice. Spoon into prepared crust.

    To prepare topping, lightly spoon 1/4 cup flour into a dry measuring cup; level with a knife. Combine flour and 1/4 cup brown sugar in a bowl; cut in 2 tablespoons butter with a pastry blender or 2 knives until mixture resembles coarse meal.

    Drizzle syrup over apple mixture; sprinkle topping over syrup. Bake at 375° for 30 minutes or until apples are tender. Cool on a wire rack.

    Pin It
    • Digg
    • Del.icio.us
    • StumbleUpon
    • Reddit
    • RSS

    Bella Cucina!

    I made a promise to myself a few weeks ago that I'd kick some of my eating habits to the curb so I'd be assured of fitting into my slinky cocktail dresses during the holiday season. Pfffft! Yeah. That lasted all of about two days. And who could fault me for gorging indulging in all the delicious food from this weekend?

    Good Eats! Charlotte hosted a chili cook-off on Sunday and on Saturday, yet another Italian themed food event in conjunction with the Italian Social Club. My entry for the Italian contest was this fabulous looking White Chocolate Tiramisu Trifle with Spiced Pears from the December 2007 edition of Bon Appetit magazine. The photo alone was enough to make me wonder why I'd waited so long to try the recipe and with more booze than Grandma's rum balls at Christmas, it was a sure-fire winner in my book. I was up against some stiff competition and in the end, a traditional tiramisu took the much deserved first place award.

    I made a few minor adjustments to the original recipe as posted below. I totally forgot the fresh ginger in the poaching liquid even though it was laying right beside the stove but I don't think anyone noticed. I used ground cinnamon and ground cardamom because I'd already spent the equivalent of my house payment on the other ingredients, so I used what I had on hand.
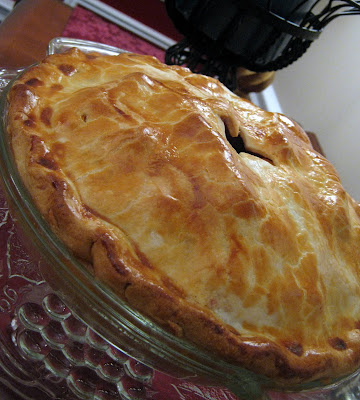
    Congratulations to the winners from both contests and if you'll excuse me, I need to go let the seams out of my cocktail dress.

    White Chocolate Tiramisu with Spiced Pears
    Bon Appetit, December 2007

    Spiced Pears:
    1 750-ml bottle dry white wine
    2 cups pear juice or pear nectar
    1 1/4 cups sugar
    12 whole green cardamom pods, crushed in resealable plastic bag with mallet
    4 1-inch-diameter rounds peeled fresh ginger (each about 1/8 inch thick)
    2 cinnamon sticks, broken in half
    5 large firm but ripe Anjou pears (3 to 31/4 pounds), peeled

    White Chocolate Mascarpone Mousse:
    7 ounces high-quality white chocolate (such as Lindt or Perugina), finely chopped
    1/3 cup poire Williams (clear pear brandy)
    1/4 cup water
    1/2 vanilla bean, split lengthwise
    1 8- to 8.8-ounce container mascarpone cheese*
    1 cup chilled heavy whipping cream

    Trifle Assembly:
    3 3-ounce packages soft ladyfingers,** separated
    2 cups chilled heavy whipping cream
    1/4 cup minced crystallized ginger
    White chocolate curls
    1 tablespoon powdered sugar


    For spiced pears:
    Combine first 6 ingredients in large saucepan. Stir over medium-high heat until sugar dissolves. Add pears and bring to boil. Reduce heat to medium, cover, and simmer until pears are just tender when pierced with knife, about 35 minutes. Transfer liquid with pears to large bowl and refrigerate until cold, about 3 hours.

    Using slotted spoon, transfer pears to plate. Boil poaching liquid in heavy large saucepan over medium-high heat until slightly thickened and reduced to generous 1 1/2 cups, about 15 minutes. Strain into 2-cup measuring cup; discard spices in strainer. Cool. Cover and chill pears and pear syrup until cold.

    For mousse:
    Combine white chocolate, pear brandy, and 1/4 cup water in top of double boiler set over simmering water. Stir until smooth (mixture will be very liquidy). Scrape in seeds from vanilla bean; discard bean. Transfer white chocolate mixture to large bowl; gradually add mascarpone, whisking until mixture is smooth. Cool mascarpone mixture until barely lukewarm.

    Using electric mixer, beat 1 cup cream in medium bowl until peaks form. Fold whipped cream into mascarpone mixture in 4 additions. Cover and chill white chocolate mousse until set, about 3 hours. DO AHEAD: Pears and mousse can be made 1 day ahead. Keep chilled.

    For trifle assembly:
    Cut pears lengthwise in half and remove cores and stems; cut halves lengthwise into 1/4-inch-thick slices.

    Arrange ladyfingers, rounded sides down, in single layer in bottom of 12-cup trifle dish (about 8 inches in diameter and 5 inches deep), covering bottom completely (using about 15 ladyfingers). Drizzle 5 tablespoons pear syrup evenly over ladyfingers. Using small offset spatula, spread 1/3 of white chocolate mousse over ladyfingers, making layer slightly thicker around outer edges of dish to allow mousse to be more visible (center of mousse layer will be thin). Starting at outer edges of dish, place pear slices in single layer with curved edges against sides of dish atop mousse, covering completely. Repeat layering of ladyfingers, syrup, mousse, and pears 2 more times. Cover with fourth layer of ladyfingers (some ladyfingers and pear slices may be left over). Drizzle ladyfingers evenly with 5 tablespoons syrup. DO AHEAD: Can be made 1 day ahead. Cover and refrigerate trifle and remaining pear syrup separately.

    Using electric mixer, beat 2 cups whipping cream in large bowl until soft peaks form. Add 1/4 cup pear syrup and beat until stiff peaks form. Working in batches, transfer cream to large pastry bag fitted with large star tip. Pipe rosettes all over top of trifle, mounding slightly in center. Sprinkle with crystallized ginger. Garnish with chocolate curls. DO AHEAD: Can be made 6 hours ahead. Keep refrigerated.

    Sift powdered sugar over trifle just before serving.

    * Mascarpone is an Italian cream cheese; sold at many supermarkets and at Italian markets.

    ** Available in the bakery or bread section of some supermarkets and at specialty foods stores.

    TEST-KITCHEN TIP:
    To make chocolate curls, place one 3 1/2-ounce bar of high-quality white chocolate (such as Lindt or Perugina) on a plate and microwave on high at 5-second intervals just until slightly softened, but not hot or beginning to melt. Using vegetable peeler and starting at one long edge of the chocolate bar, shave white chocolate into curls. If the shaved chocolate breaks into small shards, it's not soft enough, so place in microwave again for a few seconds. If the chocolate becomes too soft, let it stand at room temperature or chill briefly until it firms up a bit.

    Pin It
    • Digg
    • Del.icio.us
    • StumbleUpon
    • Reddit
    • RSS