RSS

I currently live in Charlotte, NC and after spending 7 years as a personal chef and caterer, I am now happy to share my love of cooking with friends and family. My heart is in the kitchen, but my soul is in the stars!

Showing posts with label bread. Show all posts

My Daily Bread


There is a great debate about the healthiness of grains in our diet. Some schools of thought believe our grain supply has been genetically modified to the point that grains are more harmful and no longer beneficial to our bodies. Others argue that whole grains are a good source of energy and fuel for our bodies and offer some health benefits in the form of reducing heart disease, risk of stroke, and controlling diabetes. Many people suffer from symptoms that require them to adhere to gluten-free diets, and there of those of us (me) who believe all things in moderation is key to maintaining a healthy balance to diet and life.
 
I'm a sucker for really good bread and there is no way I could completely cut it out of my diet, short of being required to because of allergies or sensitivities. Always tempted by the smell of artisan breads from the bakery section of my beloved Harris Teeter and Publix, the sample tray lures me in every single time.  But the problem that I have with those purchased artisan breads is that a) I can never eat all of it in one sitting (nor should I) and it never seems to be as good and fresh the next day, b) I think it's expensive to purchase if I'm not going to reap the full benefit of eating it all, and c) now that I'm focusing more on real food, I prefer to make my own bread and have control over what is in it.

This recipe from A Little Bit Crunchy A Little Bit Rock and Roll isn't an artisan style bread and it's 100% whole wheat (something I've never really cared for with store-bought breads before), but I can promise that it is good bread.  Really good bread. 

I've always struggled with making homemade bread, failing more often than not, but this bread was simple to make and I nailed the results on the first try.  The best part about the recipe - it makes two loaves!  One for now and one for later.  I froze my second loaf in a large Ziploc bag for a couple of weeks and it was just as fresh as the loaf I ate straight out of the oven. The bread was soft unlike many other whole wheat bread recipes I've tried (my last attempt could have been used as a wheel chock for a dump truck) and there was a deliciously slight taste of honey.  This will definitely now be my go-to recipe for bread. 

A Little Bit Crunchy A Little Bit Rock and Roll is a great blog to read - full of healthy real food recipes and a few indulgent ones too.  Head on over and check her out!


Soft 100% Whole Wheat Bread
from A Little Bit Crunch A Little Bit Rock and Roll

Printable Recipe

Ingredients:
4 1/2 teaspoons dry yeast
1/4 cup warm water (*105-115 degrees F)
1/4 cup vital wheat gluten (such as Bob's Red Mill)
1/4 cup ground flax seed
1 tablespoon Himalayan pink sea salt (or any salt)
1/4 cup oil (vegetable or grape seed)
1/2 cup raw honey + 1 tablespoon (or molasses or a combination of both)
2 1/2 cups warm water*
6-7 cups whole wheat flour

Directions:
1. In a small bowl, add 1/4 cup warm water, yeast, and 1 tablespoon honey. Stir together and allow the yeast to bloom for about 10 minutes. (The yeast will become active and puffy if it's alive.)
 
2. Meanwhile, in the bowl of your Kitchen Aid Mixer, add 6 cups of flour, vital wheat gluten, flax seed, and salt. With your dough hook attachment on, turn on the mixer to stir the ingredients together.
 
3. Add the bloomed yeast mixture and 2 1/2 cups warm water. Add oil and honey.  Turn on the mixer to #2 and allow the dough to knead for about 5 minutes. Gradually add in more flour, 1/4 cup at a time, until the kneaded dough just begins to pull away from the side of the bowl.

4. Grease a large mixing bowl. With wet hands, scrape the dough into the greased mixing bowl. Lightly grease a piece of plastic wrap and cover the bowl. Put the dough in a warm place for about an hour. (Until it has doubled in size.)
 
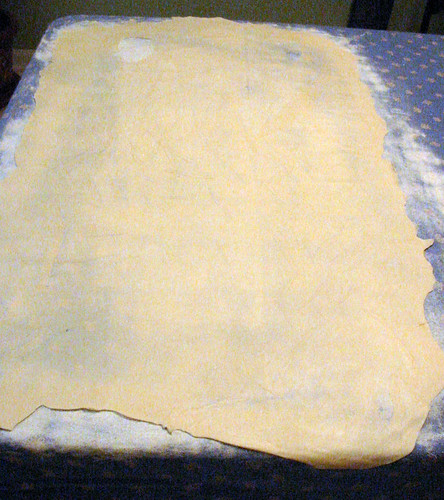
5. On a lightly floured counter, turn out your dough and give it a quick knead. Divide the dough into two equal pieces. Lightly roll out one of the pieces until it is about 12-14 inches long.  Roll up the dough and place seam side down in a greased loaf pan. Repeat with the second piece of dough. Cover both pans with a piece of greased plastic wrap. This step may seem unnecessary, but this is what will give your bread a nice swirl pattern on the inside.

6. Place the loaves in a warm place so they can rise for a second time. Let rise for about 30 minutes. Preheat oven at 350 degrees F and let dough continue to rise for another 20 minutes while the oven preheats.

7. After the oven is preheated, remove the plastic wrap and bake for about 40 minutes.

Pin It
  • Digg
  • Del.icio.us
  • StumbleUpon
  • Reddit
  • RSS

Who's The Cheesiest?


Just in time to try and capture the Super Bowl crowd, Domino's Pizza is advertising their Stuffed Cheesy Bread and how great it is. Their claim is that they sampled cheese bread from all the other competing pizza joints and then made theirs even cheesier.

I've got news for you Domino's....my bread is even more cheesier than the cheesiest bread you could ever dream of creating! With a whopping 1/2 pound of melted mozzarella and Havarti oozing out of this, who could argue??

This recipe hails from a 2008 issue of Gourmet magazine and claims to be a close replica of a traditional bread from the Republic of Georgia (the country, not the state) called khachapuri. The combination of Havarti and mozzarella is similar to the salted cow's milk cheese called sulguni used in the Georgian version of the bread. Of course we Americans are notorious for putting our own "traditional" spin on things and serving this warm, cheesy goodness with marinara sauce or a garlicky butter sauce would no doubt make this an over-the-top Super Bowl game snack.

This bread is best right out of the oven but the dough can be made the day before and left to rise slowly in the refrigerator, so you can have a batch of this ready to bake just before kick off or during half-time if you want to avoid another display of total narcissism.


Georgian Cheese Bread
Serves 8

2 1/4 teaspoons active dry yeast (a 1/4-ounce package)
7 tablespoons warm water (105-115°F)
1 2/3 cups unbleached all-purpose flour, divided
3/4 teaspoon salt
1 large egg, lightly beaten
1/4 pound Havarti cheese, coarsely grated
1/4 pound salted mozzarella, coarsely grated
1 teaspoon unsalted butter, melted

Sprinkle yeast over warm water and stir in 1 tablespoon flour. Let stand until creamy, about 5 minutes. (If yeast does not activate, start over with new yeast.)

Stir together salt and remaining flour in a large bowl, then stir in egg and yeast mixture to form a dough.

Turn out dough onto a well-floured surface and turn to coat with flour, then knead until smooth and elastic, about 5 minutes. Form into a ball and dust with flour. Let dough rest in a bowl, covered with plastic wrap, punching down with a wet fist every hour, at least 2 hours and up to 3.

Preheat oven to 500°F with rack in middle.

Turn out dough onto floured pizza pan, turning to coat, then flatten with your fingers into a 7-inch disk.

Toss together cheeses and press into a compact 3-inch ball with your hands. Place ball in middle of dough, then gather dough up around ball of cheese, squeezing excess dough into a topknot. Press down on topknot with a damp fist to press cheese out from center. Continue to flatten dough and distribute cheese evenly, pressing outward from center, until dough is an 11-inch disk.

Cut a 6-inch X through top of dough to expose cheese. Bake until pale golden, 10 to 12 minutes. Brush surface of dough with butter and bake until golden and cooked through, 3 to 5 minutes more.

Cooks' note: • Dough can be made 1 day ahead and chilled in bowl (for a slow rise), covered with plastic wrap. Punch down and bring to room temperature before proceeding with recipe.

Pin It
  • Digg
  • Del.icio.us
  • StumbleUpon
  • Reddit
  • RSS

Art Smith's Goat Cheese Biscuits Reinvented


Goat cheese excites me. 

It excites me to the point that if I see something on a restaurant menu that contains the creamy, silky, tart goodness, I look no further and order that item.  It doesn't matter if it's the first of 100 items to chose from ~ it's going on my plate.  Undoubtedly, some variety of the cheese ends up in my grocery cart each week regardless if it's priced at $50/lb.  A recipe containing goat cheese?  It's going to the top of my "To Do" list.

Crazy I know, to get so excited about cheese.

When I found a recipe for Art Smith's (who was Oprah's personal chef for awhile) Goat Cheese Drop Biscuits that are served in his Table Fifty-Two Chicago restaurant I was, well.....very excited. The combination of made-from-scratch buttermilk biscuits and goat cheese was enough to send me to the moon. But as with anything we put upon a pedestal and worship, it is bound to fail at some point.

I expected these biscuits to be oozing with warm goat cheese when I tore into them. I expected to teeter on the edge of goat cheese heaven but I was sorely disappointed when I made them per Art's recipe. It was a biscuit and nothing more.  Not the least bit exciting. 

Most times I don't give a recipe a second chance ~ I am of the opinion that there are too many recipes to try and too little time.  But I couldn't give up on my beloved goat cheese.  I revamped the recipe with some add-ins and while the goat cheese still was not very prominent, the biscuits had much more flavor and became something that I would certainly make again.  They were best right out of the oven, sliced open with a pat of softened butter smooshed right in the middle. 

Goat Cheese Drop Biscuits
Inspired by Chef Art Smith
Makes 12-14 biscuits

2 cups self-rising flour
2 tsp. baking powder
1/2 tsp. baking soda
1 tsp. salt
2 ounces cold butter
4 ounces goat cheese
3 strips bacon, cooked and finally chopped (or prosciutto)
3 Tbsp. chopped fresh parsley (or chives)
1 cup buttermilk
extra butter to grease pan and top biscuits
1/4 cup grated Parmesan cheese

Preheat oven to 400. Place one 10" cast iron pan into the oven while it is preheating. Place flour, salt, baking soda and baking powder into a medium-sized bowl. Cut in the butter and goat cheese. Add bacon (or prosciutto) and parsley (or chives).  Make a well in the middle of the ingredients and pour in the milk. Stir until mix is moistened, adding an extra tablespoon of milk if needed.

Remove the hot skillet from the oven and place a tablespoon of butter into it. When the butter has melted, drop 1/4 cupsful of batter into the pan (use a muffin scoop to drop the batter if you have one).  Bake for 12-14 minutes until browned on the top and bottom. Remove from oven, brush the tops of the biscuits with melted butter and sprinkle with the grated cheese. Return to the oven for about a minute to give the cheese a chance to melt.  Enjoy warm!

Pin It
  • Digg
  • Del.icio.us
  • StumbleUpon
  • Reddit
  • RSS

Stuffing or Dressing? What's The Difference?


The battle between "stuffing" and "dressing" has waged for years.  What is the difference anyway?  Some say "stuffing" is prepared and cooked inside the turkey while "dressing" is baked separately and served alongside the bird.  Michele Kayal does an excellent job of outlining the differences in this article for Associated Press and it all appears to boil down to being a regional thing.  Where I come from, it's referred to as "dressing."

Call it what you will, but this recipe for Sausage, Apple and Cranberry Dressing is and excellent accoutrement to your Thanksgiving turkey.  It's also great any other time of year served with pork chops or pork roast and gravy.


Sausage, Apple and Cranberry Dressing

1 lb. turkey sausage (breakfast flavor)
1-1/2 cups onion, diced
1 cup celery, diced
3 tsp. fresh sage, minced
1-1/2 tsp. fresh rosemary, minced
1/2 tsp. dried thyme
2 Golden Delicious apples, cored and chopped
3/4 cup dried cranberries
1/3 cup fresh parsley, minced
1 cup turkey or chicken broth
1/4 butter, melted
6 cups homemade bread cubes, toasted*

*Make homemade bread cubes from your favorite sandwich bread. Stack bread 6 slices high on a cutting board. Using a bread knife, saw all the way through the stack, making 1/2 inch strips of bread. Turn bread and cut strips into 1/2 inch cubes. Toast cubes on a baking sheet at 350 degrees for about 10-15 minutes.

In a large non-stick skillet, cook the sausage and onions together. Break the sausage into small pieces using a spatula. Cook until onions are cooked through. Add celery, apples, sage, rosemary and thyme. Cook for 2 minutes.

In a large bowl, combine the bread cubes and dried cranberries. Add the fresh parsley and toss well. Add meat mixture and butter and toss well. Spread the mixture into a 9x13 baking dish and pour broth over stuffing. Bake uncovered at 350 degrees for 30 minutes. Stuffing can be prepared up to the point of baking the night before. Add 15 minutes to baking time if baking from a refrigerated state (I also wait to pour the broth over just prior to baking.)

Pin It
  • Digg
  • Del.icio.us
  • StumbleUpon
  • Reddit
  • RSS

A Bun In The Oven


Thanks to the power of persuasive Harris Teeter advertising, I was thoroughly convinced that I needed two 16 ounce containers of cottage cheese in my grocery cart last week. Not only was I convinced that I needed them, but convinced that I wanted them.  That's 32 ounces. Two pounds. Of cottage cheese.  At such a bargain, who cares that it was more cottage cheese than I have ever or will ever eat in my entire life.  I was crazy to pass it up.  

Then I was even crazier trying to figure out what to do with it all.  Sure, I could load it up with some black pepper and eat it with fruit for breakfast, but remember we're talking bulk quantities here.  I have my limits.  After I used part of it in lasagna, I took to the internet for ideas.  I had a really hard time deciding between this recipe for homemade bread and the suggestion that I found of mixing the cottage cheese with mashed up bananas and raisins.  I can assure you that suggestion goes well beyond my limits.

I put all the ingredients into my bread machine, started the dough cycle and let it do it's thing because I'm lazy like that when it comes to making bread.  I only use the machine on the dough cycle because I prefer to shape my dough differently or bake in a "regular" loaf pan.  The square chunk of bread that comes out when you bake in the machine is just not my thing, and I think it turns out too dense anyway.  When the machine finished, I kneaded the dough just a bit with some extra flour (I initially used only 3-1/2 cups of flour like the recipe suggested, but really needed more like 4 cups because it was way too sticky to deal with) and let it rise in a loaf pan until doubled in size.  Baked at 350 for about 20 minutes or so, the bread was an excellent use of cottage cheese and you'd never even know it was in there!  This might be a sneaky way to get some protein and calcium into the kiddies, unbeknownst to them.  I'm thinking you could use this as a basic recipe and customize the dough to your liking with herbs, poppy seeds, sesame seeds or whatever your heart desires. 

The loaf was best when eaten within 2 days of being baked and I enjoyed it toasted with a smear of butter and homemade plum jam for breakfast in the mornings.


Cottage Cheese Bread

Ingredients:

1/2 cup water
1 cup cottage cheese
2 tablespoons butter, melted
1 egg
1 tablespoon white sugar
1/4 teaspoon baking soda
1 teaspoon salt
3 1/2 cups bread flour
2 1/2 teaspoons active dry yeast (1 package)

Directions:

Add the ingredients to your bread machine in the order suggested by the manufacturer, and start. You can use up to 1/2 cup more bread flour if the dough seems too sticky.

If you're only using the dough cycle, after the machine has finished place dough in a greased loaf pan; cover and allow to rise in a warm place until doubled in size.  Bake 350 for about 20 - 30 minutes. 

Pin It
  • Digg
  • Del.icio.us
  • StumbleUpon
  • Reddit
  • RSS

Great Day In The Morning ~ Breakfast Part I


Being relegated to just a microwave and/or toaster in the office kitchenette makes it really hard for us Monday-through-Friday-desk-jockeys to keep breakfast healthy. Sure, it's easy to pick up fast food on the way to the office or keep a stash of Poptarts and bagels in the desk drawer, but do you really want to eat something loaded with enough preservatives to make you glow in the dark?

If you crave breakfast worthy of weekend-breakfast-in-bed status, you can be the envy of the office during morning break with a little pre-planning and preparation at home. I've scoured the internet for quick and easy make-ahead breakfast recipes that store well in the freezer ~ would you believe me if I told you that I currently have 12 weeks of breakfast meals already made and stored in the office freezer?! Here's how you can do the same....

On your next shopping trip, pick up a box of your favorite waffle mix and dust off your long forgotten waffle maker. Prepare the entire box of mix per the directions on the box and bake just until the waffles are lightly golden brown ~ not as dark as you would bake them if you were eating them right away. Cool the waffles completely and store in zippie bags in the office freezer. Take one out and pop it into the toaster and Voila! you have breakfast. I have waffles on Mondays because they don't need time to thaw whereas the other recipes that I'll share in this three-part series do. I pull out a selection of items from the freezer for the rest of the week and store them in an air-tight container in the fridge. Don't forget this easy recipe for yet another weekday option.

These savory muffins are dense and hearty and excellent slathered with butter and served with fresh fruit. Enjoy your breakfast and stay tuned for links to the next round of recipes!

Savory Breakfast Muffins

2 cup(s) whole-wheat flour
1 cup(s) all-purpose flour
1 tablespoon(s) baking powder
1/2 teaspoon(s) baking soda
1/2 teaspoon(s) freshly ground pepper
1/4 teaspoon(s) salt
2 eggs
1 1/3 cup(s) buttermilk
3 tablespoon(s) extra-virgin olive oil
2 tablespoon(s) butter, melted
1 cup(s) thinly sliced scallions (about 1 bunch)
3/4 cup(s) diced ham or cooked bacon (3 ounces)
1/2 cup(s) grated Cheddar cheese
1/2 cup(s) finely diced red bell pepper

Preheat oven to 400°F. Coat 12 muffin cups with cooking spray.

Combine whole-wheat flour, all-purpose flour, baking powder, baking soda, pepper and salt in a large bowl.

Whisk eggs, buttermilk, oil and butter in a medium bowl. Fold in scallions, bacon, cheese and bell pepper. Make a well in the center of the dry ingredients. Add the wet ingredients and mix with a rubber spatula until just moistened. Scoop the batter into the prepared pan (the cups will be very full).

Bake the muffins until the tops are golden brown, 20 to 22 minutes. Let cool in the pan for 5 minutes. Loosen the edges and turn the muffins out onto a wire rack to cool completely. Store in zippie bags or air-tight containers in the freezer.  Thaw overnight in the refrigerator and heat in microwave prior to serving.

Pin It
  • Digg
  • Del.icio.us
  • StumbleUpon
  • Reddit
  • RSS

Recycling


The idea of turning something old into something new is not a concept resigned only to cans, bottles, newspapers and old tires. It also applies to food, except I like to consider that as the Art of Recreation. Who hasn't taken that last piece of grilled chicken and diced it up for chicken salad or used the leftover rice side dish from yesterday's dinner and turned it into a delicious stir fry entree for tomorrow's meal?

My freezer seems to be the catch-all place for food that needs to be recreated and only when I clear out some space can I indulge in buying more new goodies. Recent inventory figures showed it was time to recycle some bread (you know, those last few slices of bread that never get eaten and invariably lay on the counter until they're hard as a rock), so the stale slices were reborn as Bread Pudding with Port Wine Soaked Cranberries and Blueberries inspired by an Emeril Lagasse recipe.

Perfect for a weekend brunch or served as a dessert...Enjoy!


Bread Pudding with Port Wine Soaked Cranberries and Blueberries
inspired by Emeril Lagasse

1 teaspoon unsalted butter
4 large eggs
1 cup firmly packed light brown sugar
1/2 teaspoon ground cinnamon
1/8 teaspoon ground nutmeg
1 teaspoon pure vanilla extract
2 cups Berry Compote (see recipe below)
1 cup pecan pieces, toasted and rough chopped
2 cups milk
8 slices day-old bread (white or sourdough or combination of both), crusts removed and cut into 1/2 inch cubes (about 4 cups)
Fresh whipped cream, for serving

Berry Compote:
1/4 pound fresh cranberries
1/4 pound fresh blueberries
1 tablespoon grated orange zest
1 teaspoon grated lemon zest
1/4 cup fresh orange juice
3 tablespoons fresh lemon juice
1/2 cup granulated sugar
1 teaspoon pure vanilla extract
1/2 cup water
1-1/2 cups Port wine
3 tablespoons cornstarch

Preheat the oven to 350 degrees F.

Grease a 9x13 baking pan with butter.

Whisk together eggs, sugar, cinnamon, nutmeg, vanilla and berry compote until very smooth. Stir in milk, bread and pecans. Let the mixture sit for 30 minutes, stirring occasionally.

Pour the mixture into the prepared pan. Bake until the pudding is set in the center, about 55 minutes. Let cool for 5 minutes.

To serve, cut the pudding into squares and top with fresh whipped cream.

For the Berry Compote:

Put the cranberries, orange and lemon zest, orange and lemon juice, sugar, vanilla, and Port wine in a medium-size nonreactive saucepan over medium-high heat. Bring to a boil and cook for 8 minutes. Dissolve the cornstarch in the 1/2 cup of water and add to the pan along with the blueberries. Reduce the heat to medium, then stir constantly until the mixture thickens, about 2 minutes. Remove from the heat and cool completely. Yield: 2 cups

Pin It
  • Digg
  • Del.icio.us
  • StumbleUpon
  • Reddit
  • RSS

Helmut Who?

Twice a year I allow myself a delicious indulgence (okay, so I indulge ALOT during a year's time, but for the sake of this post we'll stick to only one of my indulgences and keep it food related, okay?)

The Queen City hosts the Southern Spring Show and the Southern Christmas Show in March and December and I am usually in attendance at one or both shows for one purpose only.....

Helmut's Strudels.

The food vendors are always set up at the far reaches of the show...all the way in the third building but I can smell them as soon as I hit the door of the first building....the wafting aroma of freshly baked strudels with their golden brown flaky crust covered with a sensual dusting of powdered sugar. Your choice of peach, apple, or cherry. I think there are a few savory offerings as well but I bypass those. Helmut knows my weakness is cherry.

When the advertisements for the show start playing on the radio, I immediately formulate a mental vision of Helmut's taut German muscles clad in a crisp, stark white baker's uniform lovingly shaping my cherry strudel with his manly hands and lightly dusting it with powdered sugar as it comes out of the oven steaming hot. If my family is visiting at the time, they usually buy several strudels to take home and give as gifts. I, being the selfish person that I am, buy several strudels and eat them all myself. What can I say? I look forward to my twice-a-year love affair with Helmut and I intend to gorge myself with all the fresh from the oven lovin' that I can stand.

But Helmut, honey...I hate to tell you that our affair has to end. I've found someone else. Oh, sweetie, don't be upset. It's not you. It's me. Really. I can take all the blame for this break up because the May Daring Bakers’ challenge was hosted by Linda of make life sweeter! and Courtney of Coco Cooks. They chose Apple Strudel from the recipe book Kaffeehaus: Exquisite Desserts from the Classic Cafés of Vienna, Budapest and Prague by Rick Rodgers. These lovely ladies gave us free reign with our choice of strudel filling and after just one try at the strudel making process, I've kicked Helmut to the curb and added yet another "keeper" recipe to my file.

The real challenge of this recipe is taking a dough ball the size of the palm of your hand and shaping it into a 3'x2' sheet. Believe it or not, it's easier than it seems because the dough is very forgiving. My baking constituents confirmed that holes in the dough sheet were okay and while many of them had dough similar to Swiss cheese, I ended up with only 2 holes!
A quick tour of the freezer and pantry confirmed that I would be filling my strudel with orange infused cranberries left over from this recipe, Granny Smith apples, crystallized ginger, Chinese five spice powder and walnuts. Helmut, honey, you never stood a chance with this winning combination! This strudel wound up being about as long as my arm and I could have seriously eaten it all the way up to my elbow. It was seriously that good!

Thank you Courtney and Linda (make sure you head to their sites if you are interested in seeing the recipe as written) for broadening my horizons and showing me that Helmut isn't the only strudel in town!


Strudel Dough from “Kaffeehaus – Exquisite Desserts from the Classic Cafés of Vienna, Budapest and Prague” by Rick Rodgers

1-1/3 cups unbleached flour
1/8 teaspoon salt
7 tablespoons water, plus more if needed
2 tablespoons vegetable oil, plus additional for coating the dough
1/2 teaspoon cider vinegar

Alison's Filling:

1/2 cup butter, melted & divided
1-1/2 cup fresh bread crumbs
1 cups granulated sugar
1/2 cup water
1 vanilla bean, split and seeds scraped
1 large navel oranges
12 ounces fresh or frozen cranberries
1 large Granny Smith apple, peeled & cored & sliced into half moon rounds
1/2 cup coarsely chopped walnuts
1/4 cup finely chopped crystallized ginger
1/4 teaspoon Chinese Five Spice powder
1/3 cup granulated sugar

For the dough:
1. Combine the flour and salt in a stand-mixer fitted with the paddle attachment. Mix the water, oil and vinegar in a measuring cup. Add the water/oil mixture to the flour with the mixer on low speed. You will get a soft dough. Make sure it is not too dry, add a little more water if necessary. Take the dough out of the mixer. Change to the dough hook. Put the dough ball back in the mixer. Let the dough knead on medium until you get a soft dough ball with a somewhat rough surface.

2. Take the dough out of the mixer and continue kneading by hand on an unfloured work surface. Knead for about 2 minutes. Pick up the dough and throw it down hard onto your working surface occasionally. Shape the dough into a ball and transfer it to a plate. Oil the top of the dough ball lightly. Cover the ball tightly with plastic wrap. Allow to stand for 30-90 minutes (longer is better).

3. It would be best if you have a work area that you can walk around on all sides like a 36 inch round table or a work surface of 23 x 38 inches. Cover your working area with table cloth, dust it with flour and rub it into the fabric. Put your dough ball in the middle and roll it out as much as you can. Pick the dough up by holding it by an edge. This way the weight of the dough and gravity can help stretching it as it hangs. Using the back of your hands to gently stretch and pull the dough. You can use your forearms to support it.

4. The dough will become too large to hold. Put it on your work surface. Leave the thicker edge of the dough to hang over the edge of the table. Place your hands underneath the dough and stretch and pull the dough thinner using the backs of your hands. Stretch and pull the dough until it's about 2 feet wide and 3 feet long, it will be tissue-thin by this time. Cut away the thick dough around the edges with scissors. The dough is now ready to be filled.

For the filling:

Heat 3 tablespoons of the butter in a large skillet over medium-high. Add the breadcrumbs and cook whilst stirring until golden and toasted. This will take about 3 minutes. Let it cool completely.

Meanwhile, in a large saucepan, combine the granulated sugar and water. Scrape the vanilla seeds onto a small plate and add the pod to the saucepan. Using a vegetable peeler, remove 2 long strips of zest from the orange and add them to the pan. Halve the orange and squeeze the juice into the saucepan. Bring to a simmer, stirring until the sugar is dissolved. Add the cranberries and cook over low heat just until the berries are softened but still intact, about 8 minutes. Let cool completely. Discard the vanilla bean and orange zest and refrigerate until chilled. Drain cranberries well in colander.

Put the rack in the upper third of the oven and preheat the oven to 400°F. Line a large baking sheet with baking paper (parchment paper). Spread about 3 tablespoons of the remaining melted butter over the dough using your hands (a bristle brush could tear the dough, you could use a special feather pastry brush instead of your hands). Sprinkle the buttered dough with the bread crumbs. Spread the walnuts about 3 inches from the short edge of the dough in a 6-inch-wide strip. Layer the apples over the walnuts and top with drained cranberries. Combine 1/3 cup sugar and Chinese five spice powder and sprinkle over fruit filling.

Fold the short end of the dough onto the filling. Lift the tablecloth at the short end of the dough so that the strudel rolls onto itself. Transfer the strudel to the prepared baking sheet by lifting it. Curve it into a horseshoe to fit. Tuck the ends under the strudel. Brush the top with the remaining melted butter.

Bake the strudel for about 30 minutes or until it is deep golden brown. Cool for at least 30 minutes before slicing. Use a serrated knife and serve either warm or at room temperature. It is best on the day it is baked.

Pin It
  • Digg
  • Del.icio.us
  • StumbleUpon
  • Reddit
  • RSS

Souper Bowl Weekend


It was painful to watch the Carolina Panthers get whipped like egg whites destined for meringue during the NFL playoffs against the Arizona Cardinals a few weeks ago. As loyal as I know I should be to my home team, I was torn that night between Jake Delhomme and Kurt Warner {I mean, seriously, could there be any two hunkier NFL quarterbacks?} so it's no surprise who I was cheering for during Super Bowl XLIII.

My week started out with no firm plans on what to do for Super Bowl weekend. I knew all of the sports bars would be loaded with screaming, smoking, drinking fans so I resigned myself to staying home and watching the game on my brand new 46" flat screen Samsung TV that I just indulged myself with. But as it seems to be lately, my social schedule is subject to change at a moments notice. My friend Mary called on Friday to invite me over. Standard Super Bowl party attendance rules applied....bring food and beer. So, with a cheeseball and my drink of choice in tow, I headed to Mary's late Sunday evening.

In order to make a whole celebratory weekend out of this who the heck would pay $3 million for 30 seconds event, I invited my friend J. over for dinner on Saturday. We were introduced by my realtor and J. has been super nice to me - dinners, movies, flowers, basketball games and I felt it was high time that I returned the favor. My offering to him wasn't nearly as fancy as the steak and lobster dinner he prepared for me all by himself a few weekends ago but my theory is to start simple and then there's no place to go but up. Since the weather has been sort of chilly, I felt a pot of simmering Santa Fe soup was just the thing. I paired it with Dorie Greenspans's Savory Corn and Pepper Muffins. These muffins were a recent feature on TWD and the perfect accompaniment to the soup because the combination of chili powder, cilantro, and jalapeno perfectly mimicked the zesty flavors of the soup. Visit Ezra Pound Cake blog for the recipe and decide which camp you're in when it comes to opinions on cornbread.

And speaking of meringues, do these pillowy clouds look good enough to eat or what? I love the way meringues look just before they go into the oven. I was a little extravagant with dessert, but isn't that the way it's supposed to be? While my photo isn't as pretty as the one that Food & Wine used to showcase these Cranberry and Orange Pavlovas, my dessert was just as tasty. The recipe as written makes 12 servings, but I made extra large meringue bases so we could share one dessert.

Super food, super friends, but so sorry you won't be going to Disney World Kurt :( Maybe a bowl of soup and dessert will make you feel better?


Santa Fe Soup

2 lbs. ground beef
1 onion, chopped
2 (.5 oz) pkgs. Hidden Valley Ranch dressing mix
2 (1-1/4 oz) pkgs. taco seasoning mix
1 ( 16 oz) can black beans, undrained
1 (16 oz) can kidney beans, undrained
1 (16 oz) can pinto beans, undrained
1 (16 oz) can Rotel tomatoes, undrained
1 (16 oz) can diced tomatoes, undrained
2 (16 oz) cans white corn, undrained
2 cups water
Garnish: sour cream, shredded Cheddar cheese, sliced green onions, cilantro

Cook meat and onion together until meat is browned and then drain. Stir ranch dressing mix and taco seasoning mix into meat. Add remaining ingredients with juices from all. Add water. Simmer for 2 hours (if mixture is too thick, add additional water.) Use garnishes if desired and serve with tortilla chips.
Makes 4 quarts.

~~~~~~~~~~~~~~~~~~~~~~~~~~~~~~~~~~~~~~~~~~~~~~~~~~~~~

Cranberry and Orange Pavlova
Food & Wine, December 2008

MERINGUE:
6 large egg whites, at room temperature
1 teaspoon cream of tartar
1/4 teaspoon salt
1 1/4 cups granulated sugar

TOPPING:
2 cups granulated sugar
1 cup water
1 vanilla bean, split and seeds scraped
2 large navel oranges
1 1/2 pounds cranberries (6 cups)
2 cups heavy cream
2 tablespoons confectioners’ sugar
Mint sprigs, for garnish

Make the meringues: Preheat the oven to 250°. Arrange racks in the lower and middle thirds of the oven. Line 2 large baking sheets with parchment paper.
In the bowl of a standing electric mixer fitted with the whisk, beat the egg whites, cream of tartar and salt at medium speed until soft peaks form. Increase the speed to medium-high and beat in the sugar, 2 tablespoons at a time, until the meringue is stiff and glossy, about 6 minutes.
Using a large spoon, dollop 6 mounds of meringue onto each baking sheet; spread the mounds into 5-inch squares and make an impression in the center of each. Bake the meringues for 1 hour and 45 minutes, until the outsides are firm but the insides are still slightly soft; shift the pans from top to bottom and front to back halfway through baking. Transfer the baking sheets to racks and let the meringues cool completely. (Alison's note: this time seemed sort of lengthy to me so I took mine out after an hour and I really think I should have taken them out after 45 minutes).

Meanwhile, make the topping: In a large saucepan, combine the granulated sugar and water. Scrape the vanilla seeds onto a small plate and add the pod to the saucepan. Using a vegetable peeler, remove 2 long strips of zest from one of the oranges and add them to the pan. Halve the orange and squeeze the juice into the saucepan. Bring to a simmer, stirring until the sugar is dissolved. Add the cranberries and cook over low heat just until the berries are softened but still intact, about 8 minutes. Let cool completely. Discard the vanilla bean and orange zest and refrigerate until chilled.
Finely grate the zest of the remaining orange and transfer it to a food processor. Using a sharp knife, peel the orange, removing all of the bitter white pith. Working over the food processor, cut in between the membranes to release the orange sections into the food processor. Pulse until chopped.
In a clean bowl, using clean beaters, whip the cream, confectioners’ sugar and vanilla seeds until firm. Add the chopped orange and its juice and beat just until combined.
Arrange the meringues on plates and spoon the orange whipped cream into each one. Using a slotted spoon, top with the cranberries. Drizzle with some of the juices, garnish with mint and serve right away.

Make Ahead
The cooked cranberries can be refrigerated overnight. The meringues can be made up to 8 hours ahead (on a dry day) and kept at room temperature

Pin It
  • Digg
  • Del.icio.us
  • StumbleUpon
  • Reddit
  • RSS

Someday Has Finally Come


Someday, when I'm rich, I'm going to travel the world.

Someday I will find my prince charming and live happily ever after.

Someday, when I grow up, I'm going to be a supermodel.

Someday, someday, someday....

Someday I will master the art of yeast bread.

Do you ever find yourself saying things like this? And then you find yourself waiting around for Someday to come but it never seemingly does. Is it possible that Someday never actually comes around on its own unless you take action and make it happen?

Recently, I found myself home alone with some time to kill and this very question burned in my mind. I've always said that someday I'd master the art of yeast bread. Sure, I've had good days and bad days when it comes to yeast bread but I've never really considered myself a Master Of Yeast. Maybe I never will be. But as I flipped through my dust-laden copy of The Complete Cooking Light Cookbook, I landed on page 95 and was enticed by the pictures - I've always been drawn to cookbooks with pretty pictures. I had all the ingredients on hand and so it was that Italian Spinach-Cheese Swirls became my project for the day. Little did I know that today would be my Someday, at least as far as yeast bread was concerned!

My dough came together really well and since the recipe said to let it rise in an 85 degree room, I decided to take it upstairs to my bonus room where it was exactly that temperature. We're kind of cheap when it comes to air conditioning the upstairs, so we only turn on the thermostat when we're up there. After 45 minutes of rising time, I was greeted by a gorgeous poofy bowl of elastic dough!

Rolled out and layered with spinach and Parmesan cheese....things were still looking good.

A quick flick of the kitchen scissors to showcase the fillings, one more round of rising time, and I knew I was going to hit it out of the park. By this time, I'm starting to think that the optimum 85 degree temperature was the secret ingredient. In the past, my yeast creations just sat on the kitchen counter where the temperature was probably 10 to 15 degrees less than what it should have been.


Oh, yeah. Look at me. I got it. Slice it up and butter it because I. Am. The. Queen. Seriously, though. This was an easy recipe to follow and another bonus point is that you are rewarded with two loaves and can freeze the second one and enjoy it later. I will definitely make this recipe again but I'll make one small change. Instead of using the minced garlic and oil, I plan to use some roasted garlic to kick up the garlic flavor just a bit. I don't think you can ever have too much garlic!


Italian Spinach-Cheese Swirls

3 Tbsp. olive oil
1 large garlic clove,minced
2 pkgs. dry yeast
1 tbsp sugar
2 cups warm water
5 1/4 cups bread flour
1 1/2 tsp salt
1 package frozen chopped spinach thawed and squeezed dry
1/2 cup grated fresh Parmesan cheese
1 tsp dried Italian seasonings
1 tbsp water

Combine oil and garlic in a small bowl. Microwave at HIGH 1 minute; set aside. And cool, Dissolve yeast and sugar in warm water; let stand 5 minutes.

Lightly spoon flour into dry measuring cups; level with a knife. Combine 3 cups flour and salt in a large bowl. Add garlic mixture and yeast mixture; stir until well blended. Add 2 cups flour, stirring until soft dough forms.

Turn dough out onto a floured surface. Knead until smooth and elastic (about 8 minutes); add enough of remaining flour, 1 tablespoon at a time, to prevent dough from sticking to hands (dough will feel tacky).

Place dough in a large bowl coated with cooking spray, running to coat top. Cover and let rise in a warm place (85º), free from drafts, 45 minutes or until doubled in size. (Press two fingers into dough. If indentation remains, the dough has risen enough.)

Punch dough down; cover and let rest 5 minutes. Divide in half. Working with one portion at a time (cover remaining dough to keep from drying), roll each portion into a 15 x 10-inch rectangle on a lightly floured surface Combine chopped spinach, Parmesan cheese, and Italian seasoning. Spread each portion of dough with half of spinach mixture, leaving a ½-inch border. Roll up each rectangle tightly, starting with a long edge, pressing to eliminate air pockets; pinch seam and ends to seal. Place rolls, seam side up, on opposite ends of a large baking sheet coated with cooking spray (you may want to use two separate baking sheets).

Working with one roll at a time, fold roll in half, placing one half directly on top of other half; pinch ends to seal. Using kitchen shears, cut through folded end of roll, cutting through roll to within 1 inch of opposite end. Twist cut halves of dough outward so filling faces up. Repeat procedure with remaining roll. Cover and let rise 30 minutes or until doubled in size.

Preheat oven to 350º. Combine egg white and 1 tablespoon of water. Uncover dough, and brush egg white mixture lightly over loaves. Bake at 350º for 27 minutes or until loaves are lightly browned and sound hollow when tapped. Remove loaves from pan, and cool in wire racks.

Pin It
  • Digg
  • Del.icio.us
  • StumbleUpon
  • Reddit
  • RSS

Cinna-madness

A little while ago, Lis from La Mia Cucina and a few of her blogger buddies hosted a cinnamon roll smack down between the ooey-gooey Cinnabon and the recipe that was chosen for one of the Daring Bakers monthly challenges. Sadly, my hectic work schedule and chaotic personal life prevent me from being one of the Daring Bakers but I dutifully read posts by some of my favorite bloggers each month. When I read about all those beautiful fresh-from-the-oven buns, memories of my first days as a caterer came rushing back.

One of my first pieces of business was providing continental box breakfasts for the flight crew in Captain Sturm's flight department. I had a fabulous recipe for cinnamon rolls and it would thrill me when the crew ordered boxes for themselves and a few passengers because the recipe would make a dozen rolls so that meant that I could feast on leftovers for the next few mornings! I was so proud of those breakfasts, all nice and pretty with a fresh fruit cup, yogurt and homemade granola, a spork package complete with wet nap, and a huge ooey-gooey cinnamon roll taking center stage in the box. I was a proud caterer!

Until.......

Sadly.......

Captain Sturm brought home the bad news.....

The other pilots didn't want the cinnamon rolls because they were fattening. WTF??? Men worried about fattening??? Give me a break! So that was the end of my lovely box breakfasts. Oh, sure, I still make them for the crew but somehow that low fat muffin pales in comparison to my beautiful buns.

I made the rolls a few other times for another client but she developed health problems and had to abstain from my ooey-gooey buns (okay, so maybe the pilots knew something I didn't and wanted to be pro-active against health problems associated with eating too many cinnamon rolls, I dunno....) and soon, sadly, the cinna-madness was over. It has probably been 2 years since I last made them.

Until.......

One glorious day last week when a friend of said client with health problems waltzed into my store and asked for a special order of cinnamon rolls. He said he'd heard they were the best. I baked the rolls and man, oh, man did they smell good! My entire staff oooohed and aaaahed over them all afternoon. And I'll admit, they tugged at my heart strings a bit too and caused me to wax nostalgia about the good ole days.

The next day I whipped up another batch just for myself and the staff to enjoy over the weekend. And don't you know, said friend from said client waltzed into my store again yesterday and wanted not one, but two more dozen of the beauties! And so cinna-madness has returned!!

But folks, lean close 'cause I'm gonna be completely and utterly honest with you. First, I'm a cheater when it comes to making the rolls. And too, I don't put cinnamon in them. SSSSSHHHHHHH! Don't you breathe a word!!! As far as cheating goes, can you blame me? My rolls turn out much, much better when using the dough cycle on my bread machine. I gave up trying to pretend that I could conquer the yeast beast. I can admit when I've been beaten. So, the recipe as posted below is for those of you who are cheaters as well. And for those of you I-don't-need-no-bread-machine snobs, well, just have right at it the old fashioned way! And I know you're dying to know what in the tarnation I use in my rolls if it's not cinnamon..........

That would be Chinese Five Spice Powder.

Yep, that's my secret weapon. It imparts a "what exactly is that flavor?" taste and no one can quite figure it out. Drives 'em mad, I tell ya. Try it. You'll see.


Naked, fresh-from-the-oven yummyness.


* Exported from MasterCook *

CinnaMadness Rolls

Serving Size : 12
Categories : Breads, Rolls, Muffins Breakfast

Amount Measure Ingredient -- Preparation Method
-------- ------------ --------------------------------
Dough:
1 cup warm milk (110 degrees F/45 C)
2 each eggs, room temperature
1/3 cup butter, melted
4 1/2 cups bread flour minus 2 Tablespoons
1 teaspoon salt
1/2 cup white sugar
2 1/2 teaspoons bread machine yeast
Filling:
1 cup brown sugar, packed
2 tablespoons Chinese Five Spice Powder
1/3 cup butter, softened
Topping:
1 (3 ounce) package cream cheese, softened
1/4 cup butter, softened
1 1/2 cups confectioners' sugar
1/2 teaspoon vanilla extract
1/8 teaspoon salt

Place ingredients in the pan of the bread machine in the order recommended by the manufacturer. Select dough cycle; press Start.

After the dough has finished its cycle and doubled in size, turn it out onto a lightly floured surface, cover and let rest for 10 minutes. In a small bowl, combine brown sugar and Chinese Five Spice Powder.

Roll dough into a 16x21 inch rectangle. Spread dough with 1/3 cup butter and sprinkle evenly with brown sugar/five spice mixture. Roll up dough and cut into 12 rolls. Place rolls in a lightly greased 9x13 inch baking pan. Cover and let rise until nearly doubled, about 30 minutes.

Meanwhile, preheat oven to 375 degrees F (200 degrees C). Bake rolls in preheated oven until golden brown, about 15-20 minutes (check after 10 minutes and cover with foil if getting too brown).

While rolls are baking, beat together cream cheese, 1/4 cup butter, confectioners' sugar, vanilla extract and salt. Spread frosting on warm rolls before serving. Remove rolls from pan before completely cool or they will stick.

Pin It
  • Digg
  • Del.icio.us
  • StumbleUpon
  • Reddit
  • RSS