RSS

I currently live in Charlotte, NC and after spending 7 years as a personal chef and caterer, I am now happy to share my love of cooking with friends and family. My heart is in the kitchen, but my soul is in the stars!

Showing posts with label goat cheese. Show all posts

My Little Candied Kumquat


My weekly produce deliveries from Backyard Produce have allowed me to be a bit more daring than I normally would be on my regular visits.  I'm usually on a mission when I shop - to get in and get out quickly.  I have my list and try not to deviate (too much) from said list. 

A few weeks ago, I made the daring decision to include kumquats in my delivery from Backyard Produce - something I've always been curious about but have never purchased (and most likely wouldn't ever have.)  Kumquats resemble an orange in color and have a similar thick peel but are only about the size of the end of your thumb.  They are native to south Asia and the Asia-Pacific region but have been cultivated in North America for nearly 150 years now (and I'm just now brave enough to try them?!?)  The growing season ranges from January through June for those grown in California and November through mid-March for fruits harvested in Florida. 

I wasn't sure what to expect or do with the kumquats.  Do I peel them?  Are they sweet?  How exactly should I use them?  The answers to the first two questions are no and HECK NO! The skins aren't quite as thick as an orange peel and provide the only bit of sweetness amongst an otherwise extremely tart fruit.  For such a tiny thing, it packs a punch of zing - it took me a few minutes to come back to my senses after popping one into my mouth for taste-testing. 

Preliminary recipe research showed that most people enjoy them sliced and raw on a salad but they were a bit too sour for me to enjoy that way.  Others baked with them but quite frankly, I was too lazy to deseed them, so I opted to turn them into candied kumquats to enjoy spooned over the Hillsborough Farm goat cheese (also from Backyard Produce) and crackers.  I think it would make a fantastic topping for vanilla ice cream as well. 

Dare yourself to try something new by picking up a container of these little jewels on your next shopping trip and if you're interested in receiving fresh organic and natural produce delivered right to your door, check out Backyard Produce's website for how you can get started. 


Candied Kumquats

Printable Recipe

4 cups roughly chopped kumquats (about 1-1-1/2 lbs)
1 cup water
2 cups sugar

With a pairing knife, roughly chop the kumquats.  Discard any seeds that are easy to get too, but they're edible so don't worry if you don't get them all. 

Heat the water and sugar over high heat until boiling.  Reduce heat and simmer for 4 minutes.  Add the kumquats and simmer for 10 minutes.

Drain the kumquats through a sieve over a bowl.  Return the syrup to the pan and simmer for 5 minutes to reduce the syrup.  Combine the kumquats and 1/4 cup syrup together.

Serve or jar and refrigerate for up to 2 weeks. 

Pin It
  • Digg
  • Del.icio.us
  • StumbleUpon
  • Reddit
  • RSS

Are you meeting your quota?


Last week I announced my plan to move toward more real food and away from processed ingredients. Real food can be defined as a "product of nature more so than a product of industry." It is whole fruits and vegetables, whole grains, nuts and seeds. It is organic and humanely raised meats and wild-caught seafood.  Whole dairy products are also in this category. It is the way our predecessors ate before the rise of manufacturing, industry and government took over our food production. You can think of real food as something that comes from the ground or from a plant or tree or as something that has a mother.

Real food does not contain preservatives and ingredients that you cannot pronounce. It is not artificially colored, flavored or sweetened. It does not have the shelf-life of a millennium. Real food is not dispensed from a drive-thru window.

Most times when you make a decision to change, the first impulse is to discard everything that has to do with the old habit and make a complete and immediate 100% change in every aspect.  Quite frankly, this is nothing but a set up for failure.  Making a lifestyle change is something that takes time and should be a gradual change so that it is not so much of a shock to your system.  Kitchen Stewardship sums it up best by equating your real food journey to learning to read and write.  As a child you didn't just one day pick up a pencil or book and start to read and write.  You learned to recognize letters.  Learned what sound they made.  Learned how to write them.  Learned to put letters together to form words.  And before you knew it, you were reading and writing for the rest of your life!  Although we are far from being little kids now, the fundamentals are still the same:  take small steps and learn as you go.  I won't be immediately clearing out all processed food ingredients from my pantry and refrigerator and completely changing my diet right away - I plan to use up what I have and replace it with more suitable items as I progress. 

100 Days of Real Food has done an excellent job of taking the overall move to real food and breaking it down into smaller, easy to follow steps.  I'm currently working my way through the 14 weeks of mini-pledges.  The week 1 pledge asks that you incorporate at least two different fruits/vegetables with each meal.  I was always under the assumption that I ate alot of fresh fruits and veggies, but do I meet the quota of at least two per meal? No. This pledge made me mindful of doing so.  Lunch and dinner aren't so much of a problem for me, but breakfast is tough because I'm not a big fan of breakfast and a piece of raw fruit will sometimes upset my stomach. It is also hard to continuously think of healthy and easy things to eat when you are a desk-jockey limited to a toaster and a microwave. I do try to throw in a few extra pieces of fruit during the day as a snack, so I think it all balances out in the end. 

Fresh vegetables are so easy to incorporate into your meals - they can take mere seconds to prep and only minutes to cook.  I wanted to share a few of my favorites with you although there is no actual recipe for any of them.  I roast alot of my veggies and I could literally eat an entire pound of roasted asparagus myself.  Snap the tough woody ends from the stalks (about 1 or 2-inches from the bottom), wash and dry them well.  Arrange the stalks in a single layer on a baking sheet and drizzle them with olive oil  (1 to 2 teaspoons), sprinkle with salt and pepper.  Roast for about 8-10 minutes at 400 degrees.  Give the pan a good shake at least once to make sure the asparagus isn't sticking or getting too done in one spot.  Once it comes out of the oven, grate some fresh lemon zest over the top and if I'm feeling all fancy schmancy, I'll crumble some creamy tangy goat cheese on top.  Yum!


I use the same technique for cauliflower, broccoli and whole cloves of garlic except they need to roast just a little bit longer, maybe more like 12 to 15 minutes.  If you have some baby carrots, throw those in as well.  They are pretty much the same density and take about the same amount of time to roast.  When you put them into the serving bowl, make sure you get all of the olive oil from the baking pan as well.  I usually finish this off with a sprinkle of sea salt.
 

I love this medley of vegetables that I call "farmstand saute."  You can adapt it to use pretty much any combination of fresh veggies that you have on hand.  I usually have squash, zucchini, bell peppers, onions and cherry tomatoes.  Add about 2 teaspoons of olive oil in a non-stick skillet (sometimes I add just a bit of butter too) and bring to medium-high heat.  Add your veggies along with some salt and pepper and any seasonings that you'd like.  If you use dried herbs, you can add them now but if you use fresh ones, wait until the last minute or so of cooking.  I use either dried Italian seasoning or fresh dill that grows rampant in my yard and flower beds.  Saute for about 8 to 10 minutes or until the veggies are crisp-tender (if you are using cherry tomatoes, add them about when there's only about 5 minutes left to cook as you don't want to overcook them).  Now here's the best part....

During the last minute of cooking, add a splash of vinegar - my favorite is rice wine vinegar, but you can use any kind of flavored vinegar that you'd like.  It adds a bit of unexpected freshness to your veggies.  I get rave reviews every time I prepare it. 


See?  It's as easy as that to add real food to your diet.  Don't be afraid to try different techniques of preparing vegetables - roasting, sauteing, or steaming - as each method brings out different flavors in whatever you are cooking.  Go forth and experiment and have some real food!

Pin It
  • Digg
  • Del.icio.us
  • StumbleUpon
  • Reddit
  • RSS

12 Days of Cookies: Chocolate Goat Cheese Truffles


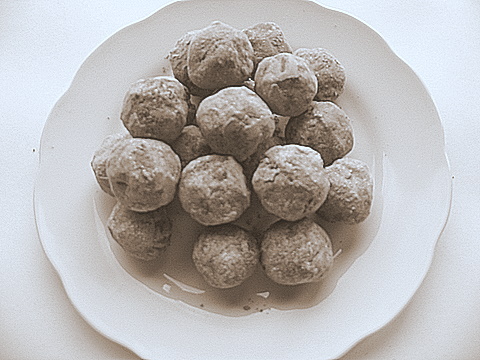
I wanted to include this tasty little treat in my "12 Days of Cookies" posts even though it's not a cookie.  I only hope that Santa shares in my love of all things goat cheese. This recipe came from Ali over at the now defunct blog called Something So Clever.  I couldn't find sweetened cocoa powder so I just sifted some powdered sugar and unsweetened cocoa together and it worked just fine.

Chocolate Goat Cheese Truffles

6 ounces bittersweet chocolate, chopped
6 ounces fresh (mild) goat cheese, at room temperature
1/4 cup confectioners' sugar
1/2 teaspoon vanilla extract
1/4 cup sweetened cocoa powder, sifted

In the top of a double boiler, or in a metal bowl set over a pot of simmering water (make sure the water does not touch the bowl), melt the chocolate, stirring until it is smooth. Set the melted chocolate aside to cool for a few minutes while you prepare the rest of the ingredients.

In a bowl whisk together the goat cheese, sugar, and vanilla until it is light and fluffy. Whisk in the melted chocolate until it is well combined. Chill, covered, until it is firm, at least 1 hour.

To form the truffles, take a heaping teaspoon of the chocolate/cheese mixture and lightly roll it into a ball with your hands. Roll the finished truffles in the sifted cocoa powder, set them onto a baking sheet lined with waxed paper, and chill until they are firm, about 30 minutes. The truffles can be stored in an airtight container in the refrigerator for up to 3 days.

Pin It
  • Digg
  • Del.icio.us
  • StumbleUpon
  • Reddit
  • RSS

Art Smith's Goat Cheese Biscuits Reinvented


Goat cheese excites me. 

It excites me to the point that if I see something on a restaurant menu that contains the creamy, silky, tart goodness, I look no further and order that item.  It doesn't matter if it's the first of 100 items to chose from ~ it's going on my plate.  Undoubtedly, some variety of the cheese ends up in my grocery cart each week regardless if it's priced at $50/lb.  A recipe containing goat cheese?  It's going to the top of my "To Do" list.

Crazy I know, to get so excited about cheese.

When I found a recipe for Art Smith's (who was Oprah's personal chef for awhile) Goat Cheese Drop Biscuits that are served in his Table Fifty-Two Chicago restaurant I was, well.....very excited. The combination of made-from-scratch buttermilk biscuits and goat cheese was enough to send me to the moon. But as with anything we put upon a pedestal and worship, it is bound to fail at some point.

I expected these biscuits to be oozing with warm goat cheese when I tore into them. I expected to teeter on the edge of goat cheese heaven but I was sorely disappointed when I made them per Art's recipe. It was a biscuit and nothing more.  Not the least bit exciting. 

Most times I don't give a recipe a second chance ~ I am of the opinion that there are too many recipes to try and too little time.  But I couldn't give up on my beloved goat cheese.  I revamped the recipe with some add-ins and while the goat cheese still was not very prominent, the biscuits had much more flavor and became something that I would certainly make again.  They were best right out of the oven, sliced open with a pat of softened butter smooshed right in the middle. 

Goat Cheese Drop Biscuits
Inspired by Chef Art Smith
Makes 12-14 biscuits

2 cups self-rising flour
2 tsp. baking powder
1/2 tsp. baking soda
1 tsp. salt
2 ounces cold butter
4 ounces goat cheese
3 strips bacon, cooked and finally chopped (or prosciutto)
3 Tbsp. chopped fresh parsley (or chives)
1 cup buttermilk
extra butter to grease pan and top biscuits
1/4 cup grated Parmesan cheese

Preheat oven to 400. Place one 10" cast iron pan into the oven while it is preheating. Place flour, salt, baking soda and baking powder into a medium-sized bowl. Cut in the butter and goat cheese. Add bacon (or prosciutto) and parsley (or chives).  Make a well in the middle of the ingredients and pour in the milk. Stir until mix is moistened, adding an extra tablespoon of milk if needed.

Remove the hot skillet from the oven and place a tablespoon of butter into it. When the butter has melted, drop 1/4 cupsful of batter into the pan (use a muffin scoop to drop the batter if you have one).  Bake for 12-14 minutes until browned on the top and bottom. Remove from oven, brush the tops of the biscuits with melted butter and sprinkle with the grated cheese. Return to the oven for about a minute to give the cheese a chance to melt.  Enjoy warm!

Pin It
  • Digg
  • Del.icio.us
  • StumbleUpon
  • Reddit
  • RSS

Two of my favorite things


Goat cheese and sweet cherries.

Combine them both in a leafy green salad dressed with a simple homemade vinaigrette and it's heaven on a plate!

With temperatures in the high 90's and even reaching 100 a few times, it's been too blazing hot here in the Carolinas to cook, let alone eat, so my meals have consisted mainly of salads or light snacks. Many thanks to a back issue of Bon Appetit magazine for giving me the idea to pair two of my most favorite things!

Enjoy and stay cool...oh, and even though the recipe says you can prepare the goat cheese ahead of time, don't. It only takes a few minutes and it's best when baked just before topping the salad. I do think the dressing tasted better prepared the day before.

Mesclun and Cherry Salad with Goat Cheese
June 2008 Bon Appetit
Serves 6

•2 tablespoons roasted almond oil or olive oil (I used toasted hazelnut oil)
•2 tablespoons finely chopped shallot
•2 tablespoons chopped fresh tarragon
•1 tablespoon fresh lemon juice
•3/4 teaspoon finely grated lemon peel
•3/4 cup sliced almonds (about 3 ounces)
•1 large egg
•1 tablespoon water
•1 11-ounce log soft fresh goat cheese, cut crosswise into 6 rounds
•6 cups (packed) mixed baby greens or baby spinach
•1 cup halved pitted fresh Bing cherries or other dark sweet cherries (about 7 ounces whole unpitted cherries)
•1/2 cup 2x1/4-inch strips fresh fennel bulb


•Preheat oven to 400°F. Whisk first 5 in small bowl. Season dressing generously with salt and pepper.
•Spread almonds on plate. Whisk egg and 1 tablespoon water in small bowl; sprinkle with freshly ground black pepper. Turn goat cheese rounds in egg mixture, then coat with sliced almonds, covering all sides. Place on rimmed baking sheet. DO AHEAD Dressing and goat cheese rounds can be made 4 hours ahead. Cover separately and chill. Bring dressing to room temperature and whisk before using.
•Bake goat cheese rounds until cheese is warm but not melted, about 10 minutes.
•Combine greens, cherries, and fennel in large bowl. Add dressing and toss to coat. Divide salad among 6 plates. Place 1 cheese round on each plate and serve.

Pin It
  • Digg
  • Del.icio.us
  • StumbleUpon
  • Reddit
  • RSS

Plum Crazy


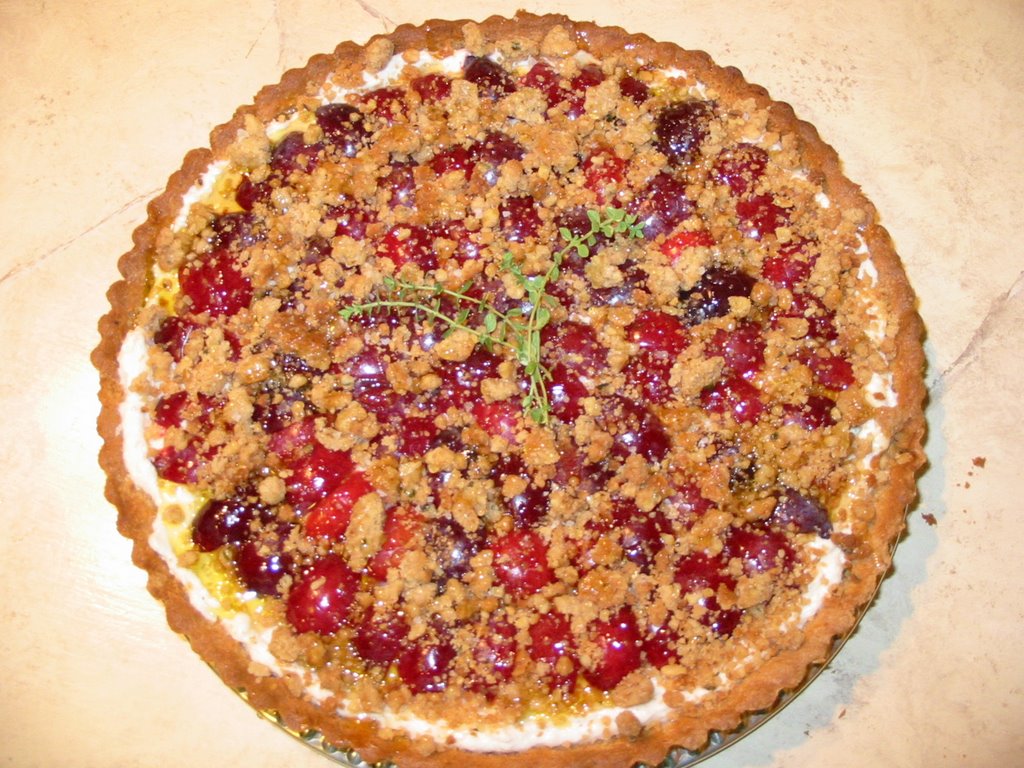
I promise this will be the last plum inspired post. I'm not sure who will be more glad of that - you, the reader, or me. I had just enough plums left over after my jam session for another kitchen project or two. One, of course being the purple ice cream (which still needs to be tasted - I will make it my priority to do so for my afternoon snack) and the rest of the plums will live a happy life as a beautiful Plum and Goat Cheese Tart. I had originally decided that I wanted to make something from the Once Upon A Tart cookbook, but since my fruit was so small I knew they wouldn't make a pretty dessert tart and what's the point of spending so much time on something that you know won't achieve all that it should be? I was surfing the internet looking for other plum inspired recipes and found this one. I knew in an instant that my plums were destined to become this. How did I know? It contained GOAT CHEESE!

My kitchen staff gets so tired of me harping about goat cheese. I love the stuff! Captain Sturm commented just the other day that I needed to have a goat farm because I eat so much of it. Lucky for me, he likes it too. I remember when I first started catering and was asked to quote a menu for a dinner party. I labored over which of my best recipes to pull together for a nice meal. I decided to give her a couple of options to choose from because I, myself, simply couldn't choose either. When I spoke with her about what she had decided on, she also assumed that I must own a goat farm because I had so many things on the menu featuring goat cheese. Okay, so maybe I'm a little too enthusiastic about that stuff. I love the tangy taste and the smooth, creamy texture. My favorite way to enjoy it is to dip in olive oil and then into seasoned bread crumbs. Heat in the oven just until it gets gooey and then put it on top of a mesculan green salad. YUM to the highest degree.

Usually when I look at a recipe and it has more than one or two steps or procedures involved, I bypass it. I guess sometimes I just don't trust my own abilities at tackling a "complicated" recipe. Well, that is going to change. I'm growing tired of Sandra Lee type recipes. Not that this one was complicated by any means, but it was time consuming. Don't think you're going to come home from work and whip this up right quick for dinner. From start to finish, it took about 4 hours and I didn't start on it until 4:30 so I had a very late dinner. That's okay because Captain Sturm is out of town for the rest of the week so I can eat on the couch at midnight in my pajamas if I want to.


PLUM TART WITH GOAT CHEESE AND WALNUT-THYME STREUSEL

Adding fleur de sel at the end transforms this tart into a delicious cross between a cheese course and dessert.

Crust
1 cup all purpose flour
1/2 cup powdered sugar
1/2 cup walnuts (about 2 ounces)
1/4 teaspoon coarse kosher salt
1 egg yolk
7 tablespoons chilled unsalted butter, cut into 1/2-inch cubes

Streusel
1 cup all purpose flour
2/3 cup walnuts (about 3 ounces)
1/3 cup (packed) golden brown sugar
1/3 cup sugar
1/2 teaspoon coarse kosher salt
1/4 teaspoon ground cinnamon
1/4 teaspoon ground nutmeg
1/4 teaspoon ground cardamom
1 teaspoon fresh thyme leaves
1/2 cup (1 stick) chilled unsalted butter, cut into 1/2-inch cubes

Filling and topping
8 ounces soft fresh goat cheese
8 ounces (1 cup) whole-milk ricotta cheese
3 tablespoons honey
3 tablespoons extra-virgin olive oil
1 tablespoon sugar
1/4 teaspoon ground nutmeg
1/8 teaspoon coarse kosher salt
Pinch of freshly ground black pepper
4 large plums (about 1 pound), halved, pitted, cut into 1/4-inch-thick wedges

Fleur de sel*

For crust:
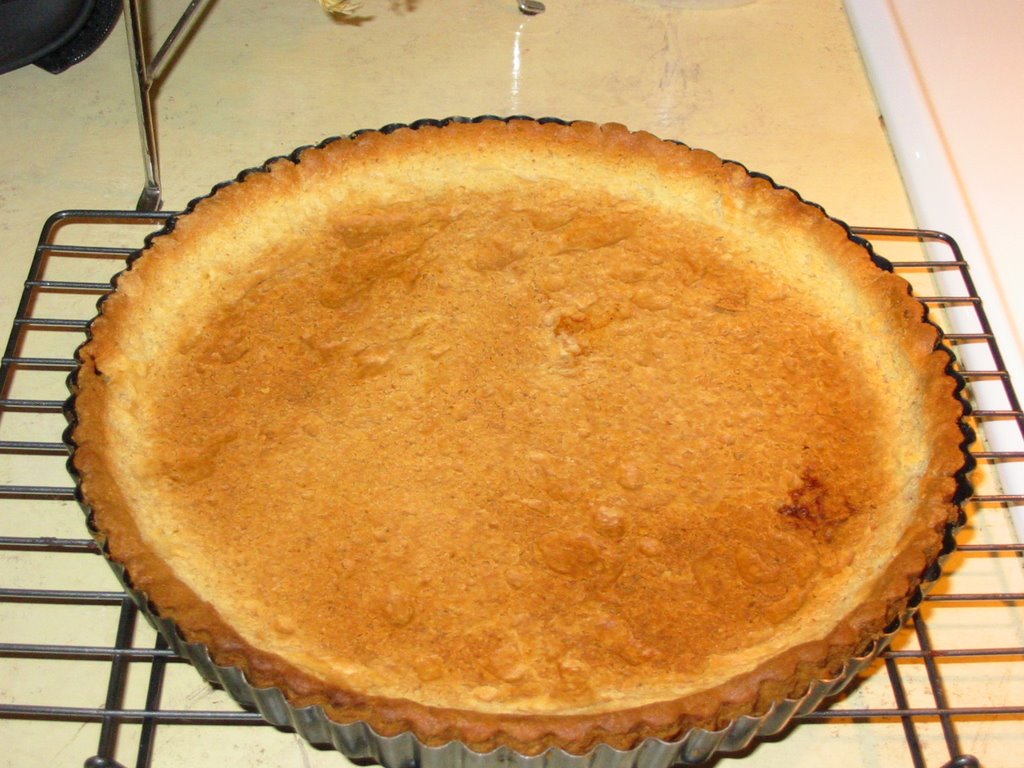
Blend first 4 ingredients in processor until nuts are finely ground. Add butter; blend until coarse meal forms. Add egg yolk; blend until moist clumps form. Press dough onto bottom and up sides of 9-inch-diameter tart pan with removable bottom. Cover; chill 1 hour.

For streusel:
Preheat oven to 350°F. Blend flour, walnuts, both sugars, coarse salt, cinnamon, nutmeg, and cardamom in processor until nuts are finely ground. Add thyme and blend 5 seconds. Transfer mixture to medium bowl. Add butter. Using fingertips, rub in until small moist clumps form.

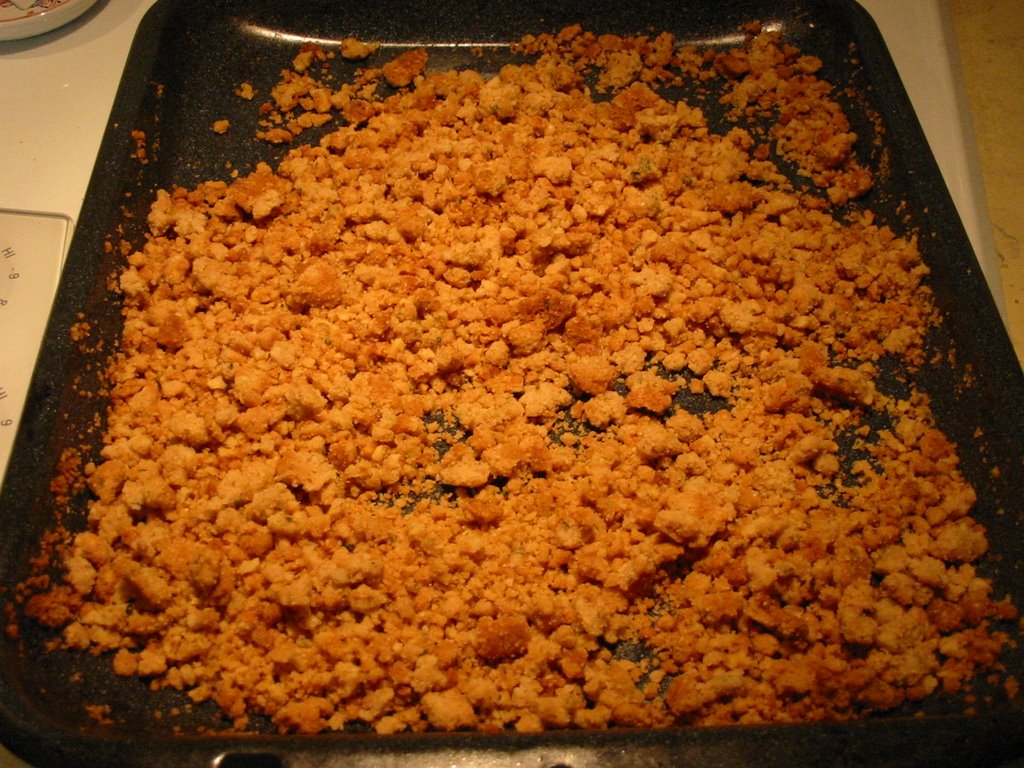
Spread streusel mixture on rimmed baking sheet. Bake 8 minutes. Stir, then continue baking until golden brown, about 7 minutes longer. Cool streusel completely (mixture will become crisp).

For filling and topping:
Combine both cheeses, 1 tablespoon honey, 1 tablespoon oil, sugar, nutmeg, coarse salt, and pepper in large bowl; stir to blend well. Refrigerate while baking crust.

Preheat oven to 350°F. Line crust with foil; fill with dried beans or pie weights. Bake crust until sides are set, about 15 minutes. Remove foil and beans. Continue to bake crust until golden brown, pressing with back of fork if crust bubbles, about 15 minutes longer. Cool crust completely.

Spread cheese filling in crust. Arrange plums in concentric circles atop filling, leaving 3/4-inch plain border. Sprinkle streusel lightly over tart. Refrigerate tart at least 1 hour and up to 4 hours.

Remove pan sides; place tart on platter. Drizzle with 2 tablespoons honey and 2 tablespoons oil; sprinkle with fleur de sel. Cut tart into wedges.

*Fleur de sel, a sea salt from Brittany, can be found at specialty foods stores.

Makes 8 servings.

Bon Appétit
September 2003

The crust came together very easily as did the streusel topping. I added 2 extra minutes to the streusel bake time. The topping made more than enough for this recipe so I put the rest of it in a zippy bag and will recycle it into another recipe. The streusel was a very tasty sweet & savory creation with the fresh thyme. I could also pick up the hint of the black pepper. I could have munched on it while my tart was finishing up.


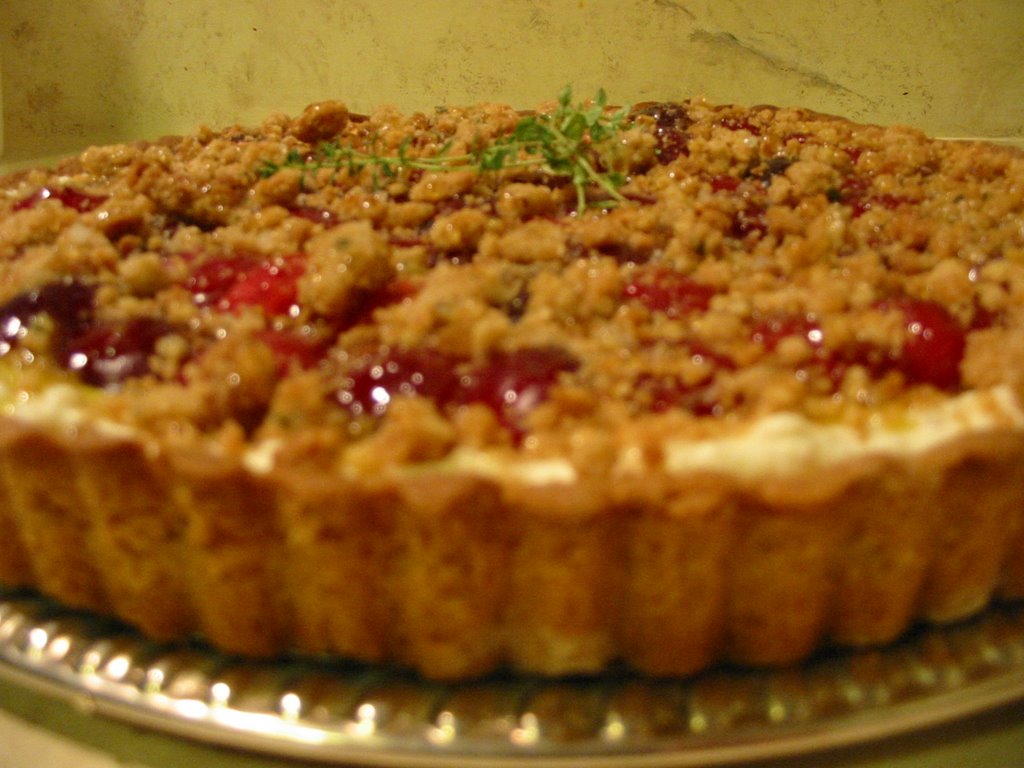
While my tart didn’t look like the photo posted with the recipe because of the type of plums that I was using, I’ll have to say it has to be one of the prettiest things I’ve ever made. I think this would be excellent served as a first course or even as a light lunch with a salad (bet you’ll never guess what I’m having for lunch?!). Skip the olive oil and fleur de sel and it would be equally as delicious as a dessert. But be sure to use a good quality olive oil when you do drizzle it over the top because it definitely adds a new dimension to the overall flavor. I tasted the tart after it cooled for an hour and while it tasted good, I enjoyed it much better the next day after the cheeses had time to meld together. The goat cheese was much more pronounced. This recipe will definitely find its way onto my catering menu. I just know there are other avid goat cheese lovers out there who will find as much pleasure in this as I did…. Enjoy!

Pin It
  • Digg
  • Del.icio.us
  • StumbleUpon
  • Reddit
  • RSS