RSS

I currently live in Charlotte, NC and after spending 7 years as a personal chef and caterer, I am now happy to share my love of cooking with friends and family. My heart is in the kitchen, but my soul is in the stars!

Too Hot For Words

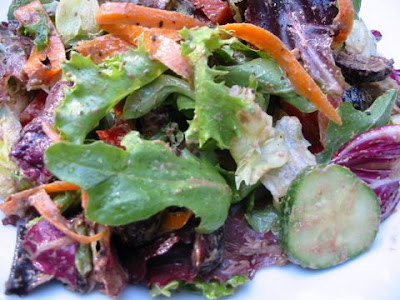
It's been extremely hot and humid here in the Natural State these last few days and today finally brought some much needed rain. Heat and humidity act as an appetite suppressor for me (and who wouldn't complain about losing a few pounds from lack of eating?!) so my meals have mainly consisted of salads, fruit, cheese and fresh veggies. I'm just as happy munching on a fruit and cheese platter or making a meal out of salad caprese and a glass of wine.

Finding a half used bag of dried figs in the pantry and a partial log of goat cheese in the fridge, I had the makings for this delicious salad dressing that was part of a Diane Mott Davidson novel called "Sticks and Scones" that I read some time ago. Davidson's novels revolve around a character named Goldie who owns a catering business in Colorado and winds up finding herself mixed up in murders, mysteries, and drama. If you enjoy light suspenseful reading, you should check her out.

This recipe calls for fresh figs and I've certainly used fresh ones in the recipe but this time I used the dried figs and only used about 2 ounces. Dried figs weigh less than fresh ones and if you use the full 4 ounces of dried, it becomes too heavy with figs. I quartered the dried ones and let them soak in the port for just a bit to reconstitute (add just a bit more port if your figs soak up any of it) and then proceeded with the recipe. I will admit, too, that I strain the figs out of the dressing because figs fall into my consistency issue problem.

Enjoy and stay cool!!

* Exported from MasterCook *

Figgy Salad

Recipe By :Diane Mott Davidson
Serving Size : 6
Categories : Salads/Salad Dressings

Amount Measure Ingredient -- Preparation Method
-------- ------------ --------------------------------
4 ounces figs
1/2 cup ruby port
1/4 teaspoon sugar
2 tablespoons hazelnuts
2 tablespoons balsamic vinegar
1 large shallot -- minced
2 ounces chevre cheese -- softened & sliced
1/4 cup olive oil
1/4 teaspoon salt
freshly ground black pepper -- to taste
8 cups field greens

Cut the stems off the figs, rinse and pat dry. Place them in a small saucepan with the port and sugar and bring to a simmer over medium heat. Cover the pan, lower the heat to the lowest setting and simmer gently for about 10 minutes, or until the figs are soft. Drain the figs, reserving the cooking liquid. Allow the figs to cool, then slice them into quarters and set aside.

Using a wide frying pan, toast the hazelnuts over medium heat, stirring frequently, until they emit a nutty smell, about 5-10 mins. Remove from the heat, and when they are cool, coarsely chop them.

Reheat the cooking liquid over low heat and stir in the vinegar, shallot, chevre, oil, and seasonings. Add the figs and raise the heat to medium low. Stir the dressing until the cheese is completely melted.

Toss with field greens and sprinkle nuts on top.

Source:
"Sticks & Scones"
- - - - - - - - - - - - - - - - - - -

Pin It
  • Digg
  • Del.icio.us
  • StumbleUpon
  • Reddit
  • RSS

Lurkers and Limes

Not long ago, a friend of mine visited Anna Marie Island and snapped a photo of a lime tree laden with juicy, shiny, ripe fruit. I ran across the photo one day while lurking admiring his personal website and it immediately made me think of key lime pie. I like to check out his site often simply because he is eye candy takes great photos and even though he lives 700 miles away, I commented on his lime photo and promised to make him a pie. What better time to try a recipe from my new Dorie Greenspan cookbook called Florida Pie.

Now I know that "Baking: From My Home To Yours" by Dorie has been all the rage for quite some time but I'm slow to catch on to new things. I'm probably the last person in the food blog world to own a copy of this book. But I really had to ask myself, "Self, do you really need another cookbook?" No sooner had I asked myself that question when I heard my mother's wise voice and wisdom echoing in my head..."Wanting and needing are two different things," she'd say when I was a kid and just had to have something. My mother is always right (or so she says) - I didn't need another cookbook. But I sure did want one!

And speaking of Dorie, I'm probably the only person in the blogworld who doesn't participate in Tuesday's with Dorie, a blog event that celebrates her recipes. I'd love to join, but it's a commitment in itself to participate and right now I just have too many irons in the fire - some of which I'm trying my best to extinguish. I do consider myself a loyal TWD lurker though.

Florida Pie takes key lime pie to a whole new outstanding level by adding shredded coconut and a cream of coconut mixture. Even though I claim to have the best recipe for key lime pie (and I can't believe that I haven't shared it with you already), I think Dorie's Florida Pie may just be my new favorite! I got a little carried away with letting my meringue brown in the oven, and since I always have graham cracker crumbs on hand, I just melted a little butter and combined it with the crumbs and pressed into a pie plate. Bake at 350 for about 7 or 8 minutes.

1 9-inch graham cracker crust
1 1/3 c heavy cream
1 1/2 c shredded sweetened coconut
4 large eggs, separated
1 14-oz can sweetened condensed milk
1/2 c lime juice
1/4 c sugar

1. Preheat oven to 350 degrees and put pie plate on a baking sheet
2. Put cream and 1 c coconut in a small saucepan and bring to a boil over medium-low heat, stirring almost constantly. Continue to cook until reduced by half and slightly thickened. Set aside to cool in a separate bowl.
3. Beat egg yolks on high until thick and pale. Beat in condensed milk and then half the lime juice on low speed. Add the rest of the lime juice and mix to combine.
4. Spread coconut cream into the graham cracker crust and then pour the lime mixture on top. Bake 12 minutes. Cool 15 minutes and then put in the freezer for at least 1 hour.
5. Put 4 egg whites and sugar in a saucepan and heat over medium low heat until the whites are hot to the touch. Transfer to a bowl and beat until the hold firm peaks. Fold in the last 1/2 c coconut.
6. Spread meringue over the pie and either run it under the broiler or use a kitchen blow torch to brown the top. Put the pie back in the freezer for at least 30 minutes to firm up.

Pin It
  • Digg
  • Del.icio.us
  • StumbleUpon
  • Reddit
  • RSS

Way Back When I Was A Kid....


It's not very often that I eat dinner at a restaurant and immediately feel compelled to run home and re-create something from my dining experience. In fact, I don't think that has ever happened, but they say there is a first time for everything. A few weeks ago, while I was visiting my family in Tennessee, we had dinner at a quaint little out-of-the-way bistro with an awesome menu. My dinner was great - shrimp with cheese grits - but it was the dessert that had me running back to my own kitchen to recreate.

Maybe it was because I was feeling nostalgic by being back in the town where I grew up, back to my roots.  Or maybe it was just because the slice of Orange Creamsicle cheesecake was so darn good. Either way, each luscious and creamy bite conjured up images of when I was a kid riding home from school on the bus that was driven by my grandfather.

After he finished driving his route, he would stop at the little gas station/convenience store close to his house and let me buy a treat. Sometimes it was a pack of Elvis Presley trading cards and sometimes it would be a Reese's Peanut Butter Cup but more often than not, it was a Creamsicle. Even knowing that my grandmother had a big dinner waiting for us as soon as we darkened the door, I was allowed to eat my treat right away (yeah, I was spoiled. Big deal. I turned out okay...well, sort of, but that's a whole different story).


As soon as I darkened my own door after devouring this sinful dessert, I searched the internet for a recipe and came upon this blog by someone named Charles French. Seems like Charles also has a fondness for Orange Creamsicles and posted his version in the form of a cheesecake. Take his advice and don't increase the amount of Cointreau and take my advice and let this jewel sit overnight. I was dying to try it so Captain Sturm and I had some friends over for dinner and decided to cut into it only a few hours out of the oven. It had an overpowering, bitter taste from the residual alcohol but by the next day it had mellowed out and I was once again taken to way back when.......


Orange Creamsicle Cheesecake

6 Tablespoons unsalted butter
1 3/4 cups graham cracker crumbs
1 1/4 cups sugar -- divided
2 pounds cream cheese at room temp.
1 1/2 Tablespoons vanilla extract
1/2 cup Cointreau (do not substitute)
1 teaspoon orange extract
4 large eggs at room temp.
4 T heavy cream
zest of one orange finely minced (couple of teaspoons)
1 pinch salt
8 oz Sour Cream
Orange food coloring

Preheat oven to 350.

Combine graham cracker crumbs, 1/4c sugar, orange zest, and 6 tablespoons butter into the bowl of a food processor and blitz, about 30 seconds until you have crumbs.

Pour this mixtures into a 9" cheesecake pan and press down with your knuckles so the pan is fully covered on the bottom and about 1/2 inch up the sides and well pressed.

Bake at 350 for 12-15 minutes until set. Remove from oven and place on cooling rack.

Lower oven temp to 275.

Place 1 package of cream cheese in the large mixing bowl (or your stand mixer bowl) along with about 1/4 of the remaining cup of sugar, beat until well combined, add in about 1/4 of the sour cream and beat until whipped well. Make certain you scrape down the bowl from time to time while doing this.

Repeat this process until all packages of cream cheese, the sugar and the sour cream are incorporated and well mixed, scrape the bowl down often.

At this point add the Cointreau, add the vanilla and orange extracts, and the heavy cream then add the salt. Slowly add the eggs a little at time while continuing to mix & scrape the bowl. Once all of this has been added whip another minute or two. Reserve 2 cups of the batter and then pour the rest into the spring form pan. With the remaining 2 cups of batter add orange food coloring until you get a tangerine color. When you get the color right, pour it in 4 dollops on top of the batter in the pan. Using a skewer swirl the orange batter into the rest don’t over do it or you’ll lose the swirls. Start with the upper right dollop swirling clockwise. Then down to the bottom right swirling counter-clockwise, bottom left, clockwise and upper left counter-clockwise. When you’re done you’ll see that all the swirls move towards the center of the cake.

Open oven, on lowest rack set the baking dish with the water. On the middle rack place the cookie sheet and set the filled spring form pan in it. Close the oven and bake at 275 for about 1 hour 45 minutes. (could take 10 minutes longer due to the alcohol content). The edges should be set but the center should still be wiggly (like jello) when done cooking. There may be some cracks around the edges up to 3/4 of an inch. Don’t worry these will settle beautifully.

Place cake on cooling rack, allow to cool for 30-45 minutes then go around edges with the offset spatula (or a thin knife) to loosen. Allow to continue cooling for 3 more hours. Refrigerate overnight to chill.

Source:
"charlesfrench.com blog"
- - - - - - - - - - - - - - - - - - -

NOTES : Has a bitter aftertaste if not chilled overnight.

Pin It
  • Digg
  • Del.icio.us
  • StumbleUpon
  • Reddit
  • RSS

Party On, Garth

In my last post, I expressed frustration over the fact that being in the catering business wasn't always about what I wanted to eat. I suppose in today's post, hard as it may be, I can admit that being self-centered isn't always a good thing.

One of my repeat clients submitted a dozen or so recipes to be used for her cocktail party a few weeks ago and after a round of testing in the catering kitchen, all but one of them were considered something I wouldn't be embarrassed/ashamed/not caught dead serving and admitting that we prepared. I even declared a couple of them as keepers to be used for future events.

I show up for the gig and strategically placed my overflowing, beautifully garnished platters of party fare around the dining area, taking special care to down-play the one "loser" recipe by trying to hide it in back of a huge floral centerpiece. And wouldn't you know it, the guests - resembling a pack of drug sniffing dogs drawn to a suspicious piece of luggage - apprehended the suspect appetizer in no time. To my horror, they started plucking the food from the platter and attempting to actually eat the weird looking little morsels. And then I heard the dreaded question.

"What is this?"

Reluctantly, I began to explain that it was a recipe that the host had chosen (making sure that I emphasized that piece of information) called Bacon Wrapped Almond Stuffed Apricots. I started to run walk away so I wouldn't have to witness the look on the guest's face - you know the one when you get something really nasty in your mouth and realize you have to keep chewing and eventually swallow so as not to gross out everyone else - when to my amazement, said guest's eyes opened wide, a smile spread across his face and the proclamation, "These are FABULOUS!" brought the rest of the dogs running. And in the blink of an eye, 30 guests obliterated nearly 200 pieces of food that I had deemed unedible and I was proven wrong. Terribly wrong.

This photo was taken during my testing phase and shows (from front to back) Parmesan Rounds, Mushroom Puffs, and a scant few of the appetizer that I tried to hide in the bushes. Since I deemed the first two as something that I'd serve again and still stand in amazement at the popularity of the third one, I'm sharing them all with you. Enjoy and party on!


* Exported from MasterCook *

Bacon-Wrapped Almond Stuffed Apricots

Amount Measure Ingredient -- Preparation Method
-------- ------------ --------------------------------
24 dried apricot halves
24 whole almonds -- lightly toasted
8 slices bacon -- cut into 3rds
3/4 cup apricot preserves
2 tablespoons soy sauce
1/8 teaspoon pepper

Fold each apricot half around 1 whole almond. Wrap 1 bacon piece around each stuffed apricot. Secure with wooden picks. Place on a wire rack in an aluminum foil lined jelly roll pan.

Bake at 375 for 20-25 minutes or until bacon is crisp, turning once.

Microwave preserves, soy sauce, and pepper in a small microwave safe bowl at medium for 1 minute or until preserves are melted. Serve dipping sauce with stuffed apricots.

Source:
"Southern Living, January 2007"
Yield:
"24 pieces"

NOTES : Serve warm - not very good at room temp.

- - - - - - - - - - - - - - - - - - -

* Exported from MasterCook *

Mushroom Puffs

Amount Measure Ingredient -- Preparation Method
-------- ------------ --------------------------------
2 packages crescent dinner rolls
8 ounces cream cheese -- room temp
4 ounces mushrooms -- drained and chopped
2 green onions -- chopped
1 teaspoon seasoned salt
1 large egg
2 tablespoons poppy seeds

Preheat oven to 375. Lay out crescent roll dough and press perforations to seal. Mix cream cheese, mushrooms, onions, and salt and spread over dough.

Roll up jelly roll fashion and slice into 1" pieces.

Brush with egg, sprinkle with poppy seeds, and bake 375 for 10 mins.

Yield:
"48 pieces"

NOTES : Can be prepared ahead up to baking point and then frozen until time to cook. In fact, the mushroom roll is easier to slice if it's frozen.

Alison's note - added a bit of roasted red bell pepper to filling for color. Okay at room temp.

- - - - - - - - - - - - - - - - - - -

* Exported from MasterCook *

Parmesan Rounds

Amount Measure Ingredient -- Preparation Method
-------- ------------ --------------------------------
2 loaves thinly sliced white bread
unsalted butter
2 packages cream cheese -- room temp
1/2 cup unsalted butter -- room temp
1/3 cup mayonnaise
6 green onions -- chopped
freshly grated parmesan cheese

Cut four 1-1/2" circles from each bread slice. Butter one side of each circle and arrange in a single layer, buttered side up, on baking sheet. Broil until lightly toasted, then turn and toast other sides. Cool on rack. Combine cream cheese, butter, mayo, and green onions. Spread 1 tsp of mixture over buttered sides of bread circles and dip into Parm cheese. Preheat broiler and arrange rounds on baking sheet. Broil until bubbly and golden, 5 mins, and serve immediately.

Source:
"Southern Living, January 2007"
Yield:
"150 pieces"

NOTES : Okay at room temp. Used lid from spice jar to cut circles.

Pin It
  • Digg
  • Del.icio.us
  • StumbleUpon
  • Reddit
  • RSS