RSS

I currently live in Charlotte, NC and after spending 7 years as a personal chef and caterer, I am now happy to share my love of cooking with friends and family. My heart is in the kitchen, but my soul is in the stars!

Showing posts with label real food. Show all posts

This is your brain. This is your brain on real food.


Do you ever have one of those moments where you walk into a room and have no idea why?  Or maybe you totally forget what you're talking about in mid-sentence? 

Yeah, me too.  And if it's happening to me at the ripe old age of 40 too many, how bad will it be in 10, 15, or 20 years? 

Que The Healthy Mind Cookbook by Rebecca Katz with Mat Edelson.  I couldn't get my hands on this book with 120 recipes to "enhance brain function, mood, memory, and mental clarity" fast enough. 

Along with recipes, photos and a lot of food and brain related research, The Healthy Mind Cookbook also contains a section called The Culinary Pharmacy that lists 80 ingredients used in the book with notes about the roles they play in helping memory, mood, energy, sleep and more.  The information was garnered from peer-reviewed studies conducted with humans and animals in a lab specifically looking at the connection between food and the brain.  Even though science has not yet proven definitive connections between diet and the brain, it is still a very important connection to study.

It is somewhat expected that fading memory and advanced age go hand in hand because it was believed that the brain was incapable of producing new cells to replace old or damaged ones.  But recent discoveries show that new brain cells can, in fact, be produced.  Omega-3's are linked to a chemical known for jump-starting neuron growth and foods rich in vitamin E like nuts, seeds, broccoli and citrus also show a link to increased neuron growth activity.

Personally, I don't need years of research and studies along with approval from the FDA or government to tell me that food affects stress, anxiety, mood, depression, memory, cognitive function and learning.   Realizing that our brain is comprised of 60% fat, it makes me wonder if the deprivation of fat due to years of the low fat/no fat diet fads could be the cause for the onset of Alzheimer's and dementia.  Do I want to take a chance with my brain health?

NO.  NO.  NO.

I want my medulla oblongata to have a fighting chance! 

After my initial glance through the book, I had no doubt that it would be one that was given a coveted spot on my kitchen counter instead of being relinquished to gather dust on the overburdened cookbook shelf.  I chose 17 recipes to try and as of this posting, I've prepared 5 of them and have not yet been disappointed.  I like the book because it makes me get outside of my real food box - it contains combinations and  ingredients that I don't normally purchase or already have on hand.  Nothing weird, just different items like chili paste and bean thread and fresh mint.  The book also contains a resource for buying special ingredients online in case you can't find them in your local grocery store.  I also liked the fact that ingredients are repeated in recipes throughout the book without being redundant or repetitive.  It helps to not waste food. 

The Thai It Up Steak Salad (pictured on the book cover) scared me at first with it's inclusion of fish sauce and bean threads but I was very pleasantly surprised.  The marinade/dressing was very spicy from the chili paste, but I couldn't stop myself from eating it.


The Shrimp-Stuffed Avocados 2.0 is perfect for lunch or as a quick and light summer dinner on the patio. I was piggish and ate two servings at one sitting.  I had some "stuffing" left over and served it over salad greens.  I liked the combination of the crunchy apple with the smooth, rich and creamy avocado.     


I eat a lot of seafood but honestly tire of so much shrimp and salmon.  The Baked Halibut with Tomato, Mint and Fennel broke up that monotony.  The  topping was an interesting combination that I wouldn't have thought about and again, it scared me but I was game to try something new and I'm so glad I did.  I served it alongside wilted fresh spinach from my garden.  I had a bit of the tomato, mint and fennel mixture leftover and tossed it with some nice chunks of Feta cheese and served it over salad greens. 


The Rosemary and Pear Muffins was written for making mini muffins and I gave thought to changing them up to make standard sized muffins instead.  But I stuck with the plan and in retrospect, I'm glad I did.  They are perfect bite-sized savory morsels.  I've enjoyed a couple for breakfast each morning at my desk with an apple and slice of cheese. 

Julie's Sweet-and-Sour Cabbage was a great way to use up the remaining red cabbage from the Thai salad and since it keeps for up to a week in the refrigerator, it's been a great side dish addition to lunches and dinners this week. Crunchy, colorful and tangy, it's been a nice change from my regular green salads. 

There are so many more recipes that I want to try, but I already declare The Healthy Mind Cookbook by Rebecca Katz and Mat Edelson a great addition to my real food cookbook collection! 

I received this book free to review from Blogging for Books. The opinions expressed in this review are my true thoughts and feeling regarding this book. I am disclosing this information in accordance with the Federal Trade Commission’s 16 CFR, Part 255.


Pin It
  • Digg
  • Del.icio.us
  • StumbleUpon
  • Reddit
  • RSS

Chilly Chili


Mother Nature is such a tease.

This time last week I was soaking up the sunshine vitamin and therapeutically weeding the garden.  We had temperatures in the mid-60's and the 'hood was buzzing with the sound of lawn mowers, roosters crowing and kids playing.  (Roosters??  And why has our ever-so-vigilant Home Moaners Association not yet called a meeting to discuss how foul running amuck will ruin our property value??)

Tonight the weatherman is using words like "windchill" and "Arctic blast" and the temperatures are nose-diving into the single digits.

So. Not. Cool. Mother Nature.

No, not cool - downright *BLEEPING* cold!

Chilly days and nights like this make me think of, you guessed it....chili.  I usually have everything on hand to pull this together and yes, I use this taco seasoning in my chili.  Tacos.  Chili.  It's all the same to me because I season both with pretty much the same spices.  Serve this topped with grated cheese, a dollop of sour cream and maybe some parsley, cilantro or chopped scallions and you've got yourself a warm, hearty meal in less than an hour.   

Snuggle up and stay warm where ever you are - if you are in the Northeast, heaven help you because I hear there is more snow coming your way. 
   

Chilly Nights Chili
Serves 4-6


1 medium onion, diced
1 pound ground beef
1 recipe make-your-own-taco-seasoning
4 ounces green chiles
15 ounces diced tomatoes
15 ounces kidney beans, rinsed and drained
15 ounces tomato sauce
1 cup water
for garnish: sour cream, grated cheese, chopped scallions

In a medium soup pot, brown onion and ground beef until beef is cooked through.  About 8-10 minutes.  Drain any grease.

Add seasoning mix, chiles, diced tomatoes, kidney beans and tomato sauce and stir until combined.  Add water to reach desired consistency (about 1 cup) and bring to a boil.  Reduce heat and simmer about thirty minutes, stirring occasionally.  

Pin It
  • Digg
  • Del.icio.us
  • StumbleUpon
  • Reddit
  • RSS

A Good Food Day cookbook review


With the Overburdened Cookbook Shelf leaching out into the rest of my house, it’s readily apparent that I do not need yet another cookbook. But I can NOT help myself.  It’s a sickness hobby.  Not long ago, I stumbled upon a website where you receive free cookbooks in exchange for reviews and it was just like having an intravenous straight line to feed my addiction hobby.  The hook, line and sinker for me (as IF I needed one) was that you don’t get just any cookbook – you could choose the book that you wanted to review.  After perusing the selections, I chose A Good Food Day by Marco Canora with Tammy Walker because it appeared to focus on the concept of real food.  

Chef Canora begins the book by telling his story and justification for writing the book – a near health disaster forced a change in his diet.   As a former contestant on Food Network’s Iron Chef and head chef and owner of Hearth, located in New York, he was over 40 years old, pre-diabetic, 30 pounds overweight, had high cholesterol, and suffered from gout.  It’s a story that unfortunately a lot of people are familiar with – not thinking about the correlation of diet and health until it’s (almost) too late.  Canora used his kitchen knowledge, creativity and sense of adventure to create this book full of 125 recipes that focus on whole and real foods to help motivate and prove that eating healthy does not mean deprivation or bland, pathetic looking food.  This is not a low carb, no meat, low fat, calorie-counting cookbook or a book about being proud for eating like you’re “supposed to.”  It is about eating local and seasonal, getting over the “fat phobia” instilled in us thanks to mass marketing, and eating good food for better health. 

At first glance, the recipes sounded indulgent and worthy of only being prepared for a fancy party or special occasion.  But why should the “good stuff” be reserved for special occasions?  Why not indulge ourselves for the sake of good health?  I liked the fact that a recommended list of pantry and fridge staples was included and I was pleased to realize that, thanks to my diligence over the past year, my pantry already had alot of the items.  I also liked the fact that some of the same ingredients were used in multiple recipes (without being repetitive of what you were eating) so as to maximize your food purchases.  

After just returning from vacation in the California wine country, I was spoiled from 8 days of indulgent food and wine and decided to cook my way through A Good Food Day to continue the streak.  I had a few apples purchased prior to my trip languishing on my counter, so the Apple Walnut Spice Muffins were the first order of business.  I could not find oat flour in my grocery store so I substituted whole wheat flour and had no issues.  They came out of the oven with a beautiful dark, rustic look and a good crown.  They were very moist and chock-full of texture thanks to the addition of diced apples along with grated ones.  These beauties are in my office freezer and ready to be pulled out for a quick, filling breakfast.  


Salmon in Parchment with Olives, Fennel and Lemon will make you feel like a king when you sit down to dinner.  This elegant-looking recipe took less than 30 minutes from start to on-the-table-ready-to-eat and I only dirtied one knife and a cutting board.  My kind of meal for sure!  I threw in a few capers and then plan to use the remaining salmon next week for the Salmon and Arugula Salad with Pomegranate.


Fennel also did double-duty in the Spinach Salad with Olives, Roasted Fennel and Grapefruit.  You may think you can’t eat just a salad for dinner and be satisfied, but I paired this with a crusty loaf of rosemary bread dipped in olive oil (a souvenir from my trip) and didn’t have so much as a grumble from my stomach for the rest of the evening.  It was very hearty and I even enjoyed the leftovers for lunch the next day.  I also used grapefruit for breakfast in the Ode to Orange Julius Shake, but due to my own personal taste preferences and less-than-stellar food processor, I didn’t enjoy it so much.  I would, however, serve it to guests for a brunch. 


And to reiterate the fact that eating good doesn’t mean deprivation, there is a section for sweets and for snacks and I just had to try the Hazelnut Brownies.  I used almond meal in place of the hazelnut meal (per a suggested substitution from Chef's notes) because I already had that in my pantry but again had to use whole wheat flour in place of the oat flour.  They baked up beautifully with nice crispy edges (my favorite part of a brownie) and had a perfectly balanced texture between fudgy and cake-like.  Normally I piggishly eat half a pan of just-out-of-the-oven brownies in one sitting and still don’t feel like I’ve gotten my chocolate fix.  With these brownies, I only ate 2 small squares.  Not because they weren’t good – quite the contrary.  It was because they were so chocolatey rich and delicious and satisfying.  


I have numerous other recipes from A Good Food Day on my list to prepare in the coming weeks but I knew I didn’t need to hold off writing my review until I had completed them all.  Chef Marco Canora has created a cookbook that exemplifies treating food as fun instead of just fuel for the body.  If you are just starting your real food journey and are used to having primarily processed foods in your diet, it’s possible that you may be leery of the recipes in this book based on names and ingredients, but don’t be intimidated.  There’s no weird tofu/soy protein/tempeh to be had here – just healthy real foods.  For my review, I give this book 4-1/2 out of 5 stars.  I deduct a half star because Chef Canora does not mince words and includes some profanity while telling his story.  I personally am not offended by the language, but based on that alone, I wouldn’t recommend this book to the likes of my mother or grandmother or any of my more conservative friends.   

I received this book free to review from Blogging for Books. The opinions expressed in this review are my true thoughts and feeling regarding this book. I am disclosing this information in accordance with the Federal Trade Commission’s 16 CFR, Part 255.

Pin It
  • Digg
  • Del.icio.us
  • StumbleUpon
  • Reddit
  • RSS

Revelations over a bowl of split pea soup


My momma always told me not to wish my life away.

When I was a kid, I can remember wishing for the days when I would be an adult.  Looking forward to having my own place to live, my own money to spend, my own rules to live by. Wanting NOW what would inevitably come. Wishing....

I think by now we've all realized that being an adult is a total rip-off.  Momma was right.

Another year has passed us by and I can't help but be a little melancholy. While everyone is oversharing on social media their enthusiasms and goals for the next 365 days, I feel sad about the passage of time. It all moves so fast. While I'm glad to finally have my family's hardships that lingered from 2013 into 2014 behind us and look forward to much healthier days ahead for everyone, I just wish it would all slow down so we can savor and enjoy the good parts more. It seems we blow through 365 days at lightening fast speed.  One day it's January 1 and in the blink of an eye we are already making resolutions for the next year.

My resolution for this year is to enjoy anything and everything as much as possible.  I resolve to see the silver lining in what might not be an ideal situation and learn from it.  I want to surround myself with those who matter and focus less on who and what doesn't.  We only have one audition for life and I want to make the most of it before the final curtain call.  I want to revel in the good times. 

We always seem to end a year with plenty of indulgences - Thanksgiving feasts, holiday parties, Christmas dinners and gifts, Champagne-laden toasts at New Year - so it stands to reason that a new year is marked with humbleness.  Black-eyed peas and collard greens are typically served as a meal for good luck and good fortune.  Most Eastern European countries serve split pea soup as a sign of prosperity in the form of money in the new year.

Since I had a nice meaty ham bone left over from Christmas dinner and since I've never eaten it, I figured it wouldn't hurt to test the split pea soup tradition.  And guess what??  I'm pleased to report that I was told today that I would be getting a 6.25% pay increase with my first 2015 paycheck.

I am a believer!!


Slow Cooker Split Pea Soup with Ham
Servings: 4 to 6

1 (16-ounce) package dried split peas, rinsed
2 carrots, peeled and sliced
1 medium onion, chopped
2 stalks celery, chopped
2 garlic cloves, minced
1 bay leaf
1/2 Tablespoon fresh parsley, chopped
1/4 teaspoon red pepper flakes
salt and pepper to taste
6 cups chicken broth
1 leftover meaty ham bone

Place all of the ingredients in the slow cooker and stir to combine. Cover and cook on low for 8 hours or on high for 4 hours. Remove the bay leaf from the soup and discard. Remove ham bone from soup and pull remaining meat from the bone and set meat aside. You can either remove a few cups of the soup, and puree the remaining with an immersion blender or use the immersion blender to puree all the soup slightly. Stir the reserved ham (and soup) back into the soup and serve warm.  (If the soup becomes too thick after blending, add water to thin.)

Pin It
  • Digg
  • Del.icio.us
  • StumbleUpon
  • Reddit
  • RSS

Making homemade stock


My favorite part of the holidays always revolves around the aspect of food – making and decorating gingerbread houses, baking cookies to fatten the coworkers, preparing appetizers for holiday gatherings, collecting festive recipes and wishing I had time to make them all.

So my absolute giddiness should be no surprise even in the days following Thanksgiving and Christmas when Boy Toy bestows upon me his beautiful turkey carcasses. My kitchen becomes much like the setting for a production of Shakespeare’s Macbeth…

Scene: A dark Cave. In the middle, a Caldron boiling. Thunder.

Enter the three Witches:

“Double, double toil and trouble;
Fire burn, and caldron bubble.
Fillet of a fenny snake,
In the caldron boil and bake;
Eye of newt, and toe of frog,
Wool of bat, and tongue of dog,
Adder's fork, and blind-worm's sting,
Lizard's leg, and owlet's wing,
For a charm of powerful trouble,
Like a hell-broth boil and bubble.”

Exit stage left.

My slow cookers are loaded with the bird leftovers and aromatics and simmer for a couple of days to produce the liquid gold that keeps my freezer stocked for most of the upcoming year. I use turkey stock interchangeably with chicken stock because there is no taste difference in my opinion. Bird is bird. And I use every leftover part of the bird for stock – bones, skin, scraps, cartilage, fat - all those pieces and parts that you wouldn’t eat for dinner and would normally throw out.

Homemade stock is a beautiful thing. Not only is it more flavorful, heartier and healthier than store-bought stock, it also makes use of something that would otherwise go in the trash. A 32-ounce carton of chicken broth can cost anywhere from $3 to $4, so making your own stock allows for extra money in the food budget over time. Soups are a huge part of my menu rotation, so it doesn’t take long for me to see the savings.

Making homemade stock is easy and not very time consuming and can be made on the stove top using a large stock pot if you don’t have a slow cooker. The biggest challenge for me is having enough vessels to store it in.  I'm usually scrounging up every empty jar or tub I can find.  I purchase whole chickens from Windy Hill Farms throughout the year but other times when I’m only cooking a few legs, thighs or bone-in breasts and don’t necessarily have enough bones at once, I’ll collect them in the freezer until I have enough for a batch (sometimes the contents of my freezer could be the makings of a good horror flick!) If you catch legs and thighs on sale for a really low price, pick up a couple of packs and use them for stock.

The beautiful thing about the recipe for homemade stock is that there is no set recipe. It can be modified to use whatever aromatics you have on hand, so don’t stress if you don’t have these exact ingredients on hand. I personally never season my stock with salt while preparing – I wait until it goes into whatever recipe I’m using it in so I can control the seasonings.

I also try to maximize my savings by using the same set of bones for two rounds of stock. After I strain the first time, everything goes right back into the pot for Round 2. The first round of stock is best used for soups and dishes where the broth is the main component of flavor and the second round is best used for flavoring things like rice or sauces.

Homemade Chicken Stock
servings = varies

1 onion, quartered
2 stalks celery
2 whole carrots
2 to 3 cloves of garlic
1 bay leaf
1 bunch fresh herbs of your choice (I like parsley, thyme or oregano or a combination of all)
2 Tablespoons whole peppercorns

Place all ingredients in the slow cooker along with your bones and meat scraps. Add enough water to fill the cooker, leaving about 1 inch of space. Cook on low for 8-10 hours or on high for 4-6 hours. If using stove top method, simmer in a pot over medium-low heat for 4 hours.

Strain contents of the pot through a sieve or colander and discard the solids (or use for a 2nd round of stock.) Cool stock overnight. When completely chilled, skim accumulated fat from the surface. Use immediately or store in containers in the freezer.

 
When you date a food nerd, sometimes you just don't know which way a conversation is going to turn.


Pin It
  • Digg
  • Del.icio.us
  • StumbleUpon
  • Reddit
  • RSS

Port Wine Cranberry Chutney


I can't help but feel a little resentment when it comes to preparing food for others for the holidays.   Boy Toy is King of the deep fryer, so for the last two Thanksgivings I've been in charge of preparing side dishes to compliment his beautiful birds.  We host his family members for the meal and I understand that my idea(s) of tradition may be somewhat foreign to others.

My family's Thanksgiving meal consisted of most things that I continue to prepare today and for two years now, most of my food has gone untouched because it is not what Boy Toy's family is used to.  As time has gone by and the more I've socialized with them around the table, I've come to realize that most of his family members are used to (and prefer) processed, packaged foods.  The mashed potatoes they know come from a box, green beans come from a can, and bread is from a plastic bag with directions to "brown and serve."  I know that people tend to stick with what they are familiar with and what they like, but it is very disheartening when my hard work and love go into food that is greeted by grimaced faces and rude comments (someone actually told me they "wouldn't cross the street" for my made-from-scratch chicken tetrazzine.  He ended up eating a sleeve of saltine crackers for dinner that day.)

Last year I made the declaration that I would no longer spend so much time, energy and money preparing what I thought was "good" food for the holiday.  But as I started giving thought to the menu for this holiday season, I had a revelation.  I decided that I would continue to make my "weird" food and they could take it or leave it.  I made reference in my last post about there being no time like the present to introduce real food to Boy Toy (who is a little more open-minded about my food) and his kids and I'm going to continue with that mindset.  I'm not going to compromise what I love about Thanksgiving - especially when I am tasked with preparing the food.  Hopefully as my food continues to appear on the table year after year, someone will give in, try it, and decide it's not so bad after all.

This year I'm arriving at the Boy Toy home loaded down with cornbread dressing, creamed corn, spinach casserole, made-from-scratch green bean casserole, sweet potato casserole, pumpkin pie, cranberry tart.  and this port wine cranberry chutney.

I will be thankful for the opportunity to spend time in my kitchen preparing the things that I love and everyone else can be thankful that McDonald's is open!

Port Wine Cranberry Sauce 
servings = makes about 2 cups

½ cup ruby port
Zest of 1 orange
½ cup fresh orange juice
12 ounces fresh cranberries
¼ cup honey
2 tablespoons candied ginger, chopped

In a medium saucepan, combine port wine with orange zest and orange juice and bring to a boil. Add the cranberries, honey and ginger and simmer over medium-low heat until the sauce is jam-like, about 15-20 minutes. Transfer to a serving bowl and serve warm or at room temperature.

Can be made ahead and refrigerated for up to 2 weeks.

Pin It
  • Digg
  • Del.icio.us
  • StumbleUpon
  • Reddit
  • RSS

Made-From-Scratch Green Bean Casserole


Green bean casserole - the prerequisite for attending Thanksgiving dinner at the Boy Toy household. It’s like the “No shoes, no shirt, no service” sign posted on the door of restaurants and convenience stores. “No green bean casserole, no entry."

But the traditional version of his beloved casserole, which contains a processed can of cream of mushroom soup, goes against my real food policy and since I’m in charge of side dishes this year, I’ve decided to contribute a made-from-scratch version. Will the Boy Toy still love me after I’ve desecrated his favorite dish? Will the other dinner guest choose to go hungry instead of trying something new (as they are sometimes apt to do when my “odd” food is placed before them?)

I know what you’re thinking - it’s just one time per year and I should allow Boy Toy to have this indulgence, right? But here’s the thing – how am I ever going to get him turned on to the idea of “real” food if he isn’t exposed to it? How will he ever know that the homemade version of a favorite dish can be just as good – even better – than the original version? I’m personally striving for an unprocessed Thanksgiving this year, at least with the food items that I contribute and with the foods of others that I consume.

Unprocess your Thanksgiving with this made-from-scratch Green Bean Casserole and give thanks that it’s so delicious! You can prepare the cream of mushroom soup a few days in advance but it is best to prepare the onions just before topping the casserole.

Made-from-Scratch Green Bean Casserole
servings = 6

4 cups green beans, steamed
½ cup milk
1 teaspoon soy sauce
For the cream of mushroom soup:
2 cloves garlic, minced
1/2 small onion, diced
1/2 cup mushrooms, diced
1/4 cup butter
1/4 cup whole wheat flour
1 cup milk
3/4 cup chicken broth
For the onions:
1 small onion, thinly sliced
1 cup milk
1 cup whole wheat flour
Oil or butter for frying

For the soup: Sauté garlic, onion and mushrooms and set aside. Melt butter over medium heat. Whisk in flour. Cook for about 2 minutes. Add milk and broth. Add sautéed garlic, onion and mushrooms.

Bring to a boil; reduce heat and simmer, stirring occasionally, until it reaches desired consistency (about 10-15 minutes). Season to taste with salt and pepper.

To assemble the casserole: Combine green beans, ½ cup milk, soy sauce and cream of mushroom soup in a 1-1/2 quart casserole. Bake at 350 degrees for 25 minutes or until mixture is hot and bubbly. Sprinkle with fried onions. Bake for 5 minutes or until the onions are golden brown.

For the onions: While the casserole is baking, soak onions in milk for 5 minutes. Dredge onions through flour to coat. Heat oil or butter in large skillet and fry onions in batches, stirring as needed to brown evenly. Drain on paper towels and season to taste.

Pin It
  • Digg
  • Del.icio.us
  • StumbleUpon
  • Reddit
  • RSS

Make-Your-Own Taco Seasoning


Even before I made the conscious decision to cut out processed foods, I would have told you that I wasn’t guilty of eating a lot of it in the first place.  But then I realized while cleaning out my pantry in preparation for the October Unprocessed Challenge that processed foods have a way of sneaking into your pantry and ultimately your food without much thought given to the how and why.

The sneaky culprits for me were prepackaged mixes like marinades, taco/chili seasoning, dip mixes and dry soup mixes.  These were simple convenience items that I regularly purchased without a second thought but now that I’m a better label-reader, I know not to put these into my grocery cart anymore.

Take a look at the ingredients in Old El Paso taco seasoning:


salt, maltodextrin, chili pepper, red pepper, monosodium glutamate, corn starch, yellow corn flour, spice, sugar, citric acid, natural flavor, partially hydrogenated soybean oil, silicon dioxide, yeast extract, ethoxyquin


That’s a lot of ingredients for such a small package – and scary, processed, fake ingredients at that! Two teaspoons of seasoning accounts for 24% of your sodium intake and I’d be lying if I said I wasn’t guilty of eating more than one serving of chili for dinner.  (I’ve been accused in years past of having no heart, but maybe in actuality my heart was just shriveled up and inoperable because of so much sodium intake!)


Making your own seasonings is simple and easy, especially if your spice collection looks anything like mine - you probably already have most of the needed ingredients on hand.  You can mix them according to your taste and control the ingredients – maybe you like a little more spice and a lot less sodium in your life.  This single batch of taco seasoning took less than 5 minutes to put together but most of that time was spent rummaging through my spice drawer to find everything (maybe reorganization is due?)  You could easily mix this in batches and store in resealable bags to have on hand for those emergency dinner prep nights.

This isn't just for tacos either!  You can also use to season homemade chili.

Make-Your-Own Taco Seasoning 
makes enough to mix with 1 lb. ground meat

2 teaspoons chili powder
1-1/2 teaspoons paprika
1 teaspoon onion powder
1/2 teaspoon salt
1/2 teaspoon garlic powder
1/2 teaspoon ground cumin
1/2 teaspoon ground coriander
1/2 teaspoon oregano
1/4 teaspoon fresh ground pepper
1 pinch red pepper flakes, to taste

Mix all items together in a bowl.

Pin It
  • Digg
  • Del.icio.us
  • StumbleUpon
  • Reddit
  • RSS

Lemony Chicken Soup


There's always some sort of soup coming out of my kitchen each week, whether it be freshly made or just thawed from having been squirreled away in my freezer from a previous batch.  I love that making soup requires such little effort and you can be so creative!  Use whatever you have on hand - most of my best batches come from having bits and pieces of leftover veggies and such in my frig that aren't enough to make something with on their own.  No two batches of my soup are ever the same.

I think most of the world's problems could be solved over a bowl of soup - there is something so satisfying and comforting about a collection of meat and veggies in rich warm broth. Chicken soup is definitely a cure-all, solve-all type of soup and it works for alot of my own problems.  Lord knows I lived on Campbell's Chicken Noodle Soup when I was a kid but I've far outgrown any premade canned versions of soup now.  And besides, have you looked at the ingredients on the side of the can?

CHICKEN STOCK, COOKED ENRICHED EGG NOODLES WITH ADDED CALCIUM (WHEAT FLOUR, CALCIUM CARBONATE*, EGGS, EGG WHITES, NIACIN, FERROUS SULFATE, THIAMINE MONONITRATE, RIBOFLAVIN, FOLIC ACID), WATER, COOKED CHICKEN MEAT, CONTAINS LESS THAN 2% OF: SALT, VEGETABLE OIL, POTATO STARCH, CHICKEN FAT, MONOSODIUM GLUTAMATE, DEHYDRATED COOKED CHICKEN, ONION POWDER, MODIFIED FOOD STARCH, YEAST EXTRACT, SPICE EXTRACT, SOY PROTEIN ISOLATE, SODIUM PHOSPHATES, CHICKEN FLAVOR (CONTAINS CHICKEN STOCK, CHICKEN POWDER, CHICKEN FAT), DEHYDRATED GARLIC, BETA CAROTENE. *IN EXCESS OF STANDARD

I don't know about you, but I don't often throw things like monosodium glutamate (MSG), ferrous sulfate, sodium phosphates (which is another name for salt, which explains why the sodium content for 1/2 cup of soup accounts for 35% of your RDA of sodium) or even soy protein isolate into my pot of soup. Who wants to eat that garbage?
Soup should be real and made with real ingredients. I love the perkiness that the lemon and fresh dill impart in this version of homemade chicken soup.  I use my own homemade broth and I've been slowly migrating to more whole wheat pasta during my real food lifestyle change, which I'll admit hasn't been easy.  There is just something about the taste and texture that hasn't quite won me over yet.  In the meantime, I've been doing a half/half combination of whole wheat and regular pastas.  It's better than nothing, I suppose, and who knows - maybe I'll eventually completely change pasta teams!

Lemony Chicken Soup
servings = 4

Inspired by bon appetit

1 tablespoon olive oil
1 medium onion, diced
1 celery stalk, thinly sliced
1 carrot, peeled and thinly sliced
12 ounces cooked organic free-range chicken
6 cups chicken broth (homemade or organic)
salt and freshly ground pepper
1/2 cup whole wheat orzo
1/4 cup fresh dill
lemon wedges, for serving

Heat oil in a large pot over medium heat.  Add onion, carrot and celery and cook, stirring often until vegetables are crisp-tender.  Add broth, season with salt and pepper,  Bring to a boil.  Add orzo and cook until al dente, about 8-10 minutes.  Reduce heat to simmer, stir in chicken and dill and heat through.
Portion soup into bowls and serve with lemon wedges for squeezing over soup.

Pin It
  • Digg
  • Del.icio.us
  • StumbleUpon
  • Reddit
  • RSS

Sausage Risotto


The Italian dish of risotto is typically prepared by adding liquid, small amounts at a time, to rice and stirring almost constantly until the liquid is absorbed each time and more can be added. Ain’t nobody got time to be standing over a stove all day long.

And that’s why I like this recipe for Italian Sausage Risotto from Farmstand Chef. It only takes a few minutes for the wine to absorb and beyond that you can dump in all the stock and forget about it with the exception of a few stirs here and there.

I used hot pork breakfast sausage for this – I have it in the freezer from my Windy Hill Farms CSA and I’m not much of a sausage eater so I’m always trying to find creative ideas to use it. I also had pork stock in the freezer from some previous kitchen project involving pork. And speaking of things in my freezer – I’m not a red wine drinker either but anytime I entertain and have red wine for Boy Toy or friends, I pour any leftover wine (WHO has leftover wine??) into a container and freeze it for use in recipes. It never freezes solid so I can chip off as much as I need and thaw.

Serve this dish with a green salad and dinner can be ready in about 30 minutes. I love easy, simple and delicious recipes like this. It’s a man-pleaser too - Boy Toy loved it.

Italian Sausage Risotto
servings = 4-6

From Farmstead Chef

1 lb. Italian pork sausage (I used hot breakfast sausage)
1 cup onions, finely chopped
1 tablespoon butter
1-1/4 cup Arborio rice
½ cup red wine
3 cup chicken stock (I used pork stock)
1/3 cup Parmesan cheese, plus extra for serving
Salt and pepper, to taste

Fry sausage in a large skillet, breaking it up into small pieces. When lightly browned (about 8-10 minutes), remove from pan and drain on paper towels.

To the same pan, add butter and onion and cook over medium heat until onions soften (about 3-5 minutes.) Add rice and toss until well coated in butter, stirring constantly.

Add wine and stir until it is absorbed. Add sausage back to pan and stir.

Add stock and bring to a boil. Reduce heat to very low, cover and cook 15-20 minutes until the broth is absorbed and the rice is tender. Stir occasionally.

Remove from heat and stir in cheese and salt and pepper. Serve extra Parmesan cheese alongside for sprinkling on top.


Pin It
  • Digg
  • Del.icio.us
  • StumbleUpon
  • Reddit
  • RSS

Real Food Shopping at Aldi


Let’s just get one thing out in the open: I shop at Aldi and I am not ashamed.

My first encounter with an Aldi store was some years ago when I lived in Arkansas. I drove past one almost daily for 6 years but never mustered the courage to stop. It was located in one of those strip-mall type places that sometimes induce fear and misconceptions so I chalked it up as being one of those scratch and dent/bargain bin/food-on-the-brink-of-death stores. When I relocated to Charlotte, I saw even more Aldi stores again located in strip-malls with although not too questionable neighbors, but businesses that I’d just never frequent. I continued to pass them by without a second thought.

It wasn’t until about two years ago when I took notice of the newly razed patch of ground a few miles from my house proudly displaying an Aldi “Coming Soon!” sign that I began to wonder about the store. It occurred to me that if they were truly a cheap food store, they would not be building a brand new store on a prime piece of Mecklenburg County real estate. Visiting an Aldi became top of my list of things to do and I soon found that my opinion of them was undeserved.

Aldi is a German owned and operated company that was founded in 1913 to initially appeal to the working class. They were able to deeply discount items by keeping their stores small, selling no fresh produce, having few offerings within a product line and removing from inventory any items that did not sell. With the exception of now selling fresh produce, they still stand by many of those same practices – you won’t find fancy shelves and displays and you won’t find 10 different choices of an item. You’ll pay a quarter to release the cart from the chain gang (and I guarantee you won’t find any loose carts in the parking lot.) They don’t accept credit cards (cash, debit or EBT only) and you’ll bag your items using your own bags or carry items out balanced precariously in your arms.

What you will find at Aldi is privately branded staple items and inexpensive household items. The U.S. division of Aldi has been around since the late 1970’s and also operates Trader Joe’s. If you look closely, you’ll see similarities in a lot of products, just different packaging. I’ve spent a lot of money at Aldi since my discovery and in return received excellent quality and value – I’ve never been disappointed in their products and even if I were, they have a double money back guarantee meaning if you aren't happy you not only get your money back but they'll also replace the item if you wish.

Before making the move to real and organic foods, nearly all of my shopping was done at Aldi but since then I do have to supplement some items from other places. I’ve recently noticed that my store is carrying more organic items so a larger portion of my grocery budget is going into Aldi’s pocket once again. The chain has also just recently announced that they will now carry several gluten-free items on a permanent basis. So many people argue that eating real and/or organic food is expensive, but Aldi is living proof that the lifestyle can be budget-friendly.

If you are looking to trim your grocery expenses and still eat quality ingredients, run to your nearest Aldi store and check them out! Here are some items that I buy at Aldi on a regular basis to support my real food lifestyle.  Remember it is still important to be a food label reader no matter where you shop.


Dairy and cheese: You’ll find an excellent variety of cheeses at Aldi – especially during the holiday season. Goat cheese always goes home with me and I’ll occasionally pick up one or two other imported selections. I normally purchase organic whole milk but if Aldi is my only shopping stop, I’ll concede to their organic 2%. I use it for smoothies and along with their plain Greek yogurt for my breakfast oatmeal during the week.


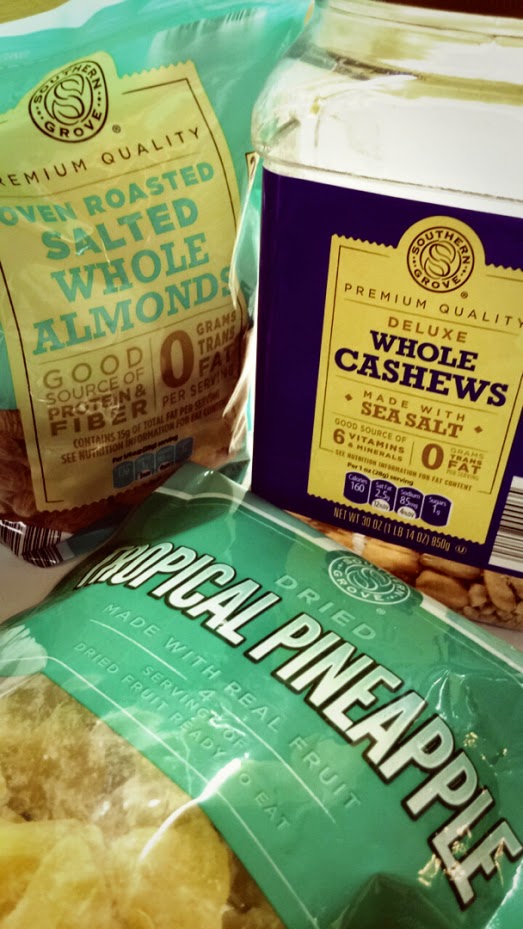
Nuts and dried fruits: I buy a lot of nuts and dried fruits here since they are more reasonably priced than other stores. Whole almonds and cashews are my go-to snacks and dried cherries, cranberries, apricots and pineapples are used for homemade granola or mix-ins for my breakfast oatmeal. I also stock up on walnuts during the holiday baking season.


Fruits and vegetables: I can’t always afford organic fruits and vegetables but if Aldi offers them, I do choose them over conventional produce. Their regular organic offerings include lettuce, carrots, cherry tomatoes and apples. Bell peppers, asparagus, lemons, limes, avocados and fresh pineapple are also significantly cheaper here. All of these items, along with any other fresh fruits and veggies like cucumbers, onions, garlic, mushrooms, broccoli and cauliflower usually go home with me on a weekly basis.  Do the best you can with what you can afford and be mindful of the "dirty dozen" if you have to make a choice between organic and conventional.


Pastas and canned goods: I've started noticing more whole wheat pastas and some organic canned goods being offered, so I always grab a few boxes and cans to replenish the pantry.

Frozen foods: I stock up on frozen organic blueberries, raspberries and strawberries for smoothies and occasionally pick up a bag of frozen peas to toss into salads or soups.  I also buy their jumbo uncooked shrimp to keep on hand for quick and easy meals.  On my last trip I picked up a box of both strawberry and blueberry organic frozen yogurt bars that were really tasty.


Crackers and snacks: Almond butter and cashew butter have recently made an appearance on Aldi shelves and make great protein rich snacks when paired with an apple or crackers or added to smoothies. Organic honey and “real” maple syrup are pantry staples and are used to sweeten my oatmeal and smoothies. I also occasionally buy Aldi’s version of Triscuits and always pick up my one indulgence – chocolate.


They distribute a German brand of chocolate bar called Moser Roth in several different varieties but I always go for the 85% cocoa. It’s not for the faint of heart, but it pairs so well with a glass of wine in the evenings for dessert. They are very reasonably priced and despite the fact that they do contain soy lecithin as an ingredient, it’s the best I can do for the money. It is hard to find chocolate without this emulsifying ingredient and when you do, the bars are usually upwards of $4. The Moser Roth packages contain 5 individually wrapped bars that are the perfect serving size.

Among the multitudes of bags of chips, you’ll find Blue Corn Tortilla chips made with organic corn masa and I also love the multi-grain flaxseed chips and they carry organic salsa as well.


Convenience items: I’m not going to lie. Even on a real food lifestyle, I do sometimes cop out to convenience/fast food/junk food just like most everyone else. There are days where I just do not feel like cooking or there just isn’t enough time. Again, I try to do the best that I can with my selections. My freezer almost always has one of Aldi’s “Specially Select” frozen pizza varieties. Containing minimally processed ingredients, uncured pepperoni with no nitrates and sometimes organic ingredients, again it is the best choice I can make with my money.

Meats: Other than a very occasional package of prosciutto to add to an antipasti platter, I do not purchase meat items from Aldi or any other grocery store. Instead, I belong to a CSA and pick up my monthly meat allowance from a local North Carolina farm called Windy Hill.

I could ramble on and on about my love of Aldi but I think you get the idea that if you aren't familiar with the store, you should be.  It isn't a one-stop-get-all-your-shopping-done kind of store and among the real and organic items there is alot of processed food and junk food, but just like any store it can be as healthy and real as you make it.  If you're still curious about Aldi but not brave enough to go in just yet, check out this three-part series about the store written by Ali, a Kansas City blogger.

Pin It
  • Digg
  • Del.icio.us
  • StumbleUpon
  • Reddit
  • RSS

Overnight Oatmeal


Born and raised in the South, it is imperative that you have good manners.

If you had asked me before I learned my manners whether or not I liked oatmeal, the answer would have been a resounding “NO” met with some unappealing gagging noises and unsavory language. My momma would have quickly reminded me that a simple “No thank you” would suffice for an answer.

Honestly, I can remember eating oatmeal only one time in my life and if I had to tell the truth, it wasn’t half bad –it was just a consistency issue because I typically don’t care for things that are soft and pudding-like. Add to that the fact that I’m not much of a breakfast foods person, don’t like to eat first thing in the morning, and don’t like having to prepare something on the spot when I am ready to eat.
Oatmeal was just a big trifecta of no’s as far as I was concerned.

And then I discovered Overnight Oatmeal while trekking along on my real food journey. All manners aside, this is some seriously good grub and it has become a staple in my morning food routine.

It can be made ahead – several days in advance, the sky is the limit as far as what can be added to it for flavor and consistency, and it’s inexpensive and full-of-protein filling. On mornings that I eat oatmeal I never seem to have hunger pangs before lunch.

Start with a base of oats, milk, and Greek yogurt (I also add chia seeds, but that is optional) then let your imagination run wild with flavors. You can sweeten with a tablespoon of honey or maple syrup. You can add fresh or dried fruits. Have some preserves or applesauce in the fridge that needs to be used? Throw it in too. There is no end to the combinations. Last week I added about ¼ cup applesauce and some chopped apples. This week is a tablespoon each of honey and peanut butter and a scattering of chocolate chips. I love the combination of dried cherries, a tiny splash of almond extract and cherry preserves.


Monica over at The Yummy Life has some excellent step-by-step instructions, FAQs and recipes here and here to get you started, so remember your manners and head on over and check them out!

Overnight Oatmeal
servings = 1

¼ cup rolled oats
1/3 cup milk
¼ cup Greek (or plain) yogurt
1-1/2 teaspoon chia seeds (optional)
Sweetener of your choice (honey, maple syrup)
Add-ins of your choice (fresh or dried fruits, nuts, peanut butter, chocolate chips)

Mix all ingredients well and refrigerate overnight. Give a quick stir before eating.

These can be made several days in advance and kept in the refrigerator.


Pin It
  • Digg
  • Del.icio.us
  • StumbleUpon
  • Reddit
  • RSS

Returning to Normal


No matter how old you get, there are times when only your Momma can make you feel better.

When you're down with a bad cold, only Momma can make chicken soup just the way you like it.

A scraped knee?  Momma will make the boo-boo all better with nothing but a kiss and a Snoopy band-aid.

When your first (second, third or twentieth) true love breaks your heart, Momma is there to help you pull yourself up by the bootstraps and make you feel loved again.

And so it is that after I've been in a blogging/cooking rut for almost a year, only Momma could get me started again.

This time last year Boy Toy and I were getting ready for vacation in Mexico and the folks were on safari in Africa.  It was the last week of "normal" as we would know it until very recently. After months, days and weeks of watching my mother struggle to get her strength back, I was very pleasantly surprised when she showed up and dropped five dozen ears of corn at my doorstep.  Things were definitely getting back to normal.


My hometown in Tennessee has long been known for fruit and produce grown by the Scott family - namely strawberries, tomatoes, and corn.  There is a world of difference between real farm-grown food and the mass-produced food in the grocery store but most people never have the chance to experience the difference. Nor have they experienced the satisfaction of "putting up" food to be enjoyed long after it's out of season.

As a child, I can vaguely remember most all of my family members sitting on the porch at some point in time stringing and snapping beans from the garden or "working" tomatoes into pints and quarts.  It was a family affair - a time to be together, talk, laugh and tell stories.  It was a joint effort to do the work and a joint effort to enjoy the bounty for the rest of the year.  It was a way of life.  Sadly, the art of canning and preserving food has been lost on alot of today's population.  Invite a bunch of friends over for a bean stringing party or a corn shucking soiree and see how many show up!  I'm still a farm girl at heart because, even after years of being removed from it,  I still love the satisfaction of "working" real food. 


The folks and I spent Friday evening shucking and plucking 60 ears of corn (some of us even clowned around) from Scott's farm and planned to prepare it on Saturday for the freezer.  Once you get past all the shucking, it's really a pretty easy thing to do.  


Once the corn is clean of all the silks and the ends are trimmed, fill the largest pot you have with water (about halfway) and bring it to a slow simmer.  Add the corn in batches and give the water a few minutes to return to a simmer.  Cook the corn for about 4 minutes, making sure to push the corn down to the bottom a few times because it floats to the top. 


Remove the corn from the pot and put it into an ice bath to stop the cooking process.  Once the corn is cool, use a sharp knife and cut the kernels from the cob.  Bag the corn in freezer bags - it works best if you make the filled bags lay flat so you can stack them in the freezer and take up less room.  We bagged the corn in both pint and quart bags and got 10 pints for me and 9 quarts for Mom. 

When you're ready to use the corn, defrost it and cook however you please.  I like to saute it with a combination of olive oil and butter along with fresh garlic, diced red or green bell peppers.  Add fresh herbs like parsley, thyme or basil at the end of cooking and season with salt & pepper. 

With a little bit of time and effort this summer, you can enjoy fresh corn all year long!

Pin It
  • Digg
  • Del.icio.us
  • StumbleUpon
  • Reddit
  • RSS

The Intimadator


"When you work in a small office, there are very few places to hide the crazy."

This is my favorite quote of the week from one of my coworkers.  She's fairly new to the office and is just now finding out what I've known for five years now - our office is a Monday through Friday psychopathic roller coaster ride.  It's a running joke that my job reminds me so much of my second marriage and I partly think that fact has helped me cope with the office full of crazy for so long.  After a while you learn how to spot the subtle (and not so subtle) signs of who is having a bad day, when to keep your head down and when it might be time to sign the separation papers and find the door.

For the most part, I love my job but there's only so much intimidation you can take before something you like and enjoy becomes a dread. Only so many days that praying that the boss doesn't come in actually pays off.  So much disappointment when you pull into the parking lot each morning and realize the place isn't totally engulfed in flames (I've actually witnessed one of my jobs burn nearly down to the ground before.)

Wielding power through intimidation is a mighty thing - a rush of addictive adrenaline.  And I only know this because I occasionally get to be the office intimadator - it's a very rare occurrence, but it happens.  And it happened last week.

A few of us were discussing lunch plans - who's going where and eating what and I announced that I was going home (I have that luxury since I only live 5 minutes away) and having leftover crawfish etouffee for lunch.  They looked at me in disbelief.

You're having what?

Crawfish etouffee. 

Where did you get it?

I made it.

That sounds so intimidating.


I tried to explain that my version of the bayou delicacy was one of the easiest things in the world to make but they would have no part of my trying to bully them into thinking that.  They rushed off to eat their fast food and talk about who does she think she is and can you believe she actually said that??  Meanwhile this office outcast went home to enjoy the simplest, most delicious lunch and felt no remorse for lording her cooking skills over the office minions. 

Seriously, folks.  Don't be intimidated or feel bullied by the title of food.  This is the simplest dish ever.  It is by no means authentic Creole cuisine and does not have a roux base because I'm taking steps to cut processed foods from my diet (in this case white flour), but there is still plenty of flavor and the simplistic nature of this dish makes it appear regularly on my menus. 


Rouxlessness Crawfish Etouffee
(Get it??  Rouxlessness = Ruthlessness.  Sounds intimidating, huh?)

Serves 4

1 package frozen crawfish meat, thawed
1 large onion, diced
1 cup green bell peppers, diced
1 cup celery, diced
1/2 cup scallions, sliced
1/2 cup fresh parsley, chopped
1 stick butter
Tony Cacheres Seasoning
Rice, cooked*

Melt butter in saute pan over medium high heat.  Saute onions, celery and bell pepper until clear, about 7 minutes.  Add crawfish and scallions.  Heat, stirring occasionally, until crawfish is heated through and begins to curl, about 10 minutes.  Season to taste with Tony Cacheres.  Remove from heat and stir in green onions and parsley.  Serve over rice.

*For every 1 cup of rice, boil 2 cups of water.  Add rice and stir once.  Cover and turn heat to lowest setting.  Do not disturb for at least 15 minutes.  Fluff with fork. 

Pin It
  • Digg
  • Del.icio.us
  • StumbleUpon
  • Reddit
  • RSS

Cleaning up my crack(er) addiction


Since starting the October Unprocessed 2013 Challenge, I feel like Old Mother Hubbard.  I can still give my dog a bone because he would sell my soul three times over for a Milkbone, but my cupboards are bare since I committed to removing what processed foods were left from my nearly year-long attempt to change my eating habits. 

You can see what my pantry looked like back in April, and I'm pleased to admit that my shelves are no longer straining under the weight and pressure of entirely too much food for one person.  Ridding my supply of processed items was a huge relief but also scared the pants off of me.  What would I reach for during those moments of weakness when I want something to eat RIGHT NOW?

More than halfway through the challenge I'm pleased to report that I haven't starved to death (yet) but it will probably take me just as long to restock my pantry with the good stuff as it did to rid it of the demons.  There's a lot of label reading involved, alot of products in the stores to weed through and one thing I've learned is that just because it's organic, all-natural or non-GMO doesn't mean it's going to taste good and I'm going to like it.  Some of the things I've tried so far, I would rather starve to death than have it in my pantry again. 

I needed to replace my crack(er) pipe addiction with an acceptable alternative quickly, before I committed really bad food-related crimes.  Of course I could make my own but who the bleep has time for that?  Triscuits were my first attempt at finding an acceptable crack alternative, but after doing some research on canola oil (one of the ingredients in Triscuits) and considering I could consume enough of them to kill a lab rat, I decided to steer clear of them.

Have you ever looked at the ingredients listed on the box of your favorite crackers?  Check out the ingredients on this box of Kashi crackers - a brand that markets itself as a healthy, nothing artificial, whole grain good-for-you product.  More than 20 items listed in something you can make at home with less than 5 ingredients.  And God only know where that "natural flavor" came from.  No thanks. 


I started paying attention to sections of the grocery store that I normally blew past, never giving a second glance or much thought to and the Jewish section yielded some really great cracker finds!  Check out the ingredients on the Streit's 100% Whole Wheat Matzo crackers and the Manischewitz brand of matzo.  Pretty simple stuff, huh?


Now check out the ingredients on the Kavli Crispy Garlic crackers.  While it does contain sugar, there's not even enough of it to even register on the RDA scale so I decided they were acceptable.


Finding good, clean, unprocessed convenience items takes a bit of effort and some thinking and looking outside the box.  If there is a questionable ingredient, look it up online and I guarantee you'll find more than you need to know about it (and if it's questionable to begin with that should tell you something, no?)

It's time to slow down, unwind, unprocess and pay attention to what goes into your mouth.  Treat your body like the temple it is meant to be instead of a make-shift pup tent.  You won't regret it and I can promise there are much-better-for-you alternatives out there to the things you currently love to eat.  If I can clean up my crack(er) addiction,  I have faith that you can too!

Pin It
  • Digg
  • Del.icio.us
  • StumbleUpon
  • Reddit
  • RSS

Shaken or Stirred?


Since I pledged to participate in the October Unprocessed 2013 challenge, I've been searching for recipes with lots of bang for the buck when it comes to flavor.  This Rachael Ray recipe for mussels simmered in a dirty martini sauce fit the bill for me.

This may not fit the "real food" model for some people with the addition of alcohol, but it does pass the "kitchen test" and alcohol is addressed in the FAQs.  It wasn't my intention to cut alcohol out of my diet anyway, because the thought of no alcohol forever (let alone for a whole month) fills me with absolute terror. 

I used frozen mussels from the frozen seafood section of my grocery store because I've never had good luck with the fresh mussels actually being fresh.  Plus, I barely have time to shave my own legs in the mornings, so where would I find time to scrub and de-beard a couple dozen crustaceans?  I keep a couple of packs of mussels in my freezer for the occasions when I crave the mussels in spicy tomato sauce or this delicious paella.  

And just like a perfectly mixed martini served in a frosty glass after a hard day's work, this recipe didn't disappoint.  I loved the olive pesto so much that I skimped on adding it all to the dish and ate some with cheese and crackers during the week for a snack.  

Rachael Ray may drive me to drink, but the woman has awesome mussels!


Dirty Martini Mussels
Serves 4

From rachaelraymag.com

1 cup packed flat-leaf parsley
¾ cup pitted green olives
3 tablespoons olive brine
4 cloves garlic, pasted or grated
1 lemon, zested and juiced
6 tablespoons extra virgin olive oil
2 small onions, chopped
Salt and Pepper
½ cup good quality gin
¼ dry vermouth
3 pounds medium mussels (about 4 dozen) scrubbed and de-bearded
3  tablespoons butter
Warm crusty bread, torn in chunks for mopping sauce

Using a food processor, finely chop the parsley, olives, garlic and lemon zest.  Pour in ¼ cup EVOO and the lemon juice and process into a pesto.

In a large pot or deep skillet with a tight fitting lid, heat the remaining 2 T of EVOO, 2 turns of the pan, over medium high heat.  Add the onions and cook until softened, 5 to6 minutes.  Season with salt and pepper.  Stir in the pesto.  Add the gin and vermouth and cook until reduced, about 1 minute.

Add the mussels, cover and steam until opened, 6 to 8 minutes; discard any unopened shells.

Add the butter to the mussels and shake the pan to melt it into sauce.  Serve with the bread for mopping.

Pin It
  • Digg
  • Del.icio.us
  • StumbleUpon
  • Reddit
  • RSS

Attack of the cherry tomatoes


I'm convinced that cherry tomatoes are going to one day take over the world as they certainly took over my garden this year.  I even noticed rogue plants springing up in the flower containers where I've used my compost as fertilizer.

I've eaten a ton of them in salads. I've whizzed up countless ones for fresh salsa. My freezer is full of them to be used later for soups and stews.  Tomatoes were taking over my life and I was running out of ideas.  But even with the overrun, I'm sort of sad to see them dwindle away - my plants are still loaded with bright green orbs but I doubt they'll ripen much now that the weather is turning cooler. 

I found this little gem of a recipe in the August 2013 issue of Eating Well magazine and it was the perfect way to finish off my bounty of cherry tomatoes.  I'm too cheap to buy "real" lobster meat and I didn't want shrimp, so I used langostino for this recipe.  It's a lobster-like crustacean and very similar to crayfish (or crawdaddy, if you're from the South.)

This Seaside Tomato Gazpacho would be great for a light meal during the hotter months of summer or a fun party appetizer served in small shot glasses.


Seaside Tomato Gazpacho
Eating Well magazine, August 2013

serves 4 (1-1/2 cup each for entree) or 6 (1 cup each for appetizer)

printable recipe

3 cups low-sodium vegetable juice, such as V8 or R.W. Knudsen Very Veggie
1 orange bell pepper, diced
1 1/2 cups diced fennel bulb or celery, plus 1/4 cup fennel fronds or celery leaves, divided
1 cup diced tomato
1/3 cup finely diced red onion
2 tablespoons red-wine vinegar
2 tablespoons extra-virgin olive oil
1 teaspoon Old Bay seasoning
1/2 teaspoon freshly ground pepper
1/4 teaspoon salt
2 cups chopped cooked lobster from two 1- to 1 1/4-pound live lobsters or 2 cups chopped peeled cooked shrimp
1 avocado, chopped

1.  Combine vegetable juice, bell pepper, fennel (or celery), tomato, onion, vinegar, oil, Old Bay, pepper and salt in a large bowl. Cover and refrigerate until chilled, at least 2 hours and up to 3 days.

2.  Top each serving of gazpacho with 1/2 cup lobster (or shrimp) for an entree portion or 1/3 cup for an appetizer serving. Garnish with avocado and fennel fronds (or celery leaves).

Make Ahead Tip: Prepare through Step 1. Cover and refrigerate for up to 3 days. Finish with Step 2 just before serving.

Pin It
  • Digg
  • Del.icio.us
  • StumbleUpon
  • Reddit
  • RSS