RSS

I currently live in Charlotte, NC and after spending 7 years as a personal chef and caterer, I am now happy to share my love of cooking with friends and family. My heart is in the kitchen, but my soul is in the stars!

Showing posts with label holidays. Show all posts

I Heart You, Valentine

It's no secret that I love the Boy Toy more than I love goat cheese.  And that, people, is ALOT.  As long as we've been together, I still get all twitterpated about date night with him. 

We had initially planned to go back to "our place" for Valentine's Day - the same restaurant where we've had dinner for the past two years, but after Boy Toy brought home a $300 souvenir speeding ticket from our California trip a few weeks ago, I made the offer to have dinner at my house instead.  I don't get the opportunity to cook for him often and I was uber excited about our plans all week.  I planned an easy-to-prepare menu complete with a sinful dessert and picked up a couple of bottles of wine that I had been wanting to try.  (This label combination made me giggle because I'm dirty like that.  50 Shades of Grey ain't got nothing on me!)


During our flights to and from California, Boy Toy entertained himself by streaming episodes of Diners, Drive-Ins and Dives on my iPad (am I turning him into a foodie??) and at one point he turned to me and asked if I thought he would like polenta.  "Yes! Of course you would!" I said. (I really had no idea if he would or not but I always try to further his interest in food so I was very agreeable that he would absolutely LOVE it while at the same time wondering if I would even like it.)  I decided the next chance I had, I would test the polenta theory.  Keep in mind that you do have to plan ahead when making it as it requires several hours (or overnight) to cool.


This holiday is all about love and spending time together and we had the perfect evening - great food (the polenta got two thumbs up from both of us), great wine and FABULOUS company! I hope you enjoyed Valentine's Day with your someone special and I hope you enjoy these recipes for your next special occasion. 


Lemon Rosemary Steak with Mushrooms
Serves 4

4 (6-ounce) grass fed sirloin steaks, about 1/2 inch thick
Salt and freshly ground pepper
3 tablespoons extra virgin olive oil
2 cloves garlic, peeled and smashed
1/2 pound fresh mushrooms, sliced
1 spring fresh rosemary
juice of 1 lemon
1/4 cup water

Pound steaks lightly with meat mallet to slightly thin.  Season both sides of steak with salt and pepper.

In a large skillet over high heat, combine 2 tablespoons of olive oil and garlic cloves. When the pan is hot, add 2 of the steaks and cook for 1 minute. Flip steaks, add rosemary to the pan and cook for 1-2 minutes more. Transfer steaks to a platter and keep warm. Add remaining olive oil and repeat process with steaks, garlic and rosemary. Remove steaks to platter and add mushrooms to pan and saute for about 2 minutes. Add lemon juice, water and any juices accumulated from steaks, lower heat to medium and cook for about 2 minutes, scraping up any browned bits from the bottom of the pan. Cook about 1-2 minutes more.

Discard rosemary and garlic, spoon pan sauce and mushrooms over steaks and serve.


Polenta cakes topped with mushroom pan sauce from the steaks


Polenta Cakes
Serves 4

1 cup cornmeal
3 cups water
1 teaspoon salt
4 tablespoons butter, divided
shredded cheese (Cheddar or Parmesan works great)

Bring water and salt to a boil. Gradually sprinkle in cornmeal, whisking continuously until all cornmeal has been added. Simmer until mixture becomes thick, about 20 minutes, stirring occasionally to keep cornmeal from sticking to bottom.. Once mixture is done cooking, stir in butter and pour mixture into a lined baking sheet making sure polenta is at least ½” thick. Cover with plastic wrap and place it in the refrigerator to cool for at least 2 hours (up to 2 days).

Slice polenta into 8 cakes. Melt 1 tablespoon of butter and place 4 polenta cakes in a skillet. Grill cakes for 5 minutes, until golden brown. Flip and grill until other side is golden brown, about 4-5 minutes. Remove from skillet and repeat with remaining polenta.

Serve topped with shredded cheese.   I also topped with mushrooms and pan sauce from the steaks


Molten Chocolate Lava Cake with Caramel Filling
Serves 4

1 stick unsalted butter, plus melted for brushing
1 tablespoon unsweetened cocoa powder
1/4 cup plus 1 tablespoon all-purpose flour
6 ounces 70% dark chocolate, chopped
1/2 cup granulated sugar
3 large eggs, at room temperature
Pint of salt
4 tablespoons store-bought caramel sauce

Preheat oven to 425 degrees.  Brush four 6-ounce ramekins with melted butter.  In a small bowl, whisk the cocoa powder with 1 tablespoon of the flour; dust the ramekins with the cocoa mixture, tapping out the excess.  Transfer ramekins to a sturdy baking sheet.

In a medium saucepan, melt 1 stick of butter with the chocolate over very low heat, stirring occasionally.  Let cool slightly.

In the bowl of an electric mixer, beat granulated sugar with the eggs and salt at medium-high speed until thick and pale yellow, about 3 minutes.  Using a rubber spatula, fold in the melted chocolate until no streaks remain.  Fold in the 1/4 cup flour.

Spoon 2/3 of the batter into the prepared ramekins, then spoon a tablespoon of the caramel sauce on top.  Cover with the remaining chocolate batter.  Bake in the center of the oven for 16 minutes, until the tops are cracked but the centers are still slightly jiggly.  Transfer ramekins to a rack and let cool for 5-8 minutes.

Run the tip of a knife around the edges of each cake to loosen.  Invert a small plate over each cake and, using pot holders, invert again.  Carefully lift off the ramekins.    

Pin It
  • Digg
  • Del.icio.us
  • StumbleUpon
  • Reddit
  • RSS

Port Wine Cranberry Chutney


I can't help but feel a little resentment when it comes to preparing food for others for the holidays.   Boy Toy is King of the deep fryer, so for the last two Thanksgivings I've been in charge of preparing side dishes to compliment his beautiful birds.  We host his family members for the meal and I understand that my idea(s) of tradition may be somewhat foreign to others.

My family's Thanksgiving meal consisted of most things that I continue to prepare today and for two years now, most of my food has gone untouched because it is not what Boy Toy's family is used to.  As time has gone by and the more I've socialized with them around the table, I've come to realize that most of his family members are used to (and prefer) processed, packaged foods.  The mashed potatoes they know come from a box, green beans come from a can, and bread is from a plastic bag with directions to "brown and serve."  I know that people tend to stick with what they are familiar with and what they like, but it is very disheartening when my hard work and love go into food that is greeted by grimaced faces and rude comments (someone actually told me they "wouldn't cross the street" for my made-from-scratch chicken tetrazzine.  He ended up eating a sleeve of saltine crackers for dinner that day.)

Last year I made the declaration that I would no longer spend so much time, energy and money preparing what I thought was "good" food for the holiday.  But as I started giving thought to the menu for this holiday season, I had a revelation.  I decided that I would continue to make my "weird" food and they could take it or leave it.  I made reference in my last post about there being no time like the present to introduce real food to Boy Toy (who is a little more open-minded about my food) and his kids and I'm going to continue with that mindset.  I'm not going to compromise what I love about Thanksgiving - especially when I am tasked with preparing the food.  Hopefully as my food continues to appear on the table year after year, someone will give in, try it, and decide it's not so bad after all.

This year I'm arriving at the Boy Toy home loaded down with cornbread dressing, creamed corn, spinach casserole, made-from-scratch green bean casserole, sweet potato casserole, pumpkin pie, cranberry tart.  and this port wine cranberry chutney.

I will be thankful for the opportunity to spend time in my kitchen preparing the things that I love and everyone else can be thankful that McDonald's is open!

Port Wine Cranberry Sauce 
servings = makes about 2 cups

½ cup ruby port
Zest of 1 orange
½ cup fresh orange juice
12 ounces fresh cranberries
¼ cup honey
2 tablespoons candied ginger, chopped

In a medium saucepan, combine port wine with orange zest and orange juice and bring to a boil. Add the cranberries, honey and ginger and simmer over medium-low heat until the sauce is jam-like, about 15-20 minutes. Transfer to a serving bowl and serve warm or at room temperature.

Can be made ahead and refrigerated for up to 2 weeks.

Pin It
  • Digg
  • Del.icio.us
  • StumbleUpon
  • Reddit
  • RSS

Made-From-Scratch Green Bean Casserole


Green bean casserole - the prerequisite for attending Thanksgiving dinner at the Boy Toy household. It’s like the “No shoes, no shirt, no service” sign posted on the door of restaurants and convenience stores. “No green bean casserole, no entry."

But the traditional version of his beloved casserole, which contains a processed can of cream of mushroom soup, goes against my real food policy and since I’m in charge of side dishes this year, I’ve decided to contribute a made-from-scratch version. Will the Boy Toy still love me after I’ve desecrated his favorite dish? Will the other dinner guest choose to go hungry instead of trying something new (as they are sometimes apt to do when my “odd” food is placed before them?)

I know what you’re thinking - it’s just one time per year and I should allow Boy Toy to have this indulgence, right? But here’s the thing – how am I ever going to get him turned on to the idea of “real” food if he isn’t exposed to it? How will he ever know that the homemade version of a favorite dish can be just as good – even better – than the original version? I’m personally striving for an unprocessed Thanksgiving this year, at least with the food items that I contribute and with the foods of others that I consume.

Unprocess your Thanksgiving with this made-from-scratch Green Bean Casserole and give thanks that it’s so delicious! You can prepare the cream of mushroom soup a few days in advance but it is best to prepare the onions just before topping the casserole.

Made-from-Scratch Green Bean Casserole
servings = 6

4 cups green beans, steamed
½ cup milk
1 teaspoon soy sauce
For the cream of mushroom soup:
2 cloves garlic, minced
1/2 small onion, diced
1/2 cup mushrooms, diced
1/4 cup butter
1/4 cup whole wheat flour
1 cup milk
3/4 cup chicken broth
For the onions:
1 small onion, thinly sliced
1 cup milk
1 cup whole wheat flour
Oil or butter for frying

For the soup: Sauté garlic, onion and mushrooms and set aside. Melt butter over medium heat. Whisk in flour. Cook for about 2 minutes. Add milk and broth. Add sautéed garlic, onion and mushrooms.

Bring to a boil; reduce heat and simmer, stirring occasionally, until it reaches desired consistency (about 10-15 minutes). Season to taste with salt and pepper.

To assemble the casserole: Combine green beans, ½ cup milk, soy sauce and cream of mushroom soup in a 1-1/2 quart casserole. Bake at 350 degrees for 25 minutes or until mixture is hot and bubbly. Sprinkle with fried onions. Bake for 5 minutes or until the onions are golden brown.

For the onions: While the casserole is baking, soak onions in milk for 5 minutes. Dredge onions through flour to coat. Heat oil or butter in large skillet and fry onions in batches, stirring as needed to brown evenly. Drain on paper towels and season to taste.

Pin It
  • Digg
  • Del.icio.us
  • StumbleUpon
  • Reddit
  • RSS

Give thanks for pumpkin pie


When I was a kid, I overheard two woman having a conversation about how they dreaded the holidays.  They were griping about having to shop and wrestle with the tree and this, that and the other and they were just going to be so glad when it was all over.  As a kid, I just could not imagine the horrid thought of not wanting to celebrate the holidays!  How could you not look forward to putting up a Christmas tree and baking cookies and going to parties and having loads of presents from Santa??  I vowed right then and there that I would never be a grumpy grown-up like them.

But guess what? 

In those years of teen-angst when I wanted nothing more than to become an adult, I didn't realize just how much of a rip-off adulthood actually is.  I didn't know that I would grow up to become a woman who did not acquire the seemingly mandatory female shopping gene and someone who hated crowds. I didn't realize it would be challenging to scrape together extra cash for buying gifts because there were so many bills that needed to be paid.  And where does one find the time to totally redecorate their home and bake dozens of cookies and attend holiday parties after they work 40+ hours each week? 

I can totally sympathize with those women from long ago and fully understand what they were talking about.  Now, don't get me wrong - I've managed to overcome these obstacles in years past what with the advent of online shopping and 0% interest credit cards and such. But on top of everything else, I have had alot of sickness in my family these past few months and a recent tragic death and I don't feel like "doing" the holidays this year.  Even my favorite holiday, Halloween, passed by without much fanfare this year and Thanksgiving will be much the same.  I don't care about all the hoopla and bling - I just want to spend time with my family and loved ones and be thankful for yet another year together. 

With my recent switch to more real foods, I wanted to prepare a Thanksgiving feast this year with nothing but real food.  No processed soups in my green bean casserole.  No canned turkey gravy and no white flour in my breads and desserts.  But there was no motivation to research and test recipes.  No excitement to shop for ingredients.  No desire to prepare food for days to impress my guests. 

Boy Toy is in charge of frying the bird and I'll do the regulatory sides, but nothing fancy this year.  I made my favorite Trader Joe's Copy Cat Cranberry Walnut Tart and cranked out a couple of pumpkin pies.  I used my secret ingredient in the pies: Chinese Five Spice.  I love this stuff!  It is a blend of cinnamon, nutmeg and cloves but the addition of star anise, Sichuan pepper and fennel give it a subtle kick. I like to use it interchangeably in recipes like my cinnamon roll recipe that calls for alot of cinnamon.  I know it sounds weird to use peppers and fennel in a sweet recipe, but trust me, it works.  The mixture is not overpowering at all and leaves people wondering what the taste is and feeling like they can't quite put their finger on what it is exactly . 

Serve this pie with freshly whipped cream and give thanks that it is so easy to make! 


Easy Pumpkin Pie
Serves 8

1 frozen deep dish pie crust, thawed
Filling:
3/4 cup sugar
1 teaspoon Chinese Five Spice
1/2 teaspoon salt
1 can (15 oz) pumpkin
1-1/4 cup evaporated milk
2 eggs, beaten

Heat oven to 425.  In a large bowl, combine filling ingredients.  Pour into pie crust.  Carefully transfer to oven rack.

Bake for 15 minutes.  Reduce oven temperature to 350 and continue baking 30-40 minutes longer or until knife inserted near the center comes out clean.  Cool 2 hours; refrigerate until serving time.

Serve with fresh whipped cream.

Pin It
  • Digg
  • Del.icio.us
  • StumbleUpon
  • Reddit
  • RSS

Dark Chocolate Brownies + Cherry Buttercream Icing = True Love


Looking for a treat to express your love this Valentine's Day?  Try these Dark Chocolate Cherry Cordial Brownies - they taste like chocolate covered cherries, only way much better.  The frosting alone is sweet enough to land your beloved in the dentist chair for a shiny new filling but the combination of cherries and dark chocolate come together for pure decadence.

These were quick and easy to make -  I pulled them together on a whim for Boy Toy's kids for Valentine's Day and sent them quickly out the door so I wouldn't be tempted by them.  I'll admit to eating a small sliver just for the sake of making sure they weren't poisonous or anything.  I snapped this photo with my phone just as they were being snatched off my kitchen counter, so it's not my best photography work.  When you are preparing the icing, make sure you beat the butter and sugar until it's fluffy before adding the other ingredients.  I was in a hurry and just threw everything into the mixer so the butter ended up separating and making the icing looking clabbered.   I really don't think my young and eager Valentines minded though - or even minded that I didn't have time to drizzle the melted chocolate on top to make them all pretty.

Dark Chocolate Cherry Cordial Brownies
from A Little Bit Crunchy A Little Bit Rock n' Roll 

Printable Recipe
 
For the brownies:
1/2 cup unsalted butter
1/4 cup dark chocolate chips
1 cup sugar
2 eggs
1 teaspoon vanilla extract
1/3 cup dark cocoa powder
1/2 cup flour
1/4 teaspoon salt
1/4 teaspoon baking powder
For the frosting:
2 cups powdered sugar
1/2 cup unsalted butter, room temperature
10 ounce jar maraschino cherries, drained & juice reserved
1 tablespoon milk
1 to 2 teaspoons maraschino cherry juice
1 teaspoon almond extract
1 teaspoon vanilla extract
1/2 cup dark chocolate chips
1 teaspoon vegetable oil

Preheat oven to 350 degrees.  Grease an 8x11 inch pan.

Drain the cherries and coarsely chop them.  Spread them out on paper towels to dry slightly.

In a small bowl, whisk together the flour, dark cocoa powder, salt, and baking powder.

Melt the butter and pour into a large bowl.  Whisk in the dark chocolate chips until melted.  Whisk in the sugar and then the eggs.  Stir in the dry ingredients.

Pour into the prepared pan and bake for 20-25 minutes.  Cool completely.

For the frosting:  beat the butter together with the powdered sugar until fluffy.  Add extracts, milk and maraschino cherry juice until desired consistency is achieved.  Fold in the chopped cherries.

Frost the cooled brownies.  Chill for 30 minutes and then cut into squares.

Melt the remaining 1/4 cup dark chocolate chips and stir in the oil.  Drizzle over the frosted cut brownies. 


Pin It
  • Digg
  • Del.icio.us
  • StumbleUpon
  • Reddit
  • RSS

12 Days of Cookies: Christmas Crack


Let's just call a spade a spade here, people. It's called Christmas Crack because that's what it is - one bite and you can't stop. You're hooked. An addict. Much like what happens when you log onto Pinterest, which is where I found this recipe. It appears to have originated from A Southern Grace.

I'm betting you probably keep everything needed to make these in your pantry as staples, so you can fuel your crack addition anytime you want.  It's quick.  It's easy.  It's addictive (did I mention that?)

And can you believe what it's made with?  Saltine crackers.  Pretty soon the grocery store is going to start keeping saltines behind a locked case and you'll need to show and ID and give personal information for their database in order to buy them.  They're going to know you're an addict....they'll see the crazed look in your eyes.

Go make a batch NOW and join me on the dark side. 
 

Christmas Crack

1 cup unsalted butter (do not use margarine)
1 cup brown sugar, packed tightly
2 cups semi-sweet chocolate chips
40 saltine crackers

Sprinkles, nuts or anything you'd like to use a garnish, if desired

Preheat oven to 350ºF. Line a 15x10-inch jelly roll pan or a 12x17-inch cookie sheet with foil and spray with non-stick spray. Lay a flat layer of crackers out on the foil.  Melt the sugar and butter until boiling.  Reduce the heat and simmer, uncovered, for 5-6 minutes or until mixture is thickened and sugar is completely dissolved (if you don't dissolve the sugar completely, your toffee will have a grainy texture).  Pour this mixture over the crackers and spread to coat evenly. Bake for 8-10 minutes, or until the toffee becomes bubbly.  After removing the pan from the oven, let it sit for 3-5 minutes.  Sprinkle on the chocolate chips, let them soften and melt, and then spread them into an even layer.  You can add nuts, cracker crumbs, or whatever else you'd like as garnish at this point.  Let cool and, if desired for expediting purposes, refrigerate until hardened. Break into pieces the size of your choice.

Pin It
  • Digg
  • Del.icio.us
  • StumbleUpon
  • Reddit
  • RSS

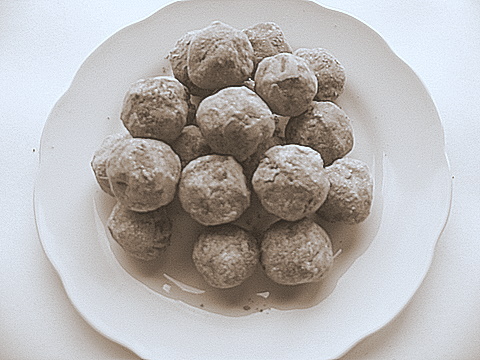
12 Days of Cookies: Chocolate Goat Cheese Truffles


I wanted to include this tasty little treat in my "12 Days of Cookies" posts even though it's not a cookie.  I only hope that Santa shares in my love of all things goat cheese. This recipe came from Ali over at the now defunct blog called Something So Clever.  I couldn't find sweetened cocoa powder so I just sifted some powdered sugar and unsweetened cocoa together and it worked just fine.

Chocolate Goat Cheese Truffles

6 ounces bittersweet chocolate, chopped
6 ounces fresh (mild) goat cheese, at room temperature
1/4 cup confectioners' sugar
1/2 teaspoon vanilla extract
1/4 cup sweetened cocoa powder, sifted

In the top of a double boiler, or in a metal bowl set over a pot of simmering water (make sure the water does not touch the bowl), melt the chocolate, stirring until it is smooth. Set the melted chocolate aside to cool for a few minutes while you prepare the rest of the ingredients.

In a bowl whisk together the goat cheese, sugar, and vanilla until it is light and fluffy. Whisk in the melted chocolate until it is well combined. Chill, covered, until it is firm, at least 1 hour.

To form the truffles, take a heaping teaspoon of the chocolate/cheese mixture and lightly roll it into a ball with your hands. Roll the finished truffles in the sifted cocoa powder, set them onto a baking sheet lined with waxed paper, and chill until they are firm, about 30 minutes. The truffles can be stored in an airtight container in the refrigerator for up to 3 days.

Pin It
  • Digg
  • Del.icio.us
  • StumbleUpon
  • Reddit
  • RSS

12 Days of Cookies: A trio of treats

Peppermint Pinwheels, Chocolate Caramel Delights and Toffee Shortbread

This trio of cookies was the hit of the cookie exchange party that I hosted a few years ago (and now that we know my deep dark secret about who baked most of the cookies....)

I will admit to making the Peppermint Pinwheels and the Chocolate Caramel Delights, but I'll give all the credit to my friend Dawn for the Toffe Shortbread.  You can't go wrong with any of these treats and they all hold up well on cookie platters.

You'll also find a recipe for George's Lavender Cookies in this past post and yes, I made those for the party as well.  Now that I have my own crop of lavender growing, I can't wait to make those more often. 

I still have two more recipes to share to make your 12 Days of Cookies platter complete!

Pin It
  • Digg
  • Del.icio.us
  • StumbleUpon
  • Reddit
  • RSS

12 Days of Cookies: Molasses Cookies

soft and chewy molasses cookies

I love gingersnap cookies but the ones that you buy in the store can be so hard and dry that they dang near come close to breaking a tooth when you eat them.  These soft and chewy molasses cookies from the Silver Palette cookbook have a slightly spicy and peppery bite from the addition of cloves and ginger and beat the Christmas socks off of store-bought any old day.   They bake up perfectly and stay chewy for days when stored in an airtight container. 

Leave a batch of these out for Santa and I guarantee you'll get lots of presents under your tree!


Pin It
  • Digg
  • Del.icio.us
  • StumbleUpon
  • Reddit
  • RSS

12 Days of Cookies: Gingerbread Houses


Some 30+ years ago, my mother attended a holiday workshop hosted by the Sullivan County Extension Homemakers (which is the grown-up version of 4-H) to learn how to make gingerbread houses. She came home that evening sporting her decorated house, the recipe for gingerbread dough and a cut-out pattern for future constructions of the house. As a kid, I was mesmerized by her cute little bungalow-style house smothered entirely in candy and sugary sweet icing and to this day I'll admit to still being verklempt anytime I see gingerbread construction.

It wasn't something we did together every year, but I can remember my mom and I making the houses together a few times and giving them as gifts to my school teachers, grandmothers, and some very close friends. If you got one of our houses, you were somebody special because this project was very detailed, time-consuming, expensive and alot of hard work.  I see these all-inclusive gingerbread house kits in the stores with everything already baked and candy and icing included, but I cannot and will not succumb to buying them because for me, it's a labor of love and a tradition to make them with my own two hands.


This year I am so excited to share my and my mom's tradition of decorating gingerbread houses with Boy Toy's daughter and some of her friends (I was probably more excited than they were!)  I volunteered to host a building and deocorating party for them this past Saturday afternoon and everyone had a great time - even the grown men who originally thought candy and icing was only for girls! 


I prepared the dough and baked the houses a week ahead of time because I've found that if you construct the houses right after baking, the pieces are soft and are easier to break or crumble.  I leave the pieces out on the counter for a few days to let them harden. 


The windows are made with crushed Jolly Rancher candies and I make some of them solid colors but I love the stained glass window effect of mixing two colors together in the same window.  When making the windows, make sure you use plenty of candy - it's okay if it's heaped up just a bit because it will melt and fill the space nicely (just make sure you don't get any bits of candy on the walls.)  I purchased 12" x 36" pieces of white styrofoam and cut them into thirds to act as the base for the house and I used Wilton Meringue powder to make the royal icing but you can make your own per the recipe below. 


Waiting for the decorators to arrive
The party guests ranged in age from 9 to 11 so I went ahead and constructed the houses about an hour before they arrived so the icing would have time to dry a bit before adding the candies.  I feared the kids' attention span wouldn't allow for the construction AND decorating and I was right - they were all about the candy and icing.  A great time was had by all and I'm hoping it is something that will become a holiday tradition in the Boy Toy household.

The gingerbread 'hood
Visit this post for my tried and true gingerbread dough recipe and to see some of my past housing creations.  I've included below another copy of the pattern that I've used every year as I noticed the link on my original post is no longer valid (and I'm too lazy to try and fix it). 


If you'd like even more ideas, check out my Flickr slideshow from last year's gingerbread house competition at the Ballentyne Resort here in Charlotte. 

Pin It
  • Digg
  • Del.icio.us
  • StumbleUpon
  • Reddit
  • RSS

12 Days of Christmas: Chocolate Chip Espresso Cookies

Chocolate Chip Espresso cookies


Holiday cookie platters are usually all about having pretty decorated cookies and "fancy" cookies, but I think you should include some all-time favorites that people enjoy as well.  Today I'm resurrecting yet another one of my most favorite cookies recipes:  Chocolate Chip Espresso Cookies.  No other chocolate chip cookie compares to this one, in my opinion, as the marriage of espresso and chocolate is divine.  No worries if you can't find espresso powder - you can substitute 4 teaspoons of instant coffee granules and get the same result.

The trick to getting these cookies to turn out perfectly is refrigerating them for at least an hour.  I usually scoop them onto parchment paper and then pop them right into the oven to bake.  You can also roll them into a log, refrigerate, and then slice into rounds for baking.  Bake them with or without nuts - it's your choice.

I hope Santa brings a whole platter of these just for me! 

Pin It
  • Digg
  • Del.icio.us
  • StumbleUpon
  • Reddit
  • RSS

12 Days of Cookies: Sugar Cookies


As I mentioned in a previous "12 Days of Cookies" post, it has been my tradition for many years to make loads of cookies and candy this time of year to have around the house for visitors and to give away to friends. But I recently saw some photographs depicting a not-so-skinny-anymore person who looked alot like me and who was trying to squeeze into wearing my clothes. It was obvious from the photographs that this person has added some poundage lately and should not be tempted by cookies lying around her house, so the decision was made to not participate in the marathon cookie baking tradition this year. I didn't think it was fair, though, to leave you high and dry for cookie recipes this holiday season so I thought I'd resurrect some oldies but goodies from Wish Upon A Chef's kitchen.

This sugar cookie recipe is a snap to mix up, easy to work with and the cookies hold their shape really well during baking. I love to make different traditional holiday shapes but I always crack myself up making these ABC (Already Been Chewed) sugar cookie guys.  I strategically hide them on the cookie platters that I give to my friends and how I wish I could see their faces when they find these lurking in with the rest of the beautiful cookies. Only those who know my warped sense of food humor understand...

Click on over to the original post for the recipe and the link for buying these kooky cookie cutters. Have a Macabre Christmas!

ABC sugar cookies

Pin It
  • Digg
  • Del.icio.us
  • StumbleUpon
  • Reddit
  • RSS

12 Days of Cookies: Rosemary Caramel Cookies


It's hard to believe that it's been three years now since I hosted a holiday cookie exchange with my friends...my how time flies!  I have to make a confession about that party -  a dark secret I've been holding on to for all this time.  The day before the party, several of my friends called to say they weren't able to come because they didn't have time to bake their cookies and didn't want to show up empty-handed.  This was pretty much going to wipe out most of my guest list because it was a small affair and I was faced with having to cancel the party.  It really wasn't so much about them bringing cookies or not, I really just wanted to spend time with my friends during the holidays so I decided to bake all the cookies if they would still promise to come. 

Yes, that's right.  I bribed all of my friends to come to my cookie exchange party by agreeing to bake all of the cookies myself.  I'll probably have to tie a pork chop around my neck next just to get the dog to play with me.  

The party went off without a hitch, everyone took home delicious treats and I got to enjoy the holiday baking season and share with my friends.  That's what it's all about for me. 

These Rosemary Caramel cookies are still, to this day, one of my favorite cookie recipes.  It's a delicious combination of shortbread cookies sandwiched together with rosemary infused caramel.  Unfortunately the only photos I have of them are this pre-I-want-to-learn-how-to-take-decent-food-photos blurry photo and the quick glimpse of them on the top right of the table at my cookie exchange, but don't let that discourage you from trying them.  Click the photo to be directed to the recipe and I promise you won't be disappointed!

Rosemary Caramel Cookies, compliments of Bon Appetit

Pin It
  • Digg
  • Del.icio.us
  • StumbleUpon
  • Reddit
  • RSS

12 Days of Cookies: Canine Cookies


Don't forget about man's best friend this holiday season - after all, our four-legged friends give so much unconditional love to us and work really hard (like dogs, practically) protecting and guarding the homestead.  My little guy can make a full day of work out of guarding the comforter on my his king-size bed and protecting it from being used by anyone else. 


Sometimes the work is very grueling and tiresome, but nevertheless he's always there keeping my side of the bed warm and making sure no one else sneaks in and steals it.


These canine cookies from Tasty Treats for Demanding Dogs are really simple to make and if your kids are getting bored and a bit unruly during their holiday break, turn them loose in the kitchen to make these.  Most likely you already have everything in your pantry to make them with the exception of the baby food (unless of course you have a two-legged baby too).  If your dog is sensitive to store-bought brands of treats, this is a great book to have because the recipes are really simple and alot of them use regular people food.  It is available on Amazon.com for really cheap.   And wouldn't this make a great Christmas gift for pup!


The cookies do puff a bit during baking so make sure to only roll them about 1/4" thick.  I used a medium-sized bone shaped cookie cutter and got approximately 50 cookies.


You will be tempted to give Fido a cookie straight away as soon as they cool (especially if he's a moocher like my boy), but he'll be happier than a kid at Christmas if you let them dry overnight because they become hard and crispy just like the store-brand cookies that Santa usually brings.


Canine Cookies
yield: approximately 50-90 cookies, depending on size of cutter

2 cups whole-wheat flour
1/2 cup unbleached all-purpose flour
1/2 cup nonfat dry milk or whey powder
1/2 tsp garlic powder
1 large egg
1 TBLS molasses (optional)
4.5 oz jar chicken-soup baby food
3/4 cup broth or drippings, or sufficient for forming dough

Postition rack in the center of the oven and preheat to 400 degrees.  Lightly grease or use parchment paper to line two cookie sheets or baking trays.

In a large bowl, using a fork or wire whisk, blend the flours, dry milk and garlic powder.

In a medium bowl, using a wire whisk or electric mixer on medium speed, beat the egg until foamy before beating in the molasses, baby food and broth.

Using a large spoon, spatula or your hand, combine the two mixes, blending until the mixture pulls away from sides of the bowl and forms a soft dough.  If the mixture seems a little dry, add a little broth, a tablespoon at a time.

Turn the dough onto a lightly floured flat surface, and using a rolling pin, roll out to 1/4" thick.  Use a 1-1/2" round cookie cutter to cut out as many cookies as you can, reworking the scraps as you go.  The doug will become still as it is reworked.

Place the cookies side by side on the prepared cookie sheets or baking trays.  Bake for 15-20 minutes or until the cookies appear very dry and the edges are light golden brown.  Remove the trays from the oven and cool to room temperature.  Turn off the oven.

When the cookies have cooled completely, put all of them on a single baking tray and return them to the cooling oven.  Leave them undisturbed, without opening the oven door, for 8 to 16 hours. 

Please note:  Some dogs may be allergic to garlic or sensitive to dairy products. 

Merry Christmas to all and to all a good night!

Pin It
  • Digg
  • Del.icio.us
  • StumbleUpon
  • Reddit
  • RSS

12 Days of Cookies: Chocolate Andes Mint Cookies


My holiday cookie recipes consist mostly of tried and true favorites, alot of which date all the way back to my childhood years when my Mom and I would make goodies together for several days to fill dozens of metal tins with treats for all those who passed through our doors to enjoy.  Through the years I've amassed my own collection of vintage cookie tins and always look forward to filling them each year for friends and family.

Several years ago, I decided that I was tired of my recipes and wanted to make different cookies so I purchased several magazines touting things like "award-winning" cookies and "100 best" cookie recipes.  I spent numerous days and an insane amount of money trying out the recipes only to be disappointed in most of them.  I came to the conclusion that just because a recipe is complicated, it doesn't mean it is good.  And with the hustle and bustle of the already busy holiday season, who needs to add more complication?  I'd rather spend my time and money elsewhere, so I reverted back to alot of my old-time tried and true favorites.  I've added a few new favorites along the way but now I'm more particular about what I look for in a cookie recipe. 

This recipe for Chocolate Andes Mint Cookies involves a box of cake mix which definitely reminds me of my childhood because this is the type of cookies that I started baking with and that piqued my interest in the kitchen.  They are quick and easy which makes them perfect for kids to do mostly all by themselves.

I tracked this recipe from Pinterest to a website called Six Sisters' Stuff.  They are best right out of the oven warm, but even the next day I think you won't be able to turn them away.  The flavor of mint is perfect for the holiday season, so get your kids involved and bring some holiday cheer to your kitchen!


Chocolate Andes Mint Cookies
makes approximately 20 cookies

1 Devil's Food Cake Mix
1/2 cup oil
2 eggs
1 package of Andes Mints

Mix cake mix, oil, and eggs together. Drop spoonfuls of dough onto baking sheet (I used the medium sized Pampered Chef cookie scoop.)

Bake at 350 degrees for 6-9 minutes. Don't bake any longer than that as you don't want them to be overdone (mine were perfect at 8 minutes.)
 
Take sheet out of oven and while the cookies are still very hot, place an Andes Mint on top of each cookie. In about 5 minutes, the mint will be melted.  Using a spoon, smooth out each mint like frosting.

Pin It
  • Digg
  • Del.icio.us
  • StumbleUpon
  • Reddit
  • RSS

Ghosts of Halloweens Past: Mummy Cookies


If the thought of spiders, skeletons, witches and ghosts scares you, you may just need your mummy. 

Mummy cookies, that is. 

These cookies are so cute and fun to make and don't require any advanced skill level or long list of ingredients.  Let your little ghouls have just as much fun wrapping the mummies as they do eating them!

View the recipe and instructions for decorating here.

Happy Halloween!

Pin It
  • Digg
  • Del.icio.us
  • StumbleUpon
  • Reddit
  • RSS

It's the Great Pumpkin!


No tricks for you today - just this fun little Halloween treat. 

The idea for these cute cheese pumpkins originated from a blog called That's So Michelle which features some really fun, easy and creative ideas and since Boy Toy and I were headed to a tailgate party I thought I'd borrow her idea.  It's things like this that have awarded me "Food Nerd" status because who, in their right mind, could show up to a party with just cheese and crackers when you can turn heads with this??

It's really simple to do.  All you need is a tub of cold-pack Cheddar cheese, some pretzel sticks, finely chopped nuts (I used pecans), a few sprigs of fresh parsley and crackers of your choice (I used Triscuits because they are sturdy). 

I used a small cookie scoop but you can also just use a tablespoon to portion out the cheese and roll it into a ball with your hands (my method yielded approximately 20 pumpkins).  Chill them for a bit afterwards to make them firm enough so you can work with them.  Using a toothpick or wooden skewer, score lines into your cheese pumpkins from top to bottom.  They don't have to be perfect as a real pumpkin is beautiful in its own rite with irregularities. 

Dip the bottom of the pumpkin into some finely chopped nuts of your choice and refrigerate them until serving time.  Just before serving, decorate with a broken pretzel stick "stem" and a piece of parsley for greenery.  You don't want to do this until just before serving because the pretzel stick becomes soft when it is refrigerated. 

Serve them atop a cracker for ease of handling, but keep in mind this is quite alot of cheese to eat in one bite or for one cracker.  Serve a basket of crackers alongside so your guests can spread some cheesy pumpkin cheer!

Visit That's So Michelle's rendition of the pumpkin cheese plate and check out some of her other totally cute and fabulous ideas. 


Pin It
  • Digg
  • Del.icio.us
  • StumbleUpon
  • Reddit
  • RSS

Ghosts of Halloweens Past: Caramel Corn


I'm so excited to make this caramel corn again because:

a) it reminds me of my childhood
b) I love to put things in cute little Halloween baggies
c) this stuff is so unbelievably addictingly good

Click on over to the original post and give your Halloween goblins a scary good after-school treat.

Pin It
  • Digg
  • Del.icio.us
  • StumbleUpon
  • Reddit
  • RSS

Ghosts of Halloweens Past: Pumpkin Bars


Halloween is one of my favorite holidays of the year - what other time can you dress up in a crazy costume and run around begging for treats from strangers?  I've already decided what this year's costume is going to be, it's just a matter of getting it all pulled together. 

Admittedly Halloween seems to be more fun when you have a couple of ghosts and goblins running around that you can claim you are baking all the cookie and candy goodies for, so I plan to take full advantage of that this year.  I'm busy making a list of everything I want to try this year and hope to get a jump start on it so we can celebrate all month long, but in the meantime I wanted to share some of the treats from Halloweens past by bringing them to the forefront once again during the month. 

These pumpkins bars are really great to bake all the way through the end of Thanksgiving since pumpkin is still in season even then.  View the original post here and stay tuned for some ghostly good new treats and a few others being brought back from the dead!

Pin It
  • Digg
  • Del.icio.us
  • StumbleUpon
  • Reddit
  • RSS

Early Bird Gets the Worm


Aren't these the most adorable cupcakes EVER??

I have been in love with these baby bluebird cupcakes ever since I first saw them a few years ago on Ali's original blog, Something So Clever, and thankfully she reminded me of them again when she reposted them last year on her newest blog creation, Jam Hands.  They're perfect for Easter or just to celebrate Spring and I knew they would be the perfect thing to take along to an Easter egg hunt that I was invited to last week.  I was meeting some special people at this egg hunt and it was a very big deal to me as this was something that I have secretly wished for for a very long time and I wanted to make sure I showed up with a totally tricked out "Pleased to meet you" offering.  The cupcakes were a hit and the holiday festivities were fabulous. 

These cutie cupcakes may look complicated but they really aren't (despite this being a Martha Stewart recipe).  And honestly, there is no harm in using a box cake mix if you'd like ~ no one would know and it's really all about the presentation anyway.  I made the buttercream with half butter and half shortening as it tends to hold up better at room temperature.  Practice piping your birds and beaks on wax paper before assembling the cupcakes and then it won't take long to get these babies hatched on their nests!

Baby Bluebird Cupcakes

Vanilla Cupcakes

Makes 1 dozen
Recipes courtesy of Martha Stewart

1 1/2 cups all-purpose flour
1 teaspoon baking powder
1/2 teaspoon salt
8 tablespoons (1 stick) unsalted butter, room temperature
1 cup sugar
3 large eggs
1 1/2 teaspoons pure vanilla extract
3/4 cup milk

1. Preheat the oven to 350°. Line a cupcake pan with paper liners; set aside.
2. In a medium bowl, sift together flour, baking powder, and salt. In the bowl of an electric mixer fitted with the paddle attachment, cream butter and sugar until light and fluffy. Add eggs, one at a time; scrape down bowl, and beat in vanilla.
3. Add flour mixture and milk alternatively, beginning and ending with flour mixture.
4. Divide batter evenly among liners, about three-quarters full each. Bake until golden and tops spring back to touch, about 20 minutes, rotating pan once if needed. Transfer pans to wire rack; cool completely.

Chocolate Buttercream
Makes 2-1/2 cups

Martha says, "If you live in a warm climate or you want to display your cupcakes for an extended period of time, use half solid vegetable shortening and half butter, which will result in a more stable frosting."

When preparing the chocolate buttercream frosting, reserve 1-1/2 cups buttercream prior to adding the melted chocolate and 1 teaspoon melted chocolate for the bird eyes.

3/4 cup sugar
3 large egg whites
1 cup (2 sticks) plus 6 tablespoons unsalted butter, room temperature
3 ounces semisweet chocolate, melted and cooled

1. Combine sugar and egg whites in the bowl of an electric mixer fitted with the whisk attachment. Place over a pot of simmering water; whisk until hot and sugar is completely dissolved, about 3 minutes. Transfer bowl to mixer stand, and beat on high speed until cooled, 7 to 10 minutes.

2. Replace whisk with paddle attachment, and set mixer on medium-high speed; add butter, 1 to 2 tablespoons at a time, until incorporated. Beat in chocolate. If not using immediately, refrigerate buttercream in an airtight container for up to a week. Bring to room temperature, and re-beat or stir vigorously before using.

To Assemble the Cupcakes:
Makes 1 dozen

1-1/2 cups shredded coconut(about 5 ounces)
Vanilla Cupcakes
Chocolate Buttercream
Yellow and light-blue food coloring

1. Preheat the oven to 350°. Spread coconut on a rimmed baking sheet; bake until light brown, 8 to 10 minutes, rotating pan once. Set aside to cool.

2. Lightly frost cupcakes with 1 cup chocolate buttercream and top with toasted coconut; set aside. Tint 2 tablespoons reserved buttercream pale yellow; place in a pastry bag fitted with a #349 Ateco leaf tip; set aside. Tint remaining buttercream light blue; place in a pastry bag fitted with a #11 Ateco plain round tip, and pipe three bluebird heads, 3/4 inch in diameter, onto each cupcake. Using leaf tip, pipe yellow beaks. With a toothpick, add melted-chocolate eyes.

Source: MarthaStewart.com

Pin It
  • Digg
  • Del.icio.us
  • StumbleUpon
  • Reddit
  • RSS