RSS

I currently live in Charlotte, NC and after spending 7 years as a personal chef and caterer, I am now happy to share my love of cooking with friends and family. My heart is in the kitchen, but my soul is in the stars!

Showing posts with label Daring Bakers. Show all posts

Spring has sprung!

I don't think I've ever seen a prettier Spring. At least not one that compelled me to get out of bed early on my coveted Sunday morning and head into the neighboring town to snap some photos of the spring blooms. Even though the weather is still a little iffy these days, I hope these pictures will help you understand why I'm a day late posting my March Daring Baker's Challenge. It was just too pretty outside to be stuck in the kitchen.

The 2010 March Daring Baker’s challenge was hosted by Jennifer of Chocolate Shavings. She chose Orange Tian as the challenge for this month, a dessert based on a recipe from Alain Ducasse’s Cooking School in Paris. And let me tell you, it was the perfect challenge for spring!


When I first saw the challenge, I decided I wasn't going to participate because I was short on time and the dessert just didn't call my name when I read through the ingredients. But a few days later, I had a change of heart and I'm so glad that I did. The combination of sweet oranges, freshly whipped cream infused with homemade orange marmalade atop a pate sablee crust was a delightful, airy combination. If you haven't chosen your Easter menu dessert, give some serious consideration to the Orange Tian. Don't let the length of the recipe posted below scare you as it's really not that complicated at all. All of the components with the exception of the whipped cream can be made in advance.

Thank you, Jennifer, for an excellent challenge!


Note: There are quite a few steps to making this dessert; however a lot of them can be made in advance. The orange marmalade can be made several days ahead of time and the caramel sauce and orange segments preparation should be made the day before you make the dessert. Also, if you have a scale, try and use the weighed measurements as they will be the most accurate.

The recipe can be a little bit tricky to put together, especially the first time. The main tip is to make sure the whipped cream is firm enough when you make it and be sure to leave the desserts to set in the freezer for long enough or they will fall apart when you unmold them.

Preparation time:
- Pate Sablee: 20 minutes to make, 30 minutes to rest, 15 minutes to roll out, 20 minutes to bake
- Marmalade: 20 minutes to make, 30 minutes to blanch
- Orange segments: 20 minutes, overnight to sit
- Caramel: 15 minutes, overnight to sit
- Whipped Cream: 15 minutes
- Assembling: 20 minutes
- Freezer to Set: 10 minutes

Equipment required:
• Cookie cutters . Ideally, you should have about 6 cookie cutters to build the desserts in and cut the circles of dough. The cookie cutters will be the size of your final dessert, so they should be the size of an individually-sized tart mold. If you don’t have round cookie cutters you could use an individually-sized cheesecake mold without its base.
• A food processor (although the dough could be made by hand too)
• A stand-up or hand mixer
• Parchment paper or a silicone sheet
• A baking sheet
• A rolling pin

For the Pate Sablee:

Ingredients U.S. Imperial Metric Instructions for Ingredients
2 medium-sized egg yolks at room temperature
granulated sugar 6 tablespoons + 1 teaspoon; 2.8 oz; 80 grams
vanilla extract ½ teaspoon
Unsalted butter ¼ cup + 3 tablespoons; 3.5 oz; 100 grams ice cold, cubed
Salt 1/3 teaspoon; 2 grams
All-purpose flour 1.5 cup + 2 tablespoons; 7 oz; 200 grams
baking powder 1 teaspoon ; 4 grams

Directions:
Put the flour, baking powder, ice cold cubed butter and salt in a food processor fitted with a steel blade.

In a separate bowl, add the eggs yolks, vanilla extract and sugar and beat with a whisk until the mixture is pale. Pour the egg mixture in the food processor.

Process until the dough just comes together. If you find that the dough is still a little too crumbly to come together, add a couple drops of water and process again to form a homogenous ball of dough. Form into a disc, cover with plastic wrap and leave to rest in the fridge for 30 minutes.
Preheat your oven to 350 degree Fahrenheit.

Roll out the dough onto a lightly floured surface until you obtain a ¼ inch thick circle.

Using your cookie cutter, cut out circles of dough and place on a parchment (or silicone) lined baking sheet. Bake for 20 minutes or until the circles of dough are just golden.

For the Marmalade:

Ingredients U.S. Imperial Metric Instructions for Ingredients
Freshly pressed orange juice ¼ cup + 3 tablespoons; 3.5 oz; 100 grams
1 large orange used to make orange slices
cold water to cook the orange slices
pectin 5 grams
granulated sugar: use the same weight as the weight of orange slices once they are cooked

Finely slice the orange. Place the orange slices in a medium-sized pot filled with cold water. Simmer for about 10 minutes, discard the water, re-fill with cold water and blanch the oranges for another 10 minutes.

Blanch the orange slices 3 times. This process removes the bitterness from the orange peel, so it is essential to use a new batch of cold water every time when you blanch the slices.

Once blanched 3 times, drain the slices and let them cool.

Once they are cool enough to handle, finely mince them (using a knife or a food processor).

Weigh the slices and use the same amount of granulated sugar . If you don’t have a scale, you can place the slices in a cup measurer and use the same amount of sugar.

In a pot over medium heat, add the minced orange slices, the sugar you just weighed, the orange juice and the pectin. Cook until the mixture reaches a jam consistency (10-15 minutes).

Transfer to a bowl, cover with plastic wrap and put in the fridge.

For the Orange Segments:

For this step you will need 8 oranges.

Cut the oranges into segments over a shallow bowl and make sure to keep the juice. Add the segments to the bowl with the juice.

For the Caramel:

Ingredients U.S. Metric Imperial Instructions for Ingredients
granulated sugar 1 cup; 7 oz; 200 grams
orange juice 1.5 cups + 2 tablespoons; 14 oz; 400 grams

Place the sugar in a pan on medium heat and begin heating it.

Once the sugar starts to bubble and foam, slowly add the orange juice. As soon as the mixture starts boiling, remove from the heat and pour half of the mixture over the orange segments.

Reserve the other half of the caramel mixture in a small bowl — you will use this later to spoon over the finished dessert. When the dessert is assembled and setting in the freezer, heat the kept caramel sauce in a small saucepan over low heat until it thickens and just coats the back of a spoon (about 10 minutes). You can then spoon it over the orange tians.

[Tip: Be very careful when making the caramel — if you have never made caramel before, I would suggest making this step while you don’t have to worry about anything else. Bubbling sugar is extremely, extremely hot, so make sure you have a bowl of ice cold water in the kitchen in case anyone gets burnt!]

For the Whipped Cream:

Ingredients U.S. Metric Imperial Instructions for Ingredients
heavy whipping cream 1 cup; 7 oz; 200 grams
3 tablespoons of hot water
1 tsp Gelatin
1 tablespoon of confectioner's sugar
orange marmalade (see recipe above) 1 tablespoon

In a small bowl, add the gelatin and hot water, stirring well until the gelatin dissolves. Let the gelatin cool to room temperature while you make the whipped cream. Combine the cream in a chilled mixing bowl. Whip the cream using a hand mixer on low speed until the cream starts to thicken for about one minute. Add the confectioner sugar. Increase the speed to medium-high. Whip the cream until the beaters leave visible (but not lasting) trails in the cream, then add the cooled gelatin slowly while beating continuously. Continue whipping until the cream is light and fluffy and forms soft peaks. Transfer the whipped cream to a bowl and fold in the orange marmalade.
[Tip: Use an ice cold bowl to make the whipped cream in. You can do this by putting your mixing bowl, cream and beater in the fridge for 20 minutes prior to whipping the cream.]

Assembling the Dessert:

Make sure you have some room in your freezer. Ideally, you should be able to fit a small baking sheet or tray of desserts to set in the freezer.

Line a small tray or baking sheet with parchment paper or a silicone sheet. Lay out 6 cookie cutters onto the parchment paper/silicone.

Drain the orange segments on a kitchen towel.

Have the marmalade, whipped cream and baked circles of dough ready to use.

Arrange the orange segments at the bottom of each cookie cutter. Make sure the segments all touch either and that there are no gaps. Make sure they fit snuggly and look pretty as they will end up being the top of the dessert. Arrange them as you would sliced apples when making an apple tart.

Once you have neatly arranged one layer of orange segments at the bottom of each cookie cutter, add a couple spoonfuls of whipped cream and gently spread it so that it fills the cookie cutter in an even layer. Leave about 1/4 inch at the top so there is room for dough circle.

Using a butter knife or small spoon, spread a small even layer of orange marmalade on each circle of dough.

Carefully place a circle of dough over each ring (the side of dough covered in marmalade should be the side touching the whipping cream). Gently press on the circle of dough to make sure the dessert is compact.

Place the desserts to set in the freezer to set for 10 minutes.

Using a small knife, gently go around the edges of the cookie cutter to make sure the dessert will be easy to unmold. Gently place your serving plate on top of a dessert (on top of the circle of dough) and turn the plate over. Gently remove the cookie cutter, add a spoonful of caramel sauce and serve immediately.

Pin It
  • Digg
  • Del.icio.us
  • StumbleUpon
  • Reddit
  • RSS

The 5th kind of love


The month of February cannot come and go without thoughts of love, relationships, and togetherness. According to this article, there are four types of love and it's really important to a relationship to have all four.

Agape love is the unconditional side of love where your significant other loves you no matter what. Even if you've forgotten to take the trash out for the second week in a row, don't worry. Everything is going to be okay because of this non-judgemental kind of love.

Phileo love, or friendship love, is just that....the kind of love that makes you laugh at each other's jokes even when they're not really funny. It's what makes you have fun together when you're doing boring things like matching socks from the laundry.

Storge love may be better known as PDA or public display of affection. It's the hand holding, a simple kiss on the cheek just because, or the touchy-feely when you think no one is looking.

Eros love is the hot and steamy antics that happen behind closed doors. It's the stuff we can't talk about here because my mother is reading.

But the article didn't talk about the fifth kind of love. It is, in my opinion, the best love of all kinds....

Tiramisu love. This is the kind of love that makes you want to spend an entire day making your own pastry cream, savoiardi biscuits, zabaglione, and mascarpone cheese. And when the espresso soaked biscuits melt in your mouth and the luscious silky pastry cream takes over your senses, you'll realize you can never love another store-bought tiramisu again.


The February 2010 Daring Bakers’ challenge was hosted by Aparna of My Diverse Kitchen and Deeba of Passionate About Baking. They chose Tiramisu as the challenge for the month. Their challenge recipe is based on recipes from The Washington Post, Cordon Bleu at Home and Baking Obsession.

This was an awesome challenge ~ probably my most favorite one of all that I've participated in so far. When the five pages of instructions printed out, I nearly gave up on my tiramisu relationship, but it was a very simple process, very well worth it and hardly took any active time at all. Most of the time was spent waiting for everything to chill overnight. When you see the instructions at the bottom of this post, you'll most likely run screaming with a click of the Back button, but I promise you it's not that bad.

I also promise that if, during this month of all things love, you take a long, hard look at your current relationship and realize you're missing any one of the four important types of love, just grab a spoon and discover the love of tiramisu...


TIRAMISU

(Recipe source: Carminantonio's Tiramisu from The Washington Post, July 11 2007 )
This recipe makes 6 servings

For the zabaglione:
2 large egg yolks
3 tablespoons sugar
1/4 cup Marsala wine (or port or coffee)
1/4 teaspoon vanilla extract
1/2 teaspoon finely grated lemon zest

For the vanilla pastry cream:
1/4 cup sugar
1 tablespoon all purpose flour
1/2 teaspoon finely grated lemon zest
1/2 teaspoon vanilla extract
1 large egg yolk
3/4 cup whole milk

For the whipped cream:
1 cup chilled heavy cream (we used 25%)
1/4 cup sugar
1/2 teaspoon vanilla extract

To assemble the tiramisu:
2 cups brewed espresso, warmed
1 teaspoon rum extract (optional)
1/2 cup sugar
1/3 cup mascarpone cheese
36 savoiardi/ladyfinger biscuits (you may use less)
2 tablespoons unsweetened cocoa powder

For the zabaglione:
Heat water in a double boiler. If you don’t have a double boiler, place a pot with about an inch of water in it on the stove. Place a heat-proof bowl in the pot making sure the bottom does not touch the water.
In a large mixing bowl (or stainless steel mixing bowl), mix together the egg yolks, sugar, the Marsala (or espresso/coffee), vanilla extract and lemon zest. Whisk together until the yolks are fully blended and the mixture looks smooth.
Transfer the mixture to the top of a double boiler or place your bowl over the pan/ pot with simmering water. Cook the egg mixture over low heat, stirring constantly, for about 8 minutes or until it resembles thick custard. It may bubble a bit as it reaches that consistency.
Let cool to room temperature and transfer the zabaglione to a bowl. Cover and refrigerate at least 4 hours or overnight, until thoroughly chilled.

For the pastry cream:
Mix together the sugar, flour, lemon zest and vanilla extract in a medium heavy-bottomed saucepan. To this add the egg yolk and half the milk. Whisk until smooth.
Now place the saucepan over low heat and cook, stirring constantly to prevent the mixture from curdling.
Add the remaining milk a little at a time, still stirring constantly. After about 12 minutes the mixture will be thick, free of lumps and beginning to bubble. (If you have a few lumps, don’t worry. You can push the cream through a fine-mesh strainer.)
Transfer the pastry cream to a bowl and cool to room temperature. Cover with plastic film and refrigerate at least 4 hours or overnight, until thoroughly chilled.

For the whipped cream:
Combine the cream, sugar and vanilla extract in a mixing bowl. Beat with an electric hand mixer or immersion blender until the mixture holds stiff peaks. Set aside.

To assemble the tiramisu:
Have ready a rectangular serving dish (about 8" by 8" should do) or one of your choice.
Mix together the warm espresso, rum extract and sugar in a shallow dish, whisking to mix well. Set aside to cool.
In a large bowl, beat the mascarpone cheese with a spoon to break down the lumps and make it smooth. This will make it easier to fold. Add the prepared and chilled zabaglione and pastry cream, blending until just combined. Gently fold in the whipped cream. Set this cream mixture aside.

Now to start assembling the tiramisu.
Working quickly, dip 12 of the ladyfingers in the sweetened espresso, about 1 second per side. They should be moist but not soggy. Immediately transfer each ladyfinger to the platter, placing them side by side in a single row. You may break a lady finger into two, if necessary, to ensure the base of your dish is completely covered.
Spoon one-third of the cream mixture on top of the ladyfingers, then use a rubber spatula or spreading knife to cover the top evenly, all the way to the edges.
Repeat to create 2 more layers, using 12 ladyfingers and the cream mixture for each layer. Clean any spilled cream mixture; cover carefully with plastic wrap and refrigerate the tiramisu overnight.
To serve, carefully remove the plastic wrap and sprinkle the tiramisu with cocoa powder using a fine-mesh strainer or decorate as you please. Cut into individual portions and serve.

MASCARPONE CHEESE

(Source: Vera’s Recipe for Homemade Mascarpone Cheese)
This recipe makes 12oz/ 340gm of mascarpone cheese

Ingredients:
2 cups whipping (36 %) pasteurized (not ultra-pasteurized), preferably organic cream (between 25% to 36% cream will do)
1 tablespoon fresh lemon juice

Bring 1 inch of water to a boil in a wide skillet. Reduce the heat to medium-low so the water is barely simmering. Pour the cream into a medium heat-resistant bowl, then place the bowl into the skillet. Heat the cream, stirring often, to 190 F. If you do not have a thermometer, wait until small bubbles keep trying to push up to the surface.
It will take about 15 minutes of delicate heating. Add the lemon juice and continue heating the mixture, stirring gently, until the cream curdles. Do not expect the same action as you see during ricotta cheese making. All that the whipping cream will do is become thicker, like a well-done crème anglaise. It will cover a back of your wooden spoon thickly. You will see just a few clear whey streaks when you stir. Remove the bowl from the water and let cool for about 20 minutes. Meanwhile, line a sieve with four layers of dampened cheesecloth and set it over a bowl. Transfer the mixture into the lined sieve. Do not squeeze the cheese in the cheesecloth or press on its surface (be patient, it will firm up after refrigeration time). Once cooled completely, cover with plastic wrap and refrigerate (in the sieve) overnight or up to 24 hours.
Vera’s notes: The first time I made mascarpone I had all doubts if it’d been cooked enough, because of its custard-like texture. Have no fear, it will firm up beautifully in the fridge, and will yet remain lusciously creamy.
Keep refrigerated and use within 3 to 4 days.

LADYFINGERS/ SAVOIARDI BISCUITS
(Source: Recipe from Cordon Bleu At Home)
This recipe makes approximately 24 big ladyfingers or 45 small (2 1/2" to 3" long) ladyfingers.

Ingredients:
3 eggs, separated
6 tablespoons granulated sugar
3/4 cup cake flour, sifted (or 3/4 cup all purpose flour + 2 tbsp corn starch)
6 tablespoons confectioner's sugar,

Method:

Preheat your oven to 350 F degrees, then lightly brush 2 baking sheets with oil or softened butter and line with parchment paper.
Beat the egg whites using a hand held electric mixer until stiff peaks form. Gradually add granulate sugar and continue beating until the egg whites become stiff again, glossy and smooth.
In a small bowl, beat the egg yolks lightly with a fork and fold them into the meringue, using a wooden spoon. Sift the flour over this mixture and fold gently until just mixed. It is important to fold very gently and not overdo the folding. Otherwise the batter would deflate and lose volume resulting in ladyfingers which are flat and not spongy.
Fit a pastry bag with a plain tip (or just snip the end off; you could also use a Ziploc bag) and fill with the batter. Pipe the batter into 5" long and 3/4" wide strips leaving about 1" space in between the strips.
Sprinkle half the confectioner's sugar over the ladyfingers and wait for 5 minutes. The sugar will pearl or look wet and glisten. Now sprinkle the remaining sugar. This helps to give the ladyfingers their characteristic crispness.
Hold the parchment paper in place with your thumb and lift one side of the baking sheet and gently tap it on the work surface to remove excess sprinkled sugar.
Bake the ladyfingers for 10 minutes, then rotate the sheets and bake for another 5 minutes or so until the puff up, turn lightly golden brown and are still soft.
Allow them to cool slightly on the sheets for about 5 minutes and then remove the ladyfingers from the baking sheet with a metal spatula while still hot, and cool on a rack.
Store them in an airtight container till required. They should keep for 2 to 3 weeks.

Pin It
  • Digg
  • Del.icio.us
  • StumbleUpon
  • Reddit
  • RSS

Home for the Holidays

Baking gingerbread houses has been a tradition in my family for quite some time. My mother took an Agriculture Extension workshop years ago to learn how to make them and when I was younger, I'd sit at the table and "help" mostly by eating candy, chattering incessantly and getting covered in the sticky icing. I'm sure I was more of a pest who tried her patience (some things never change, do they Mom?) while she was trying to concentrate on her creations, but the activity would become one of those traditions that I have and will always associate with my mother this time of year. I was so excited to see that gingerbread houses would be this month's Daring Bakers' challenge.

The December 2009 Daring Bakers’ challenge was brought to you by Anna of Very Small Anna and Y of Lemonpi. They chose to challenge Daring Bakers’ everywhere to bake and assemble a gingerbread house from scratch. They chose recipes from Good Housekeeping and from The Great Scandinavian Baking Book as the challenge recipes.

It seems that other DBers had problems with the dough recipes but I didn't use either of the choices, opting instead to use my tried and true recipe which makes between 4 and 5 houses. Once you get started, there's really no difference between making 1 house or 5 ~ it's sort of an assembly line process. There's nothing I enjoy more than seeing the look on my friends' faces when I give them one of the houses as a gift. One of my houses went to my lovely friend, the Greek Goddess and another to my friend Mary so her little boy could enjoy it. The other 2 houses were given as door prizes at my holiday cookie exchange party that I hosted a couple of weeks ago.

I've posted my recipe below and the template that I use is posted here so start a new tradition in your family next year by baking and building the house of your dreams!

Thank you Anna and Y for a fun challenge.


* Exported from MasterCook *

Gingerbread House Recipe

Recipe By :Sullivan County Extension Homemakers Club


Amount Measure Ingredient -- Preparation Method
-------- ------------ --------------------------------
7 to 8 Cups Sifted All Purpose Flour
1 Teaspoon Soda
1 Teaspoon Salt
1 Teaspoon Nutmeg
3 Teaspoons Ginger
1 Cup Shortening
1 Cup Sugar
1 1/2 Cups unsulphered Molasses -- use light color
2 Each Eggs
1 Cup Additional Flour -- 1-2 cups
Royal Icing:
3 Each Eggs Whites -- room temp
4 Cups Confectioner's Sugar
1/2 Teaspoon Cream of Tarter

Sift together first 5 ingredients. Blend together molasses, shortening, sugar and eggs. Stir dry ingredients into molasses mixture. Add enough of the additional flour to make a dough stiff enough to be shaped into a disc. Refrigerate overnight for easier handling. Can be frozen.

Will make 4-5 small gingerbread house using this pattern.

Roll to about 1/4" thickness on a floured cookie sheet. Trace the house pattern pieces onto typing paper and cut out. Arrange pattern pieces on cookie dough and carefully cut around each pattern being certain to allow 1/2" space between pieces to allow the dough to expand as it bakes.

Cut the dough with a sharp paring knife or the edge of a metal pancake turner. Be certain the walls and roof are the same size as the patterns. Remove scraps leaving house pieces on the cookie sheet. Do not attempt to shift pieces once they have been cut out. This will stretch the dough and distort the shape. Bake at 350 12-15 mins.

Carefully loosen then remove each piece with a metal pancake turner. Cool on a wire rack. When the walls are completely cooled, place a sheet of aluminum foil on the cookie sheet shiny side up. Arrange the walls on the foil. With a hammer, pulverize a few pieces of hard clear candy in a plastic bag. Spoon some of the crushed candy into each window. Return the cookie sheet to the oven and bake a few mins in order to melt the candy. Watch carefully, the candy melts quickly. Remove pieces from the cookie sheet and cool on a rack. When completely cooled (don't rush this cooling step) peel the foil from the backs of each wall. The foil will peel easily from the window if it has cooled sufficiently.

I usually allow my house pieces to sit for a day or so to dry out just a bit. They seem to be a little too soft to assemble the houses on the same day as baking. My houses are constructed on a 12x12 piece of white styrofoam.

Assemble using Royal Icing as "glue". Glue the walls together first. When icing has hardened (about 15 mins) then glue on the roof. Glue on the chimney and door. When icing has hardened you may begin decorating the house with additional icing and candy.

Suggested candies: cinnamon red hots, starlight peppermints, candy canes, gum drops, miniature marshmallows, M&M's, sweettarts, silver dragees.

Make a larger house by increasing the size of the pattern pieces. As you assemble a larger house, stuff a small string of miniature Christmas lights inside the house with the cord sticking out. Your gingerbread house can glow with the lights are plugged in. Make a gingerbread house for your pet. Use yellow, pink, or orange hard clear candies for the windows.

Royal Icing: Purchase Wilton Meringue Powder where cake decorating supplies are sold and follow the recipe on the can for Royal Icing. Or, use the scratch recipe above. Do NOT use a shortening based frosting. When making Royal Icing, it is essential that all mixing utensils are grease free. The slightest bit of oil or grease will case the Royal Icing to break down. Royal Icing dries quickly so keep the bowl covered with a damp cloth at all times. Can be refrigerated.

Beat all icing ingredients at high speed for 7-10 mins. Add more sugar for a stiffer consistency if necessary. Makes 2-1/2 cups.

Source:
"Mom"

Pin It
  • Digg
  • Del.icio.us
  • StumbleUpon
  • Reddit
  • RSS

Holy Cannoli! There may be hope for me yet!

If you asked me how I've fared in each of the past Daring Bakers' challenges, my initial response would be "Loser." It's a good thing I have this blog to chronicle my kitchen antics because looking back through past challenge entries I realize that while each of the challenges seemingly had it's own aspect of failure, the end result could be chalked up in the "Winner" column. With this one exception, of course. There's always an exception to every rule. This month's challenge will most definitely be considered a "Winner" from beginning to end with absolutely no problems except (again with the exceptions) I can't stop stroking my own ego and patting myself on the back at how well I did!

The November 2009 Daring Bakers Challenge was chosen and hosted by Lisa Michele of Parsley, Sage, Desserts and Line Drives. She chose the Italian Pastry, Cannolo (Cannoli is plural), using the cookbooks Lidia’s Italian-American Kitchen by Lidia Matticchio Bastianich and The Sopranos Family Cookbook by Allen Rucker; recipes by Michelle Scicolone, as ingredient/direction guides. She added her own modifications/changes, so the recipe is not 100% verbatim from either book.

And boy, was I proud of myself! (There I go again...pat, pat, pat). There was quite alot of leniency in the challenge but having the fear of failure deep within me, I decided to stick pretty close to the recipe for the first time. Now that I know I'm an awesome cannoli maker (pat, pat) the sky is the limit for future batches. My only deviations from the recipe was in the filling. I did not add the pistachios and instead of the adding the chocolate, I added a whopping tablespoon of Nutella hazelnut spread which blended nicely with the orange zest flavor.

I wound up with nearly two dozen cannoli shells and if I had to confess to any problems, I'd say that I lost a few shells during the frying process because they floated right off the metal tube form. I made sure I really sealed the next batch with the egg white and had no problems. And at a temperature of 350 degrees, my shells only took about a minute to fry instead of the two minutes mentioned in the recipe. And don't let the frying aspect scare you...a heavy bottomed saucepan and a candy thermometer worked perfectly.

Thank you Lisa Michele for choosing such a winning recipe that proves there is hope for me yet in the world of Daring Bakers. I guess all the time spent with the Italian has paid off!


CANNOLI SHELLS
2 cups (250 grams/16 ounces) all-purpose flour
2 tablespoons(28 grams/1 ounce) sugar
1 teaspoon (5 grams/0.06 ounces) unsweetened baking cocoa powder
1/2 teaspoon (1.15 grams/0.04 ounces) ground cinnamon
1/2 teaspoon (approx. 3 grams/0.11 ounces) salt
3 tablespoons (42 grams/1.5 ounces) vegetable or olive oil
1 teaspoon (5 grams/0.18 ounces) white wine vinegar
Approximately 1/2 cup (approx. 59 grams/approx. 4 fluid ounces/approx. 125 ml) sweet Marsala or any white or red wine you have on hand
1 large egg, separated (you will need the egg white but not the yolk)
Vegetable or any neutral oil for frying – about 2 quarts (8 cups/approx. 2 litres)
1/2 cup (approx. 62 grams/2 ounces) toasted, chopped pistachio nuts, mini chocolate chips/grated chocolate and/or candied or plain zests, fruits etc.. for garnish
Confectioners' sugar

Note - If you want a chocolate cannoli dough, substitute a few tablespoons of the flour (about 25%) with a few tablespoons of dark, unsweetened cocoa powder (Dutch process) and a little more wine until you have a workable dough.

CANNOLI FILLING
2 lbs (approx. 3.5 cups/approx. 1 kg/32 ounces) ricotta cheese, drained
1 2/3 cups cup (160 grams/6 ounces) confectioner’s sugar, (more or less, depending on how sweet you want it), sifted
1/2 teaspoon (1.15 grams/0.04 ounces) ground cinnamon
1 teaspoon (4 grams/0.15 ounces) pure vanilla extract or the beans from one vanilla bean
3 tablespoons (approx. 28 grams/approx. 1 ounce) finely chopped good quality chocolate of your choice
2 tablespoons (12 grams/0.42 ounces) of finely chopped, candied orange peel, or the grated zest of one small to medium orange
3 tablespoons (23 grams/0.81 ounce) toasted, finely chopped pistachios

Note - If you want chocolate ricotta filling, add a few tablespoons of dark, unsweetened cocoa powder to the above recipe, and thin it out with a few drops of warm water if too thick to pipe.

DIRECTIONS FOR SHELLS:
1. In the bowl of an electric stand mixer or food processor, combine the flour, sugar, cocoa, cinnamon, and salt. Stir in the oil, vinegar, and enough of the wine to make a soft dough. Turn the dough out onto a lightly floured surface and knead until smooth and well blended, about 2 minutes. Shape the dough into a ball. Cover with plastic wrap and let rest in the fridge from 2 hours to overnight.

2. Cut the dough into two pieces. Keep the remaining dough covered while you work. Lightly flour a large cutting or pastry board and roll the dough until super thin, about 1/16 to 1/8” thick (An area of about 13 inches by 18 inches should give you that). Cut out 3 to 5-inch circles (3-inch – small/medium; 4-inch – medium/large; 5-inch;- large. Your choice). Roll the cut out circle into an oval, rolling it larger and thinner if it’s shrunk a little.

3. Oil the outside of the cannoli tubes (You only have to do this once, as the oil from the deep fry will keep them well, uhh, oiled..lol). Roll a dough oval from the long side (If square, position like a diamond, and place tube/form on the corner closest to you, then roll) around each tube/form and dab a little egg white on the dough where the edges overlap. (Avoid getting egg white on the tube, or the pastry will stick to it.) Press well to seal. Set aside to let the egg white seal dry a little.

4. In a deep heavy saucepan, pour enough oil to reach a depth of 3 inches, or if using an electric deep-fryer, follow the manufacturer's directions. Heat the oil to 375°F (190 °C) on a deep fry thermometer, or until a small piece of the dough or bread cube placed in the oil sizzles and browns in 1 minute. Have ready a tray or sheet pan lined with paper towels or paper bags.

5. Carefully lower a few of the cannoli tubes into the hot oil. Do not crowd the pan. Fry the shells until golden, about 2 minutes, turning them so that they brown evenly.

6. Lift a cannoli tube with a wire skimmer or large slotted spoon, out of the oil. Using tongs, grasp the cannoli tube at one end. Very carefully remove the cannoli tube with the open sides straight up and down so that the oil flows back into the pan. Place the tube on paper towels or bags to drain. Repeat with the remaining tubes. While they are still hot, grasp the tubes with a potholder and pull the cannoli shells off the tubes with a pair of tongs, or with your hand protected by an oven mitt or towel. Let the shells cool completely on the paper towels. Place shells on cooling rack until ready to fill.

7. Repeat making and frying the shells with the remaining dough. If you are reusing the cannoli tubes, let them cool before wrapping them in the dough.

Pasta Machine method:
1. Divide the dough into 4 equal pieces. Starting at the middle setting, run one of the pieces of dough through the rollers of a pasta machine. Lightly dust the dough with flour as needed to keep it from sticking. Pass the dough through the machine repeatedly, until you reach the highest or second highest setting. The dough should be about 4 inches wide and thin enough to see your hand through

2. Continue rolling out the remaining dough. If you do not have enough cannoli tubes for all of the dough, lay the pieces of dough on sheets of plastic wrap and keep them covered until you are ready to use them.

3. Roll, cut out and fry the cannoli shells as according to the directions above.

For stacked cannoli:
1. Heat 2-inches of oil in a saucepan or deep sauté pan, to 350-375°F (176 - 190 °C).

2. Cut out desired shapes with cutters or a sharp knife. Deep fry until golden brown and blistered on each side, about 1 – 2 minutes. Remove from oil with wire skimmer or large slotted spoon, then place on paper towels or bags until dry and grease free. If they balloon up in the hot oil, dock them lightly prior to frying. Place on cooling rack until ready to stack with filling.

DIRECTIONS FOR FILLING:
1. Line a strainer with cheesecloth. Place the ricotta in the strainer over a bowl, and cover with plastic wrap and a towel. Weight it down with a heavy can, and let the ricotta drain in the refrigerator for several hours to overnight.

2. In a bowl with electric mixer, beat ricotta until smooth and creamy. Beat in confectioner’s sugar, cinnamon, vanilla and blend until smooth. Transfer to another bowl and stir in chocolate, zest and nuts. Chill until firm.(The filling can be made up to 24 hours prior to filling the shells. Just cover and keep refrigerated).

ASSEMBLE THE CANNOLI:
1. When ready to serve..fill a pastry bag fitted with a 1/2-inch plain or star tip, or a ziplock bag, with the ricotta cream. If using a ziplock bag, cut about 1/2 inch off one corner. Insert the tip in the cannoli shell and squeeze gently until the shell is half filled. Turn the shell and fill the other side. You can also use a teaspoon to do this, although it’s messier and will take longer.

2. Press or dip cannoli in chopped pistachios, grated chocolate/mini chocolate chips, candied fruit or zest into the cream at each end. Dust with confectioner’s sugar and/or drizzles of melted chocolate if desired.

TIPS AND NOTES:
- Dough must be stiff and well kneaded

- Rolling the dough to paper thinness, using either a rolling pin or pasta machine, is very important. If the dough is not rolled thin enough, it will not blister, and good cannoli should have a blistered surface.

- Initially, this dough is VERY stubborn, but keep rolling, it eventually gives in. Before cutting the shapes, let the dough rest a bit, covered, as it tends to spring back into a smaller shapes once cut. Then again, you can also roll circles larger after they’re cut, and/or into ovals, which gives you more space for filling.

- Your basic set of round cutters usually doesn’t contain a 5-inch cutter. Try a plastic container top, bowl etc, or just roll each circle to 5 inches. There will always be something in your kitchen that’s round and 5-inches if you want large cannoli.

- Oil should be at least 3 inches deep and hot – 360°F-375°F, or you’ll end up with greasy shells. I prefer 350°F - 360°F because I felt the shells darkened too quickly at 375°F.

- If using the cannoli forms, when you drop the dough on the form into the oil, they tend to sink to the bottom, resulting in one side darkening more. Use a slotted spoon or skimmer to gently lift and roll them while frying.

- DO NOT crowd the pan. Cannoli should be fried 2-4 at a time, depending on the width of your saucepan or deep fryer. Turn them once, and lift them out gently with a slotted spoon/wire skimmer and tongs. Just use a wire strainer or slotted spoon for flat cannoli shapes.

- When the cannoli turns light brown - uniform in color, watch it closely or remove it. If it’s already a deep brown when you remove it, you might end up with a really dark or slightly burnt shell.

- Depending on how much scrap you have left after cutting out all of your cannoli shapes, you can either fry them up and sprinkle with confectioner’s sugar for a crispy treat, or let the scraps rest under plastic wrap and a towel, then re-roll and cut more cannoli shapes.

- Push forms out of cannoli very gently, being careful not to break the shells as they are very delicate. DO NOT let the cannoli cool on the form, or you may never get it off without it breaking. Try to take it off while still hot. Hold it with a cloth in the center, and push the form out with a butter knife or the back of a spoon.

- When adding the confectioner’s sugar to the filling..TASTE. You may like it sweeter than what the recipe calls for, or less sweet, so add in increments.

- Fill cannoli right before serving! If you fill them an hour or so prior, you’ll end up with soggy cannoli shells.

- If you want to prepare the shells ahead of time, store them in an airtight container, then re-crisp in a 350°F (176 °C) oven for a few minutes, before filling.

Pin It
  • Digg
  • Del.icio.us
  • StumbleUpon
  • Reddit
  • RSS

Doomed Macaroons

If this post weren't mandatory, I'd just as soon forget all about my latest Daring Baker Challenge episode. Just sweep it right under the rug along with the rejected crumbs that my dog refuses to snort up from the kitchen floor. But, I suppose being accountable allows us to learn from our mistakes and helps others to learn as well.

Here's what I learned from this month's challenge:

(1) I won't be buying almond flour again anytime soon. At least not until I get a pay raise or win the lottery. $11.50 for a pound of flour is for the rich and famous, not the nearly destitute and barely remembered.

(2) My macaroon making/baking skills stink.

The 2009 October Daring Bakers’ challenge was brought to us by Ami S. She chose macarons from Claudia Fleming’s The Last Course: The Desserts of Gramercy Tavern as the challenge recipe.

I was excited when I saw this month's challenge ~ I've spent alot of time admiring Helene's absolutely gorgeous macaroons and seeing as how this recipe only contained four ingredients, I figured it couldn't be too difficult (<--that's cocky Alison talking there and we all know what happens when she runs her mouth.)

Having never made macaroons before and not knowing what each stage of the preparation was supposed to look like, I'm not really sure what went wrong. My egg whites, having set out overnight, were room temperature per the recipe. I beat them into a nice stiff peak (I'm wondering at this point if I should have beaten them into submission until they gave me a stiffer, glossy finish like a traditional meringue?) I added my flour/sugar combination in thirds even though my sifter did not like having to deal with the $11.50/lb almond flour (did I mention that stuff was ridiculously expensive?!) Had I known it was a little too coarse to go through my sifter easily, I would have sifted before I started anything else and then added it because it took FOREVER. Maybe taking so long to sift and add was the culprit?

It had been my intention to do an espresso macaroon with blackberry filling inspired by a recipe I saw in the now defunct Gourmet magazine some time ago, so I added 2 tablespoons of espresso powder with the other dry ingredients and and tried really hard not to over fold. Heck, I don't even like to fold laundry so I don't think I over-invested time with this task either. I'm just grasping at straws here, people.

My stencils were drawn on the parchment paper and right up until this moment in time, I seriously thought I was breezing through this challenge.

And then....

Brace yourself 'cause it ain't pretty....

Are you ready?
My piped mounds of batter turned into oozing puddles of sludge. I knew I had a problem but didn't quite know how to fix it. I went ahead and baked the first batch thinking they were still salvageable. With the next batch I tried piping smaller mounds but that didn't help either. There were no "feet" that seems to be the signature trademark of a perfect macaroon. There was no Tartelette-like gorgeous cookies waiting to be filled.

It was mandatory that we fill the macaroons with our choice of filling, but honestly, I wasn't going to waste more time trying to salvage my poor, failed attempt at spending all day in the kitchen cookies. So without further adieu, I present my macaroons just before they filled my trash can.....


Despite my failure, I want to thank Ami of Baking Without Fear for presenting this challenge. I will eventually get brave enough to tackle the macaroon challenge again, but long after this memory has faded. And I'm sure if perusing food blogs is your thing, you'll no doubt see many, many posts of gorgeous macaroons from this month's challenge.

Pin It
  • Digg
  • Del.icio.us
  • StumbleUpon
  • Reddit
  • RSS

A day late, but not a Dobos Torte short


After spending a weekend slaving in the kitchen, dirtying every dish in the house and washing them countless times, running a load of kitchen towels through the laundry, and recovering from a week-long headache, I am finally ready to reveal this month's Daring Baker's challenge. The headache had absolutely nothing to do with the challenge ~ I just thought I'd throw that in there for a little sympathy and to explain why my post is a day late getting published. It's really hard to accurately describe the details of making a 6 layer cake smothered in luscious creamy chocolate buttercream when there are lightening bolts repeatedly firing at your medulla oblongata like a semi-automatic weapon.

The August 2009 Daring Bakers' challenge was hosted by Angela of A Spoonful of Sugar and Lorraine of Not Quite Nigella. They chose the spectacular Dobos Torte based on a recipe from Rick Rodgers' cookbook Kaffeehaus: Exquisite Desserts from the Classic Caffés of Vienna, Budapest, and Prague.

After my last experience with sponge cake, I was a bit apprehensive about trying this recipe but a challenge is a challenge and I'm not about to back down from one yet. Worse case scenario, I would end up with yet another set of floor mats for my car but my DB hosts did not disappoint...the cake came together beautifully. I'm still convinced that the F&W people couldn't bake a sponge cake if their life depended on it (because no way could it have been the fault of the cook!)

The chocolate buttercream with the butter and whipped sugar/egg mixture was like no other that I'd ever made before. Very rich and creamy, but I strongly recommend keeping the cake in the refrigerator if you live in a humid area because it's not as stable as other versions of buttercream. The toffee also reportedly works better in a non-humid environment. Mine was a bit sticky but nothing worth getting stressed over.

The cake, as a whole, came together beautifully and I'll have to admit that it was one of the prettier desserts that I've ever made. I carted the Dobos Torte off to work the next morning where soon enough it met its terrible fate in the office break room.

Be sure to visit the Daring Kitchen website here for the recipe and be amazed at the gorgeous creations presented this month. Heck, while you're there, go ahead and sign up to be one of us and we'll look forward to seeing you next month!

Pin It
  • Digg
  • Del.icio.us
  • StumbleUpon
  • Reddit
  • RSS

Procrastination at its finest

Call me a procrastinator. Go ahead....I'm a big girl and can take it when people call me names. Especially when they're true. Give me any amount of time to complete a project and you'll find me in the 11th hour trying to put the finishing touches on it. True to form, here I sit finalizing this post for the July Daring Bakers' Challenge on the eve of it's due date even though I've had an entire month to complete the project. I'm not ashamed of my procrastination habit ~ I'm quite proud of it, actually, because I work better under pressure. When time is of the essence, I can turn out some fabulous results.

The July Daring Bakers' challenge was hosted by Nicole at Sweet Tooth. She chose Chocolate Covered Marshmallow Cookies and Milan Cookies from pastry chef Gale Gand of the Food Network.

The pressure was on this morning when I finally rolled out of bed at nearly 10am to get these cookies done. Each individual component was easy enough on its own but like most DB challenges, the time involved was rather extensive. We had a choice of making one of the cookies or both and since I was already under the gun, I chose to only make the chocolate marshmallow cookies. It was an all-day project and the results turned out great even though I wasn't overly impressed with the finished product. I'm more of an ooey-gooey, warm, slightly under baked chocolate chip cookie kinda girl myself but I think the guys at work will lay waste to these little chocolate dipped treats in no time.

The recipe said it yielded 2 dozen cookies so can anyone tell me how I wound up with 4 dozen cookies?? And exactly enough marshmallow to pipe on all 48 cookies? And just enough chocolate for dipping all of them? The longer I worked, the more they multiplied....it was like rabbits! The only problem I ran into is that, nearly 4 hours after they were dipped, my chocolate still has not set up. That may only be because I chose to use what I had on hand and combined 3 different types of chocolate. I wound up being 1 ounce short so I shorted the vegetable oil just slightly. I'm currently financially embarrassed thanks to a busted air conditioner and a trip to the beach, so it was nice to not have to add to my already exorbitant grocery bill for this challenge.
The real treat in this challenge was the homemade marshmallows. I've never made them before and I'm already thinking of other projects that I want to do with them and these will be at the top of my list!

Thank you Nicole for a great Daring Bakers' challenge and for giving me the inspiration for yet another project!


Mallows(Chocolate Covered Marshmallow Cookies)
Recipe courtesy Gale Gand, from Food Network website

Prep Time: 10 min
Inactive Prep Time: 5 min
Cook Time: 10 min
Serves: about 2 dozen cookies

• 3 cups (375grams/13.23oz) all purpose flour
• 1/2 cup (112.5grams/3.97oz) white sugar
• 1/2 teaspoon salt
• 3/4 teaspoon baking powder
• 3/8 teaspoon baking soda
• 1/2 teaspoon ground cinnamon
• 12 tablespoons (170grams/ 6 oz) unsalted butter
• 3 eggs, whisked together
• Homemade marshmallows, recipe follows
• Chocolate glaze, recipe follows

1. In a mixer with the paddle attachment, blend the dry ingredients.
2. On low speed, add the butter and mix until sandy.
3. Add the eggs and mix until combine.
4. Form the dough into a disk, wrap with clingfilm or parchment and refrigerate at least 1 hour and up to 3 days.
5. When ready to bake, grease a cookie sheet or line it with parchment paper or a silicon mat.
6. Preheat the oven to 375 degrees F.
7. Roll out the dough to 1/8-inch thickness, on a lightly floured surface. Use a 1 to 1 1/2 inches cookie cutter to cut out small rounds of dough.
8. Transfer to the prepared pan and bake for 10 minutes or until light golden brown. Let cool to room temperature.
9. Pipe a “kiss” of marshmallow onto each cookie. Let set at room temperature for 2 hours.
10. Line a cookie sheet with parchment or silicon mat.
11. One at a time, gently drop the marshmallow-topped cookies into the hot chocolate glaze (I actually balanced my cookie on the fork and used a spoon to drizzle the chocolate over the cookie).
12. Lift out with a fork and let excess chocolate drip back into the bowl.
13. Place on the prepared pan and let set at room temperature until the coating is firm, about 1 to 2 hours.

Note: if you don’t want to make your own marshmallows, you can cut a large marshmallow in half and place on the cookie base. Heat in a preheated 350-degree oven to slump the marshmallow slightly, it will expand and brown a little. Let cool, then proceed with the chocolate dipping.

Homemade marshmallows:
• 1/4 cup water
• 1/4 cup light corn syrup
• 3/4 cup (168.76 grams/5.95oz) sugar
• 1 tablespoon powdered gelatin
• 2 tablespoons cold water
• 2 egg whites , room temperature
• 1/4 teaspoon pure vanilla extract

1. In a saucepan, combine the water, corn syrup, and sugar, bring to a boil until “soft-ball” stage, or 235 degrees on a candy thermometer.
2. Sprinkle the gelatin over the cold water and let dissolve.
3. Remove the syrup from the heat, add the gelatin, and mix.
4. Whip the whites until soft peaks form and pour the syrup into the whites.
5. Add the vanilla and continue whipping until stiff (the recipe didn't state how long it would take but I found it took nearly 15 minutes to achieve a stiff consistency).
6. Transfer to a pastry bag.

Chocolate glaze:
• 12 ounces semisweet chocolate
• 2 ounces cocoa butter or vegetable oil

1. Melt the 2 ingredients together in the top of a double boiler or a bowl set over barely simmering water.

Pin It
  • Digg
  • Del.icio.us
  • StumbleUpon
  • Reddit
  • RSS

Bake Well Or Not ~ You Decide

The June Daring Bakers' challenge was hosted by Jasmine of Confessions of a Cardamom Addict and Annemarie of Ambrosia and Nectar. They chose a Traditional (UK) Bakewell Tart... er... pudding that was inspired by a rich baking history dating back to the 1800's in England.

Prior to starting any previous DB project, I spend alot of time organizing my shopping lists & ingredients, researching the subject, and reading posts by other DB'ers to see their outcomes and experiences during the process. I'm always well prepared to begin the project and to achieve the best possible outcome. I took one look at this month's challenge and decided that I could do it with my eyes closed. And one hand tied behind my back. There was really no need to spend all that extra time preparing...this one would be a cinch!

Maybe I should have closed my eyes and tied my hands back. It couldn't have been any worse than what I wound up with as a final result.

The individual components came together with ease and presented no real challenge ~ my crust looked tender and crumbly all nestled into my tart pan. The luxurious frangipane completely engulfed a layer of strawberry lavender jam and all I had to do was wait out the baking time and my not-so-much of a challenge would be done. I figured I'd use that time to catch up on some gossip, so I dialed my best girlfriend on the phone.

But the proof is in the pudding...err...tart or whatever the heck this thing was starting to overflow its pan and smoke up my oven, that the easiest things aren't always as they appear. And that you should never distract yourself during a Daring Bakers project. My luxurious frangipane was overflowing like a volcano and turning into charcoal briquettes. My kitchen was filling with smoke and soon the detector would alert everyone that the girl who calls herself a caterer needed to put her gossiping on hold and call the fire department {should I mention here that this was the second time in a week that I've smoked the place up??} But have no worries...slide a baking sheet underneath to catch the burning goo and the gossip monger never misses a beat.

The timer announced that my easy peasy pudding/tart/whatever thing was ready to be unveiled and I must say it looked mighty pretty ~ I was so proud of myself at this point and still incessantly chatting away.

Some time later, after I'd gleaned all the juicy, dirty details about who said what to who I came back to the kitchen to admire my Bakewell Tart. Anticipating the taste of the crunchy almonds and silky lavender infused jam combined with a flaky shortbread crust, I slid my knife through the perfectly browned top {trying to ignore the burnt crusty stuff on the sides of the pan} and was met with a gushing pile of goo spewing forth from the innards of this now I'm cursing thing. Had I done my research, I would have known that the frangipane does turn a lovely golden brown, almost to the point of looking like what I feared was burnt, but a piece of foil over the top would have allowed it to continue baking until it was completely set. Also, had I not been yakking away about trivial stuff, I would have been smart enough to stick a toothpick in the thing and figure that out for myself.

Fearing my tart/pudding/total waste of time was a loss, I tossed it in the fridge to be dealt with, photographed, and cataloged here as a failure. But much to my surprise, after spending the night in those frigid confines, it wasn't that bad at all! The tart eventually set up and even though I knew it was a little underdone, I don't think anyone else would have known it. Although I would prefer this for breakfast more so than for a dessert course, it tasted great and will possibly make it into my files as a "try it again because you screwed it up the first time" project.

Thanks again to Jasmine and Annemarie for a wonderful challenge! Click the links above to head over to their blogs for the recipe and then spend a day or two reading about all the other creative concoctions from the Daring Bakers blogroll.

Pin It
  • Digg
  • Del.icio.us
  • StumbleUpon
  • Reddit
  • RSS

Helmut Who?

Twice a year I allow myself a delicious indulgence (okay, so I indulge ALOT during a year's time, but for the sake of this post we'll stick to only one of my indulgences and keep it food related, okay?)

The Queen City hosts the Southern Spring Show and the Southern Christmas Show in March and December and I am usually in attendance at one or both shows for one purpose only.....

Helmut's Strudels.

The food vendors are always set up at the far reaches of the show...all the way in the third building but I can smell them as soon as I hit the door of the first building....the wafting aroma of freshly baked strudels with their golden brown flaky crust covered with a sensual dusting of powdered sugar. Your choice of peach, apple, or cherry. I think there are a few savory offerings as well but I bypass those. Helmut knows my weakness is cherry.

When the advertisements for the show start playing on the radio, I immediately formulate a mental vision of Helmut's taut German muscles clad in a crisp, stark white baker's uniform lovingly shaping my cherry strudel with his manly hands and lightly dusting it with powdered sugar as it comes out of the oven steaming hot. If my family is visiting at the time, they usually buy several strudels to take home and give as gifts. I, being the selfish person that I am, buy several strudels and eat them all myself. What can I say? I look forward to my twice-a-year love affair with Helmut and I intend to gorge myself with all the fresh from the oven lovin' that I can stand.

But Helmut, honey...I hate to tell you that our affair has to end. I've found someone else. Oh, sweetie, don't be upset. It's not you. It's me. Really. I can take all the blame for this break up because the May Daring Bakers’ challenge was hosted by Linda of make life sweeter! and Courtney of Coco Cooks. They chose Apple Strudel from the recipe book Kaffeehaus: Exquisite Desserts from the Classic Cafés of Vienna, Budapest and Prague by Rick Rodgers. These lovely ladies gave us free reign with our choice of strudel filling and after just one try at the strudel making process, I've kicked Helmut to the curb and added yet another "keeper" recipe to my file.

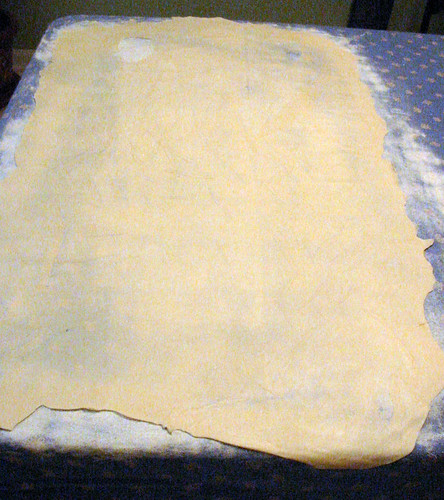
The real challenge of this recipe is taking a dough ball the size of the palm of your hand and shaping it into a 3'x2' sheet. Believe it or not, it's easier than it seems because the dough is very forgiving. My baking constituents confirmed that holes in the dough sheet were okay and while many of them had dough similar to Swiss cheese, I ended up with only 2 holes!
A quick tour of the freezer and pantry confirmed that I would be filling my strudel with orange infused cranberries left over from this recipe, Granny Smith apples, crystallized ginger, Chinese five spice powder and walnuts. Helmut, honey, you never stood a chance with this winning combination! This strudel wound up being about as long as my arm and I could have seriously eaten it all the way up to my elbow. It was seriously that good!

Thank you Courtney and Linda (make sure you head to their sites if you are interested in seeing the recipe as written) for broadening my horizons and showing me that Helmut isn't the only strudel in town!


Strudel Dough from “Kaffeehaus – Exquisite Desserts from the Classic Cafés of Vienna, Budapest and Prague” by Rick Rodgers

1-1/3 cups unbleached flour
1/8 teaspoon salt
7 tablespoons water, plus more if needed
2 tablespoons vegetable oil, plus additional for coating the dough
1/2 teaspoon cider vinegar

Alison's Filling:

1/2 cup butter, melted & divided
1-1/2 cup fresh bread crumbs
1 cups granulated sugar
1/2 cup water
1 vanilla bean, split and seeds scraped
1 large navel oranges
12 ounces fresh or frozen cranberries
1 large Granny Smith apple, peeled & cored & sliced into half moon rounds
1/2 cup coarsely chopped walnuts
1/4 cup finely chopped crystallized ginger
1/4 teaspoon Chinese Five Spice powder
1/3 cup granulated sugar

For the dough:
1. Combine the flour and salt in a stand-mixer fitted with the paddle attachment. Mix the water, oil and vinegar in a measuring cup. Add the water/oil mixture to the flour with the mixer on low speed. You will get a soft dough. Make sure it is not too dry, add a little more water if necessary. Take the dough out of the mixer. Change to the dough hook. Put the dough ball back in the mixer. Let the dough knead on medium until you get a soft dough ball with a somewhat rough surface.

2. Take the dough out of the mixer and continue kneading by hand on an unfloured work surface. Knead for about 2 minutes. Pick up the dough and throw it down hard onto your working surface occasionally. Shape the dough into a ball and transfer it to a plate. Oil the top of the dough ball lightly. Cover the ball tightly with plastic wrap. Allow to stand for 30-90 minutes (longer is better).

3. It would be best if you have a work area that you can walk around on all sides like a 36 inch round table or a work surface of 23 x 38 inches. Cover your working area with table cloth, dust it with flour and rub it into the fabric. Put your dough ball in the middle and roll it out as much as you can. Pick the dough up by holding it by an edge. This way the weight of the dough and gravity can help stretching it as it hangs. Using the back of your hands to gently stretch and pull the dough. You can use your forearms to support it.

4. The dough will become too large to hold. Put it on your work surface. Leave the thicker edge of the dough to hang over the edge of the table. Place your hands underneath the dough and stretch and pull the dough thinner using the backs of your hands. Stretch and pull the dough until it's about 2 feet wide and 3 feet long, it will be tissue-thin by this time. Cut away the thick dough around the edges with scissors. The dough is now ready to be filled.

For the filling:

Heat 3 tablespoons of the butter in a large skillet over medium-high. Add the breadcrumbs and cook whilst stirring until golden and toasted. This will take about 3 minutes. Let it cool completely.

Meanwhile, in a large saucepan, combine the granulated sugar and water. Scrape the vanilla seeds onto a small plate and add the pod to the saucepan. Using a vegetable peeler, remove 2 long strips of zest from the orange and add them to the pan. Halve the orange and squeeze the juice into the saucepan. Bring to a simmer, stirring until the sugar is dissolved. Add the cranberries and cook over low heat just until the berries are softened but still intact, about 8 minutes. Let cool completely. Discard the vanilla bean and orange zest and refrigerate until chilled. Drain cranberries well in colander.

Put the rack in the upper third of the oven and preheat the oven to 400°F. Line a large baking sheet with baking paper (parchment paper). Spread about 3 tablespoons of the remaining melted butter over the dough using your hands (a bristle brush could tear the dough, you could use a special feather pastry brush instead of your hands). Sprinkle the buttered dough with the bread crumbs. Spread the walnuts about 3 inches from the short edge of the dough in a 6-inch-wide strip. Layer the apples over the walnuts and top with drained cranberries. Combine 1/3 cup sugar and Chinese five spice powder and sprinkle over fruit filling.

Fold the short end of the dough onto the filling. Lift the tablecloth at the short end of the dough so that the strudel rolls onto itself. Transfer the strudel to the prepared baking sheet by lifting it. Curve it into a horseshoe to fit. Tuck the ends under the strudel. Brush the top with the remaining melted butter.

Bake the strudel for about 30 minutes or until it is deep golden brown. Cool for at least 30 minutes before slicing. Use a serrated knife and serve either warm or at room temperature. It is best on the day it is baked.

Pin It
  • Digg
  • Del.icio.us
  • StumbleUpon
  • Reddit
  • RSS

Happy Birthday to......


....pretty much everyone I know!

April is probably my most favorite month....the world seems to take on a fresh, new Springy green look with the flowers and trees in bloom, the weather is still a bit sporadic but the warm days bring people out of hibernation from a long cold winter, and this month is also loaded with birthday celebrations for special people in my life.

On April 11, my office celebrated my boss's birthday and while it would be really unethical and weird to say that he is a special person in my life, he does sign my paycheck so that makes him an honorary special person.

April 13 marks the date that Captain Sturm was born into this world and while he's no longer at the top of my "Special People" list, it would be rude for me not to acknowledge his special day at least nonchalantly.

I have April 21 to thank for bringing the Italian into my life.

April 22 brings about a celebration for my sweet four-legged constant companion Jesse James who loves me unconditionally and forces me to take long walks when I don't really feel like it.

And the most special person of all who celebrates a birthday in April is ME! April 27 marks the day that my mother realized the greatest joy in her life {isn't that right, Mother?} The years may be adding up, but I can honestly say that at this point in time, I feel so unbelievable happy and young at heart - I just remarked to one of my girlfriends the other day that if I were any happier, I'd burst into a million pieces!

How fortunate for me is it that my birthday is the day that the Daring Bakers' April challenge gets posted? I can't help but think that all these lovely cheesecakes were made especially for me on my special day. The April 2009 challenge is hosted by Jenny from Jenny Bakes. She has chosen Abbey's Infamous Cheesecake as the challenge. We were given free reign with this recipe to be as daring and creative as we wanted to be. I wanted to be as creative as my pantry would allow without having to purchase anything other than cream cheese, because it's already somewhat ridiculous that a weekly grocery bill for a single chick hovers around $150 per week. A quick inventory of my shelves showed several boxes of crystallized ginger and a jar of lemon curd. And so a lemon ginger cheesecake was born right here in my kitchen last night.
I was really afraid that the nearly 1 cup of chopped crystallized ginger would be overpowering, but in the end, the flavors melded very well. I used the zest and juice of only 1 lemon and in retrospect could have added a ton more zest and still been happy with the results. I knew the cheesecake would be topped with lemon curd so I erred on the side of caution. I did not use any liqueur because I didn't have anything on hand that complimented my chosen flavors but I was recently intrigued by a ginger flavored vodka that I saw on the shelf in the ABC store this past weekend.

I loved the texture of this cheesecake - so fluffy and creamy. I've had some cheesecakes that tasted like nothing more than eating a brick of cream cheese right out of the foil package. This will definitely be a great basic recipe that I will keep in my files for when creativity in a springform pan strikes me again. There was alot of discussion on the DB forums about how to prevent water from seeping into the layers of foil during the waterbath. I've never solved that mystery myself, so I opted to put the pan of water on the rack below. My cake cracked - which is nothing new for me - but that's what garnish is for, people. No one ever knew that those lemon slices were strategically placed over the San Andreas Cheesecake Fault.

Congratulations on another great Daring Bakers challenge {make sure you head over to Jenny's blog JennyBakes for the awesome recipe that she chose} and happy birthday to you, you, you, and me! I'm so excited to read about all of these fabulous birthday cheesecakes - about as excited as I am about the birthday present that I bought for myself!!!


Pin It
  • Digg
  • Del.icio.us
  • StumbleUpon
  • Reddit
  • RSS

Surviving the Real World

Is it true that those closest to you know you best?

Oh, sure they may know exactly what drink to order for you at the bar or they may know your favorite flavor of ice cream and that you love garlic stuffed olives from the olive bar at Harris Teeter. But do they really and truly know what makes you tick? I think not.

Case in point....someone very close to me and who once revered me as an independent, got-it-going-on kind of girl told me not long ago that I had no idea what it took to live in the real world. Huh??? I made it just fine on my own before and when I look at my life today, I see that not only am I surviving, I'm flourishing. I've managed to acquire a well paying job. I bought a cute little house and I have a ton of friends. Oh, yeah...and I mowed my lawn last week {yet another impossibility according to Captain You-Are-So-Wrong}. And I did every bit of it all by my own self!

NEVER, EVER tell me that I can't do something because I will do it or die!

And so it was with that same fervidity that I joined the ranks of the awesome group known as The Daring Bakers. My friend Lis over at La Mia Cucina has practically begged me for over a year to join. Well, okay...that's not entirely true. She asked nicely once or twice but I put her off because my life was so upside down at the time. But now that I'm ready to face challenges in the real world, I figured I was ready for the first challenge that the DB'ers threw my way.

The March 2009 challenge is hosted by Mary of Beans and Caviar, Melinda of Melbourne Larder and Enza of Io Da Grande. They have chosen Lasagne of Emilia-Romagna from The Splendid Table by Lynne Rossetto Kasper as the challenge.

Now, ya'll know I love all things Italian. And Lord knows I've made my fair share of Italian recipes. But this, my friends, is a real Italian recipe and not an Americanized version with noodles from a box and sauce from a jar. No sir. This was a crank out your own handmade noodles {but only after the cramps in your pectorals have subsided from the kneading process}, and you can't take a nap on Sunday because the ragu has to simmer for 2-1/2 hours kind of recipe.

This challenge was a 3 day process for me but only because I decided to divide it up that way and two of my three components seemingly had major issues. Shall we take a bet before reading any further as to whether or not my challenge was successful and I can claim a high rate of survival in the real world?

The whole point of being a DB'er is to get you out of your kitchen comfort zone and while the technique aspects of this challenge weren't new to me, the flavor aspects were. The ragu featured not only ground beef but ground pork, ground veal, pancetta, and proscuitto. All of this was browned and simmered with chicken stock, red wine, and milk. As someone who doesn't eat alot of meat to begin with, has serious issues with meatloaf, and an aversion to a dairy product on her hamburger, you're gonna take all the animals on the farm and cook them together along with some milk? Yeah, right! I should mention here that my ragu did not look nor smell very appetizing after it was finished. Seriously, folks...it took 2 days for me to get the smell out of my house. I was close to chalking the ragu up as a failure but my faithful DB pep squad cheered me on and assured me that all was not lost.
As I was heating it for final assembly, I added a few more crushed tomatoes and some tomato juice from the can both of which went a long way toward making it look more appealing.

The second day of prep was the homemade pasta. My first attempt at making pasta turned out quite well, so I thought this would be a breeze. Ha! Do something once and you think you have it mastered, do ya? I wound up adding 2 extra eggs and I think I could have added another because the flour would NOT come together as dough. Let's not mention that I added 10 ounces of spinach because I had no use for the leftover 4 ounces from the box AND I forgot to finely chop the spinach per the recipe instructions. After it finally starts to resemble dough, I'm kneading, kneading, kneading {dear Lord I'm needing this pasta to turn out right!} for what seems like forever but only 3 of the 10 minutes have passed. Total lightweight, I am. I start cranking it through my pasta machine, going through each setting, trying to achieve the transparency that is required but I think my spinach was a little too coarse to achieve the proper transparency. My noodles were so transparent, they actually had holes. By this point I really didn't give a flip because it was getting late and I was losing my patience so I slapped the noodles on the only thing I had lying around that could be used for a drying rack.

Are you laughing out loud yet? Because I was {and still am} at the sight of pasta hanging in my laundry room. Appetizing, huh? In retrospect, the hangers were not wide enough to keep the noodles from touching and gluing themselves together once they were dried. I didn't even share this perceived failure with my DB pep squad for surely they'd ban me from the group.

The final day of prep started only after I had trimmed trees in my back yard {is there no limit to the things I can do all on my own now??} and was dog tired. The bechamel came together with no problems and I boiled the crumbled, pitiful pasta noodles. Out of the water, they looked like masses of wet Kleenex.

Was there hope for survival?

Fully assembled, it didn't look half bad and honestly, when it came out of the oven I was quite pleased with how well it looked and smelled. Also impressive was how nicely it held together after it was sliced and plated. The taste? I will be honest and say that I didn't particularly care for the flavors of the ragu. It was bit rich and too heavy for me. I'm also ashamed to say that most of the lasagna went uneaten and into the trash.

The final verdict?

Success in the world of The Daring Bakers! Bring on the next challenge!

Please make sure you visit all the lovely Daring Baker blogs and especially vist the lovely hosts and author links shown below.

Enza - da grande
Melinda - Melbourne Larder
Mary - Beans and Caviar
Lynne Rossetto Kasper - The Splendid Table

Pin It
  • Digg
  • Del.icio.us
  • StumbleUpon
  • Reddit
  • RSS